Busy weeknights don’t have to mean sacrificing your heart health or taste buds! Dive into our roundup of 20 Delicious 30-minute Heart-Healthy Recipes that promise not only to save you time but also to deliver the nutrition and flavor your body craves. Whether you’re craving something light and fresh or cozy and comforting, we’ve got you covered. Keep scrolling to discover your next favorite meal!
Quinoa and Black Bean Salad
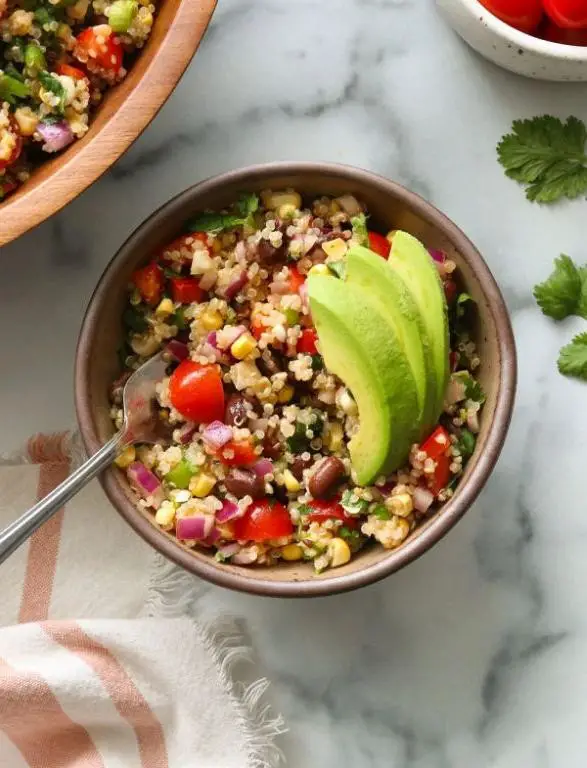
Kickstart your healthy eating journey with this vibrant Quinoa and Black Bean Salad, a perfect blend of textures and flavors that’s as nutritious as it is delicious. Follow these simple steps to create a dish that’s sure to become a staple in your meal rotation.
Ingredients
- 1 cup quinoa, rinsed (for best texture)
- 2 cups water (or vegetable broth for extra flavor)
- 1 can (15 oz) black beans, drained and rinsed (to remove excess sodium)
- 1 cup corn kernels (fresh, frozen, or canned)
- 1 red bell pepper, diced (for a sweet crunch)
- 1/4 cup cilantro, chopped (or parsley if you prefer)
- 2 tbsp olive oil (or any neutral oil)
- 1 lime, juiced (about 2 tbsp, adjust to taste)
- 1 tsp cumin (for a warm, earthy flavor)
- Salt and pepper to taste (start with 1/2 tsp salt)
Instructions
- In a medium saucepan, combine quinoa and water. Bring to a boil over high heat.
- Once boiling, reduce heat to low, cover, and simmer for 15 minutes, or until water is absorbed and quinoa is fluffy.
- While quinoa cooks, in a large bowl, mix black beans, corn, red bell pepper, and cilantro.
- In a small bowl, whisk together olive oil, lime juice, cumin, salt, and pepper to create the dressing.
- Fluff the cooked quinoa with a fork and let it cool for 5 minutes to avoid wilting the vegetables.
- Add the quinoa to the bowl with the vegetables, pour the dressing over, and toss gently to combine.
- Let the salad sit for 10 minutes before serving to allow flavors to meld.
Here’s a dish that’s as versatile as it is vibrant, with the quinoa offering a nutty base, the black beans and corn adding heartiness, and the lime dressing bringing a zesty freshness. Serve it chilled as a refreshing summer salad or warm as a comforting winter bowl.
Grilled Salmon with Avocado Salsa
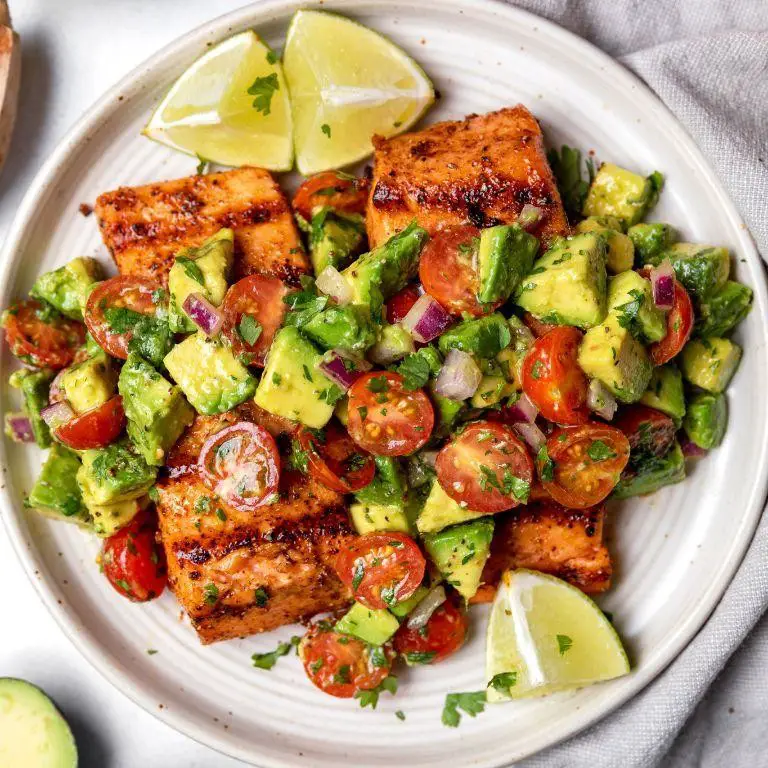
Welcome to a delightful culinary journey where we’ll master the art of preparing Grilled Salmon with Avocado Salsa, a dish that’s as nutritious as it is flavorful. This recipe is perfect for those looking to impress with minimal effort, combining the richness of salmon with the freshness of avocado salsa.
Ingredients
- 1 lb salmon fillet (skin-on for extra flavor)
- 1 tbsp olive oil (or any neutral oil)
- 1 tsp salt (adjust to taste)
- 1/2 tsp black pepper (freshly ground preferred)
- 1 avocado, diced (ripe but firm)
- 1/4 cup red onion, finely chopped (soak in cold water to mellow)
- 1 jalapeño, seeded and minced (adjust to taste)
- 2 tbsp cilantro, chopped (stems removed)
- 1 lime, juiced (about 2 tbsp)
- 1/2 tsp cumin (toasted for depth)
Instructions
- Preheat your grill to medium-high heat (about 375°F to 400°F) to ensure a good sear without burning.
- Brush the salmon fillet with olive oil and season both sides with salt and black pepper, pressing the seasoning gently into the flesh.
- Place the salmon skin-side down on the grill. Close the lid and cook for 6 minutes, resisting the urge to move it for a perfect sear.
- Carefully flip the salmon using a spatula. Grill for another 4 minutes or until the internal temperature reaches 145°F for medium doneness.
- While the salmon cooks, combine the diced avocado, red onion, jalapeño, cilantro, lime juice, and cumin in a bowl. Gently mix to avoid mashing the avocado.
- Remove the salmon from the grill and let it rest for 2 minutes to allow the juices to redistribute.
- Serve the grilled salmon topped with the avocado salsa, ensuring each bite includes a bit of both for balanced flavors.
Outstanding in its simplicity, this dish offers a buttery texture from the salmon contrasted with the creamy, tangy salsa. For a creative twist, serve atop a bed of quinoa or alongside grilled asparagus for a complete meal.
Turkey and Spinach Stuffed Peppers
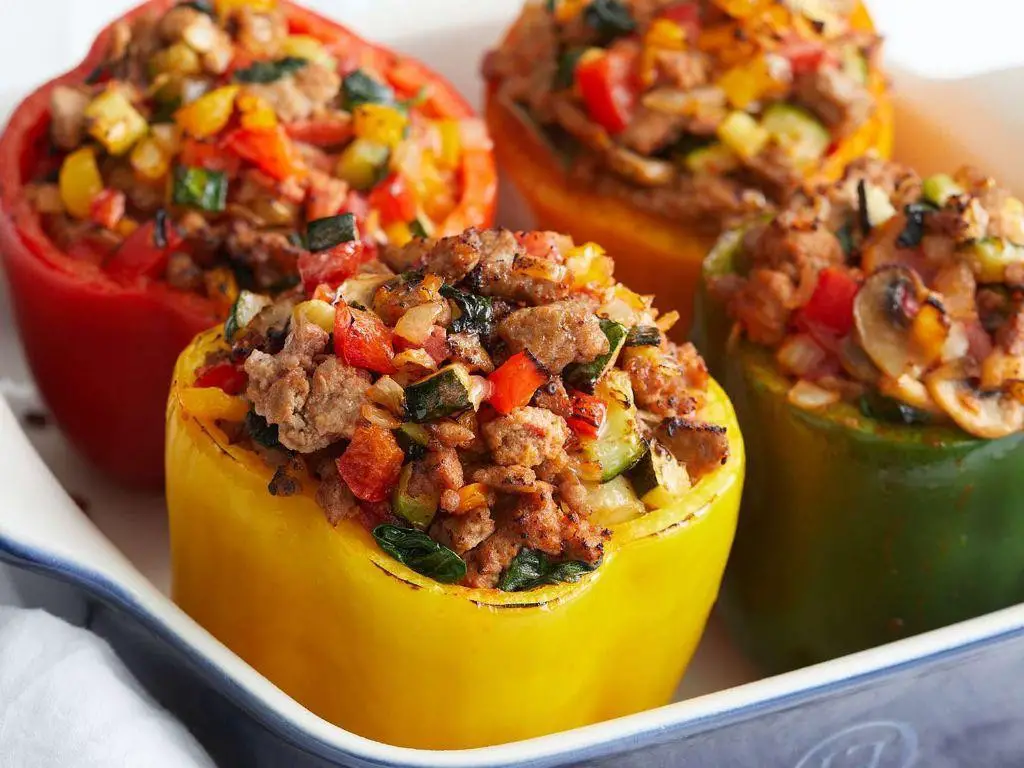
Unlock the flavors of a wholesome meal with these Turkey and Spinach Stuffed Peppers, a perfect blend of lean protein and vibrant vegetables. This dish is not only nutritious but also incredibly versatile, making it a great option for any day of the week.
Ingredients
- 4 large bell peppers (any color, but red adds a nice sweetness)
- 1 lb ground turkey (lean for healthier option)
- 2 cups fresh spinach, chopped (packed tightly)
- 1 cup cooked quinoa (or rice for a different texture)
- 1/2 cup diced onion (yellow or white for milder flavor)
- 2 cloves garlic, minced (adjust to taste)
- 1 tbsp olive oil (or any neutral oil)
- 1 tsp salt (adjust to taste)
- 1/2 tsp black pepper (freshly ground preferred)
- 1/2 tsp paprika (smoked paprika for a deeper flavor)
- 1 cup shredded mozzarella cheese (optional for topping)
Instructions
- Preheat your oven to 375°F (190°C) to ensure it’s ready for baking the peppers.
- Cut the tops off the bell peppers and remove the seeds and membranes. Tip: Keep the tops if you want to use them as lids for a decorative touch.
- Heat olive oil in a large skillet over medium heat. Add the diced onion and minced garlic, sautéing until translucent, about 3-4 minutes.
- Add the ground turkey to the skillet, breaking it apart with a spoon. Cook until no longer pink, approximately 5-6 minutes. Tip: Drain any excess fat for a leaner dish.
- Stir in the chopped spinach, cooked quinoa, salt, black pepper, and paprika. Cook for another 2-3 minutes until the spinach is wilted and everything is well combined.
- Fill each bell pepper with the turkey and spinach mixture, packing it down lightly. If using, sprinkle the top with shredded mozzarella cheese.
- Place the stuffed peppers in a baking dish and bake for 25-30 minutes, or until the peppers are tender and the cheese is bubbly and slightly golden.
Now these Turkey and Spinach Stuffed Peppers offer a delightful contrast between the tender peppers and the hearty, flavorful filling. Serve them with a side of sour cream or a fresh salad for a complete meal that’s as pleasing to the eye as it is to the palate.
Whole Wheat Pasta with Tomato and Basil
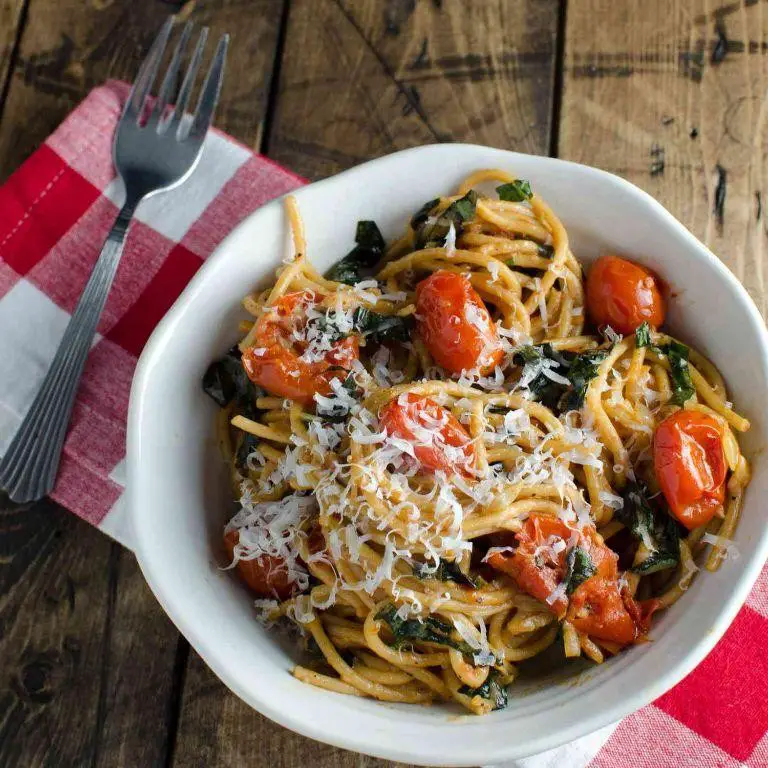
Getting dinner on the table doesn’t have to be complicated, especially when you have a recipe as straightforward and delicious as whole wheat pasta with tomato and basil. This dish is a testament to how simple ingredients can come together to create something truly satisfying.
Ingredients
- 8 oz whole wheat pasta (spaghetti or penne works well)
- 2 tbsp olive oil (or any neutral oil)
- 3 cloves garlic, minced (adjust to taste)
- 1 can (14.5 oz) diced tomatoes, undrained
- 1/4 cup fresh basil leaves, chopped (plus extra for garnish)
- 1/2 tsp salt (adjust to taste)
- 1/4 tsp black pepper (adjust to taste)
- 1/4 cup grated Parmesan cheese (optional, for serving)
Instructions
- Bring a large pot of salted water to a boil over high heat. Add the whole wheat pasta and cook according to package instructions, usually about 8-10 minutes, until al dente. Tip: Stir occasionally to prevent sticking.
- While the pasta cooks, heat olive oil in a large skillet over medium heat. Add the minced garlic and sauté for about 1 minute, until fragrant but not browned. Tip: Keep the heat medium to avoid burning the garlic.
- Add the diced tomatoes with their juice to the skillet. Stir in the salt and black pepper. Simmer the sauce for about 5 minutes, allowing the flavors to meld. Tip: If the sauce thickens too much, add a splash of the pasta cooking water to loosen it.
- Drain the pasta, reserving 1/2 cup of the cooking water. Add the drained pasta to the skillet with the tomato sauce. Toss to combine, adding a little reserved pasta water if needed to help the sauce coat the pasta.
- Remove the skillet from the heat. Stir in the chopped basil leaves. Taste and adjust seasoning if necessary.
- Serve the pasta hot, garnished with additional basil leaves and grated Parmesan cheese if desired.
Now, this dish boasts a delightful contrast of textures, from the tender pasta to the juicy tomatoes, all brought together by the aromatic basil. For a creative twist, try serving it with a side of garlic bread or atop a bed of fresh arugula for a peppery bite.
Baked Chicken with Sweet Potatoes
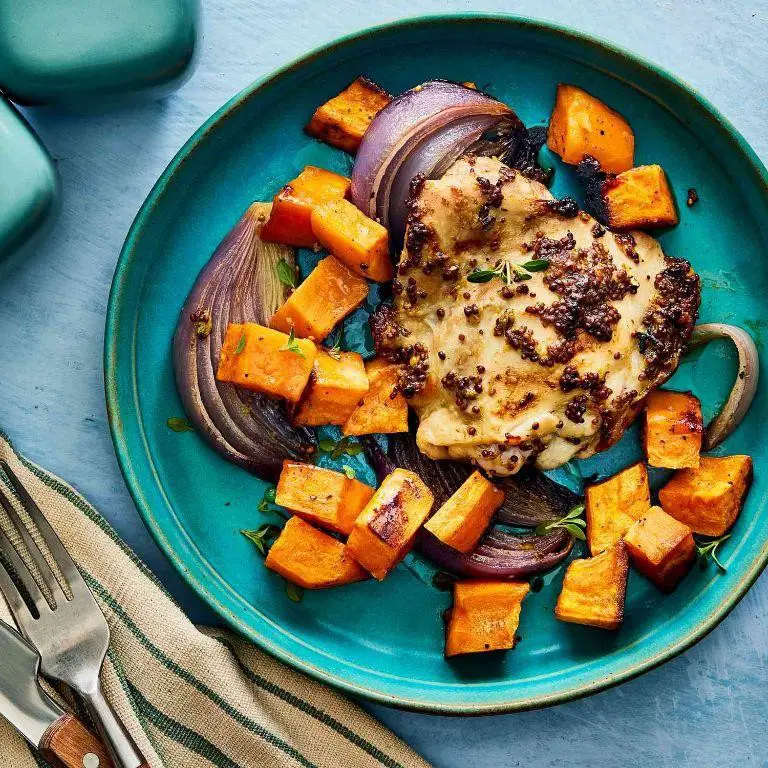
Ready to dive into a comforting and nutritious meal that’s perfect for any weeknight? This baked chicken with sweet potatoes is a harmonious blend of savory and sweet, offering a balanced dish that’s as easy to make as it is delicious.
Ingredients
- 2 boneless, skinless chicken breasts (about 1 lb total, for even cooking)
- 2 medium sweet potatoes, peeled and cubed (1-inch pieces for uniform cooking)
- 2 tbsp olive oil (or any neutral oil)
- 1 tsp garlic powder (adjust to taste)
- 1 tsp paprika (for a smoky flavor)
- 1/2 tsp salt (adjust to taste)
- 1/4 tsp black pepper (freshly ground preferred)
- 1 tbsp fresh rosemary, chopped (or 1 tsp dried)
Instructions
- Preheat your oven to 400°F (200°C) to ensure it’s hot enough for roasting.
- In a large bowl, toss the sweet potato cubes with 1 tbsp olive oil, 1/2 tsp salt, and 1/4 tsp black pepper until evenly coated. Tip: Cutting the sweet potatoes into uniform sizes ensures they cook at the same rate.
- Spread the sweet potatoes in a single layer on a baking sheet. Roast for 20 minutes, stirring halfway through, until they start to soften. Tip: Use a rimmed baking sheet to prevent any oil from dripping into your oven.
- While the sweet potatoes roast, season the chicken breasts with garlic powder, paprika, the remaining salt, and rosemary. Tip: Letting the chicken sit with the seasoning for a few minutes enhances the flavor.
- In a skillet over medium-high heat, heat the remaining 1 tbsp olive oil. Add the chicken and sear for 3-4 minutes per side, until golden brown. Tip: Searing the chicken before baking locks in the juices.
- Transfer the seared chicken to the baking sheet with the sweet potatoes. Bake for 15-20 minutes, or until the chicken reaches an internal temperature of 165°F (74°C) and the sweet potatoes are tender.
Zesty and satisfying, this dish pairs the tender juiciness of the chicken with the natural sweetness of the roasted sweet potatoes. Serve it over a bed of greens for a colorful plate or alongside a crisp white wine to elevate your dining experience.
Lentil and Vegetable Stir Fry
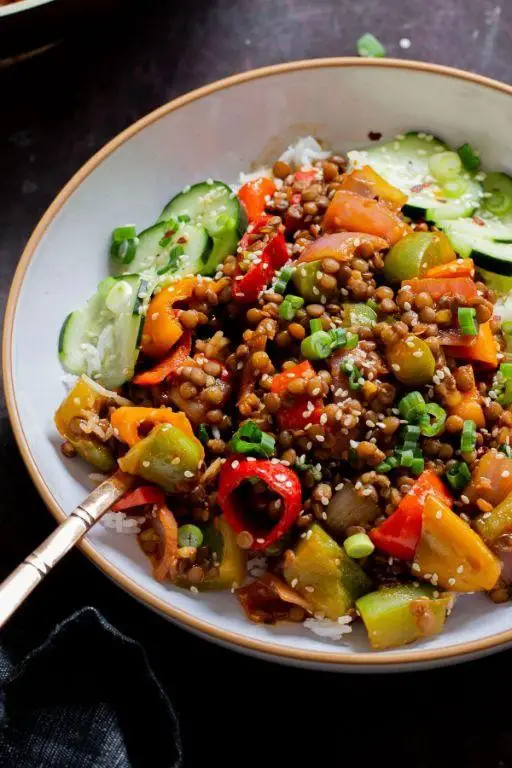
On a bustling weeknight when time is of the essence, this Lentil and Vegetable Stir Fry emerges as a savior, combining nutrition with ease. Perfect for beginners, this dish walks you through each step, ensuring a delicious outcome every time.
Ingredients
- 1 cup dried lentils (rinsed and drained)
- 2 tbsp olive oil (or any neutral oil)
- 1 medium onion, diced (about 1 cup)
- 2 cloves garlic, minced (adjust to taste)
- 1 bell pepper, sliced (any color)
- 1 cup broccoli florets
- 2 tbsp soy sauce (low sodium preferred)
- 1 tsp ginger, grated (fresh for best flavor)
- 1/2 tsp red pepper flakes (optional for heat)
- 1 tbsp sesame oil (for finishing)
Instructions
- In a medium pot, bring 3 cups of water to a boil. Add the lentils, reduce heat to low, cover, and simmer for 20 minutes or until tender. Drain any excess water and set aside.
- Heat olive oil in a large skillet over medium-high heat. Add the onion and garlic, sautéing for 2 minutes until fragrant.
- Add the bell pepper and broccoli to the skillet. Stir-fry for 5 minutes, until vegetables are crisp-tender.
- Stir in the cooked lentils, soy sauce, ginger, and red pepper flakes. Cook for another 3 minutes, allowing the flavors to meld.
- Remove from heat and drizzle with sesame oil. Toss to combine.
Kindly note the delightful crunch of the vegetables against the soft lentils, creating a harmonious texture. Serve this stir-fry over a bed of quinoa for an extra protein boost or enjoy it as is for a light, satisfying meal.
Avocado and Chickpea Salad Wrap

This Avocado and Chickpea Salad Wrap is a refreshing and nutritious option for a quick lunch or a light dinner. The combination of creamy avocado and hearty chickpeas makes for a satisfying meal that’s both easy to make and delicious.
Ingredients
- 1 ripe avocado, mashed (look for one that yields slightly to pressure)
- 1 cup canned chickpeas, drained and rinsed (or cooked from dry)
- 1/4 cup red onion, finely diced (soak in cold water for 10 minutes to mellow the flavor)
- 2 tbsp lime juice (freshly squeezed for the best flavor)
- 1/2 tsp salt (adjust to taste)
- 1/4 tsp black pepper (freshly ground preferred)
- 2 large whole wheat tortillas (or any wrap of your choice)
- 1/2 cup mixed greens (for added crunch and color)
Instructions
- In a medium bowl, combine the mashed avocado, chickpeas, red onion, lime juice, salt, and black pepper. Mix well until all ingredients are evenly distributed.
- Lay out the tortillas on a clean, flat surface. Divide the avocado and chickpea mixture evenly between the two tortillas, spreading it out in the center.
- Top each tortilla with 1/4 cup of mixed greens, placing them over the avocado mixture.
- Fold the bottom of the tortilla up over the filling, then fold in the sides, and roll tightly to enclose the filling completely.
- Cut each wrap in half diagonally for easier eating, if desired. Serve immediately or wrap in parchment paper for a to-go option.
Ultra creamy and packed with flavor, these wraps are a testament to how simple ingredients can come together to create something extraordinary. The lime juice adds a bright note that balances the richness of the avocado, while the chickpeas provide a satisfying texture. For an extra kick, consider adding a sprinkle of chili flakes or a drizzle of hot sauce before serving.
Steamed Fish with Ginger and Scallions
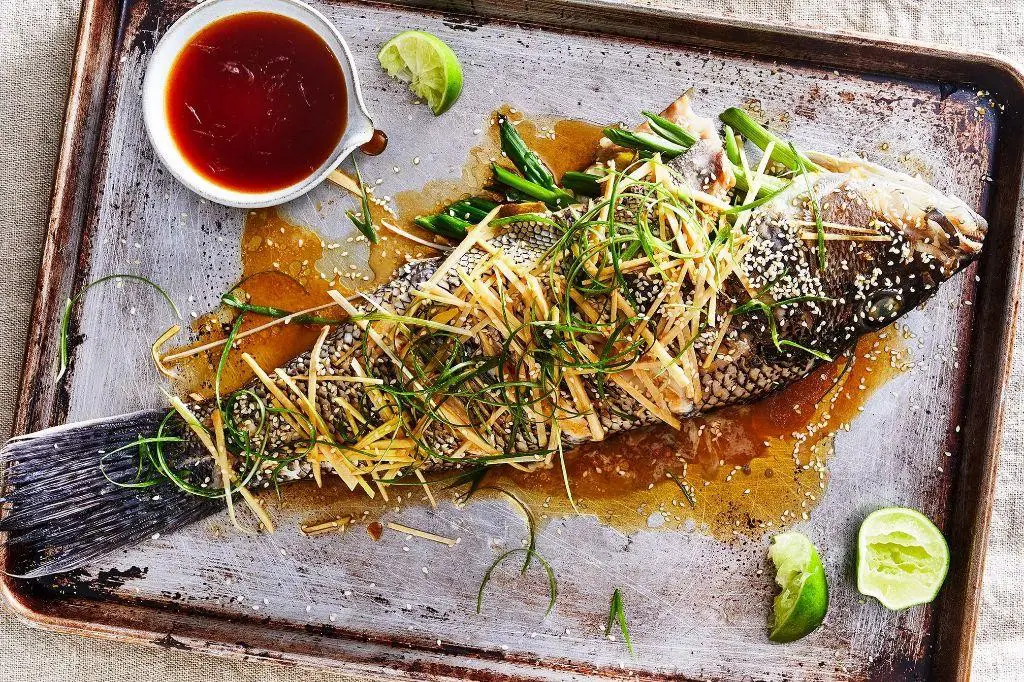
Unlock the simplicity and elegance of preparing a classic steamed fish with ginger and scallions, a dish that brings out the natural flavors of the sea with minimal fuss. This methodical guide will walk you through each step, ensuring a perfectly cooked meal every time.
Ingredients
- 1 whole white fish (about 1.5 lbs), cleaned and scaled (such as sea bass or snapper)
- 2 tbsp soy sauce (use light soy sauce for a less salty flavor)
- 1 tbsp sesame oil (or any neutral oil)
- 1 inch ginger, julienned (more for extra spice)
- 2 scallions, cut into 2-inch strips (green parts only for garnish)
- 1/4 cup water (for steaming)
Instructions
- Rinse the fish under cold water and pat dry with paper towels to ensure the skin is moisture-free.
- Place the fish on a heatproof plate that fits inside your steamer, making sure the plate is slightly elevated to allow steam to circulate.
- Scatter the julienned ginger evenly over the top of the fish, focusing on the cavity and the thicker parts for even flavor distribution.
- Fill a wok or steamer pot with 1/4 cup of water and bring to a boil over high heat. Once boiling, reduce to medium heat to maintain a steady steam.
- Carefully place the plate with the fish into the steamer, cover, and steam for exactly 12 minutes for a 1.5 lb fish. Adjust time accordingly for larger or smaller fish.
- While the fish is steaming, mix the soy sauce and sesame oil in a small bowl to create the dressing.
- After steaming, carefully remove the plate from the steamer and pour the dressing over the fish, ensuring it coats evenly.
- Garnish with the scallion strips, placing them on top of the fish for a fresh, colorful finish.
Perfectly steamed fish should flake easily with a fork, revealing moist, tender flesh infused with the aromatic ginger and scallions. Serve it over a bed of steamed rice to soak up the flavorful dressing, or alongside stir-fried vegetables for a balanced meal.
Vegetable and Bean Chili

Tackling a hearty vegetable and bean chili is simpler than you might think, and it’s a fantastic way to pack in nutrients without sacrificing flavor. This guide will walk you through each step, ensuring a delicious outcome every time.
Ingredients
– 2 tbsp olive oil (or any neutral oil)
– 1 large onion, diced (about 1 cup)
– 2 cloves garlic, minced (adjust to taste)
– 1 bell pepper, diced (any color)
– 1 can (15 oz) black beans, drained and rinsed
– 1 can (15 oz) kidney beans, drained and rinsed
– 1 can (28 oz) diced tomatoes
– 2 cups vegetable broth
– 2 tbsp chili powder
– 1 tsp cumin
– Salt to taste
Instructions
1. Heat olive oil in a large pot over medium heat (about 300°F) until shimmering.
2. Add diced onion and cook, stirring occasionally, until translucent (about 5 minutes). Tip: Don’t rush this step; caramelizing the onions slightly adds depth.
3. Stir in minced garlic and diced bell pepper, cooking for another 3 minutes until fragrant.
4. Add black beans, kidney beans, diced tomatoes, and vegetable broth to the pot.
5. Sprinkle in chili powder and cumin, then stir to combine all ingredients evenly. Tip: Toast your spices lightly before adding for an extra flavor boost.
6. Bring the mixture to a boil, then reduce heat to low (about 200°F) and simmer uncovered for 25 minutes. Tip: Stir occasionally to prevent sticking.
7. Taste and adjust salt as needed before serving.
Rich in flavors and textures, this vegetable and bean chili is wonderfully hearty with a slight kick from the spices. Serve it over rice or with a side of cornbread for a complete meal.
Brown Rice and Vegetable Pilaf
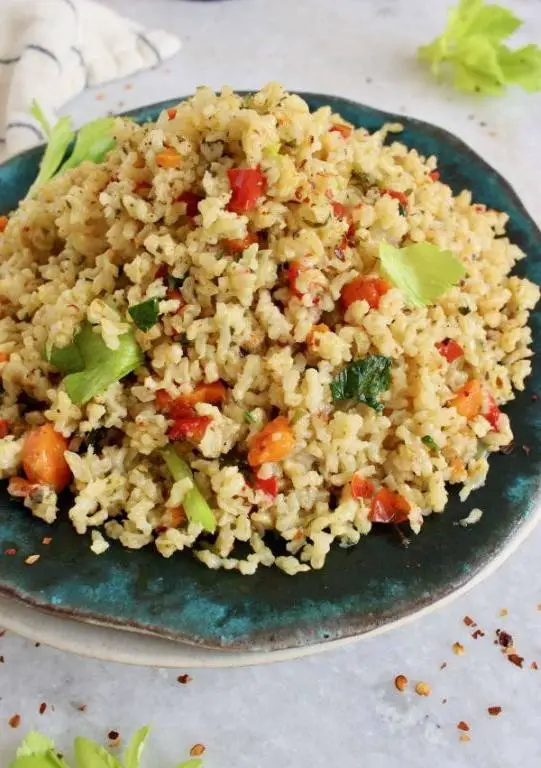
For a wholesome and flavorful side dish that pairs beautifully with almost any main, this Brown Rice and Vegetable Pilaf is a must-try. Follow these steps to create a dish that’s as nutritious as it is delicious.
Ingredients
- 1 cup brown rice (for a nuttier flavor)
- 2 cups vegetable broth (or water for a lighter taste)
- 1 tbsp olive oil (or any neutral oil)
- 1 medium onion, diced (about 1 cup)
- 2 cloves garlic, minced (adjust to taste)
- 1 cup mixed vegetables (carrots, peas, and bell peppers recommended)
- 1/2 tsp salt (adjust to taste)
- 1/4 tsp black pepper (freshly ground preferred)
- 1/4 tsp turmeric (for color and health benefits)
Instructions
- Rinse the brown rice under cold water until the water runs clear to remove excess starch.
- In a medium saucepan, heat the olive oil over medium heat. Add the diced onion and sauté until translucent, about 5 minutes.
- Add the minced garlic and sauté for another 30 seconds, until fragrant. Tip: Avoid browning the garlic to prevent bitterness.
- Stir in the mixed vegetables and cook for 3-4 minutes, until they begin to soften.
- Add the rinsed brown rice to the saucepan, along with the vegetable broth, salt, black pepper, and turmeric. Stir to combine.
- Bring the mixture to a boil, then reduce the heat to low, cover, and simmer for 45 minutes. Tip: Resist the urge to lift the lid to ensure even cooking.
- After 45 minutes, remove the saucepan from the heat and let it sit, covered, for 10 minutes. This allows the rice to steam and become fluffy.
- Fluff the pilaf with a fork before serving. Tip: For an extra touch, garnish with fresh herbs like parsley or cilantro.
This pilaf boasts a delightful texture with each grain of rice distinct yet tender, and the vegetables add a colorful crunch. The subtle earthiness of the brown rice complements the sweetness of the vegetables, making it a versatile dish that can stand alone or accompany your favorite protein. Try serving it in a hollowed-out bell pepper for an eye-catching presentation.
Grilled Chicken with Steamed Broccoli
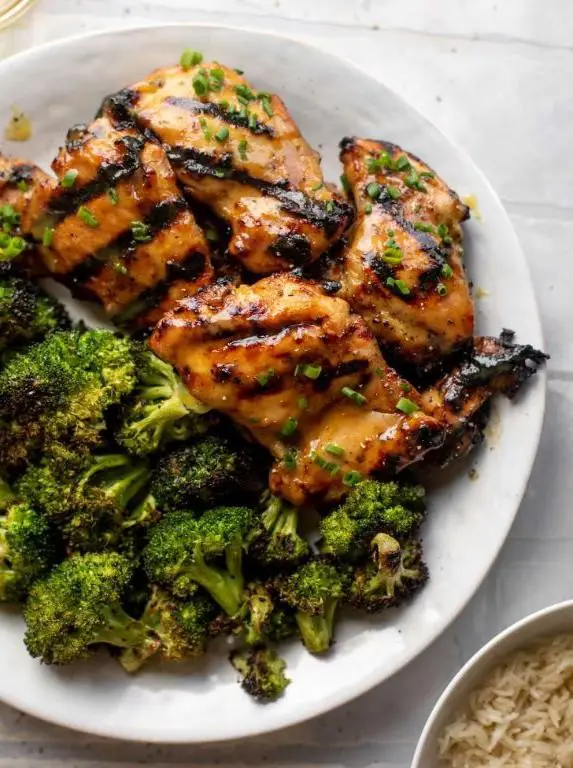
You’ll find that Grilled Chicken with Steamed Broccoli is a straightforward yet satisfying dish perfect for weeknight dinners. Let’s break down the process to ensure you achieve juicy chicken and perfectly tender broccoli every time.
Ingredients
- 2 boneless, skinless chicken breasts (about 1 lb total, for even cooking)
- 1 tbsp olive oil (or any neutral oil)
- 1 tsp salt (adjust to taste)
- 1/2 tsp black pepper (freshly ground preferred)
- 1/2 tsp garlic powder (for a hint of flavor)
- 2 cups broccoli florets (fresh or frozen)
- 1/2 cup water (for steaming)
Instructions
- Preheat your grill to medium-high heat (about 375°F to 400°F) to ensure a good sear without burning.
- While the grill heats, pat the chicken breasts dry with paper towels to help the seasoning stick better.
- Rub the chicken breasts with olive oil, then season both sides evenly with salt, black pepper, and garlic powder.
- Place the chicken on the grill. Cook for 6-7 minutes on the first side, then flip and cook for another 6-7 minutes, or until the internal temperature reaches 165°F.
- Meanwhile, place the broccoli florets in a steamer basket over 1/2 cup of boiling water in a pot. Cover and steam for 5 minutes, or until bright green and fork-tender.
- Remove the chicken from the grill and let it rest for 5 minutes before slicing to retain its juices.
- Serve the grilled chicken alongside the steamed broccoli for a balanced meal.
Unbelievably simple, this dish pairs the smoky char of the chicken with the fresh, crisp texture of broccoli. Try drizzling a little lemon juice over the broccoli for an extra zing, or slice the chicken and serve it over a bed of quinoa for a heartier option.
Spinach and Mushroom Omelette
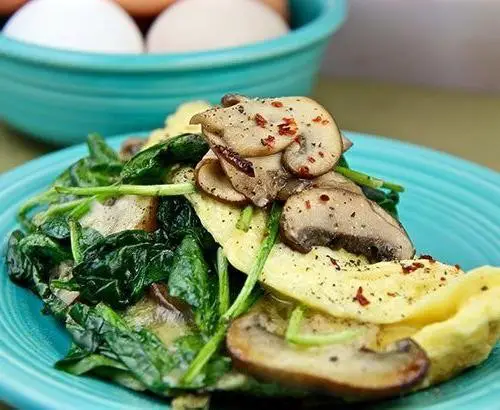
Ready to elevate your breakfast game with a simple yet satisfying dish? This spinach and mushroom omelette combines fluffy eggs with earthy mushrooms and vibrant spinach for a meal that’s as nutritious as it is delicious.
Ingredients
- 2 large eggs (room temperature for fluffier omelette)
- 1/4 cup fresh spinach, chopped (packed tightly)
- 1/4 cup mushrooms, sliced (white or cremini)
- 1 tbsp unsalted butter (or any neutral oil)
- Salt and pepper (adjust to taste)
- 1 tbsp grated cheese (optional, cheddar or parmesan recommended)
Instructions
- Heat a non-stick skillet over medium heat (about 300°F) and add the butter, swirling to coat the pan evenly.
- Once the butter is melted and slightly bubbly, add the sliced mushrooms. Cook for 2-3 minutes until they start to soften and brown slightly.
- Add the chopped spinach to the skillet, stirring gently until wilted, about 1 minute. Remove the vegetables from the skillet and set aside on a plate.
- In a bowl, whisk the eggs with a pinch of salt and pepper until fully blended and slightly frothy.
- Pour the whisked eggs into the same skillet, tilting to spread them evenly. Let cook undisturbed for 30 seconds.
- Once the edges begin to set, use a spatula to gently lift and fold one edge towards the center, allowing uncooked eggs to flow underneath.
- Sprinkle the cooked vegetables and grated cheese over one half of the omelette. Carefully fold the other half over the filling.
- Cook for another 30 seconds to 1 minute, then slide the omelette onto a plate. Serve immediately.
Enjoy the perfect balance of textures in every bite—creamy eggs, tender vegetables, and a hint of melted cheese. For an extra touch, serve with a side of avocado or a sprinkle of fresh herbs.
Tomato and Cucumber Salad with Olive Oil
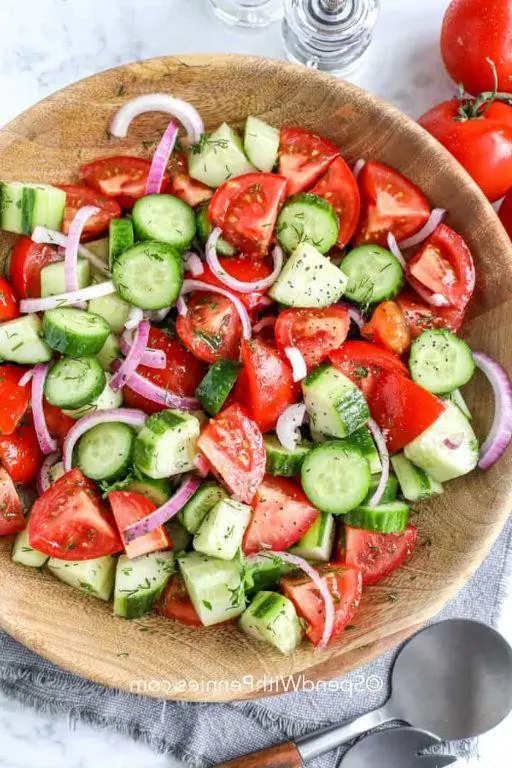
Ready to dive into a refreshing and simple dish that celebrates the essence of summer? This Tomato and Cucumber Salad with Olive Oil is a crisp, vibrant side that pairs perfectly with any meal, requiring minimal effort for maximum flavor.
Ingredients
- 2 cups diced tomatoes (ripe but firm)
- 1 cup diced cucumber (peeled if desired)
- 2 tbsp extra virgin olive oil (or any neutral oil)
- 1 tbsp lemon juice (freshly squeezed for best flavor)
- 1/2 tsp salt (adjust to taste)
- 1/4 tsp black pepper (freshly ground)
Instructions
- In a large mixing bowl, combine the diced tomatoes and cucumber.
- Drizzle the olive oil and lemon juice over the vegetables.
- Sprinkle the salt and black pepper evenly across the salad.
- Gently toss the salad with a large spoon or your hands to ensure all pieces are coated with the dressing. Tip: Avoid overmixing to keep the vegetables crisp.
- Let the salad sit at room temperature for 10 minutes before serving to allow the flavors to meld. Tip: For enhanced flavor, cover and refrigerate for 30 minutes.
- Give the salad a final gentle toss before serving. Tip: Garnish with fresh herbs like basil or parsley for an extra layer of flavor.
After the final toss, the salad should glisten with the olive oil and lemon dressing, offering a juicy bite with every forkful. Serve it alongside grilled meats or as a topping for toasted bread to add a refreshing crunch to your meal.
Baked Cod with Lemon and Dill
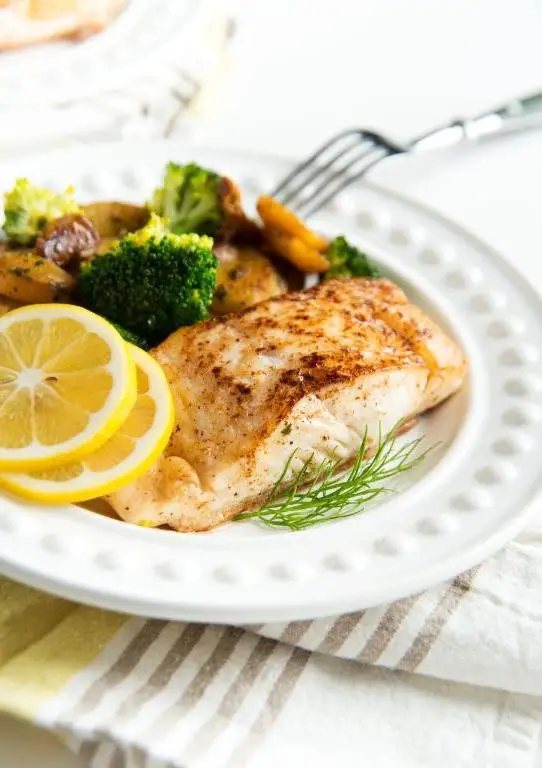
Baking cod with lemon and dill is a simple yet elegant way to enjoy this delicate fish, perfect for a weeknight dinner or a special occasion. Follow these steps to create a dish that’s both flavorful and foolproof.
Ingredients
- 1 lb cod fillets (fresh or thawed if frozen)
- 2 tbsp olive oil (or any neutral oil)
- 1 lemon, thinly sliced (plus extra for serving)
- 1 tbsp fresh dill, chopped (or 1 tsp dried dill)
- 1/2 tsp salt (adjust to taste)
- 1/4 tsp black pepper (adjust to taste)
- 2 cloves garlic, minced (optional for extra flavor)
Instructions
- Preheat your oven to 375°F (190°C) to ensure it’s ready for baking.
- Lightly coat a baking dish with olive oil to prevent the cod from sticking.
- Place the cod fillets in the prepared dish, arranging them so they don’t overlap.
- Drizzle the remaining olive oil over the cod, ensuring each piece is lightly coated.
- Season the cod evenly with salt and black pepper, adjusting the amounts to your preference.
- Scatter the minced garlic over the cod if using, for an added depth of flavor.
- Arrange the lemon slices on top of the cod, covering as much surface area as possible.
- Sprinkle the chopped dill over the lemon slices and cod, distributing it evenly.
- Bake in the preheated oven for 12-15 minutes, or until the cod flakes easily with a fork.
- Remove from the oven and let it rest for 2 minutes before serving to allow the flavors to meld.
Serve this baked cod with a side of steamed vegetables or a light salad for a complete meal. The lemon and dill not only add a bright, herby flavor but also keep the cod moist and tender. Squeeze a little extra lemon juice on top just before eating to enhance the freshness.
Stir-Fried Tofu with Mixed Vegetables
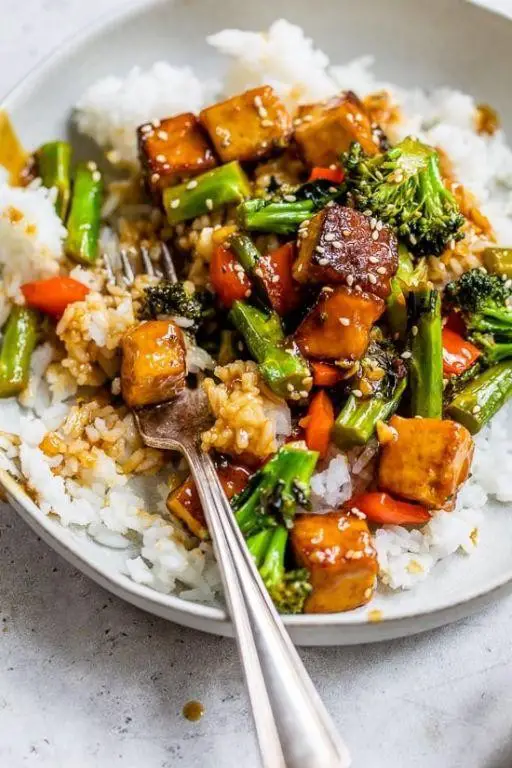
Understanding how to whip up a quick and nutritious meal can transform your weeknight dinners. Stir-fried tofu with mixed vegetables is a versatile dish that packs both flavor and health benefits, perfect for beginners to master.
Ingredients
- 1 block (14 oz) firm tofu, pressed and cubed (for better texture)
- 2 cups mixed vegetables (bell peppers, broccoli, carrots), sliced (or any veggies you prefer)
- 2 tbsp vegetable oil (or any neutral oil)
- 2 tbsp soy sauce (adjust to taste)
- 1 tbsp garlic, minced (fresh is best)
- 1 tsp ginger, grated (adds a nice zing)
- 1/2 tsp red pepper flakes (optional for heat)
Instructions
- Heat 1 tbsp of vegetable oil in a large skillet or wok over medium-high heat (375°F).
- Add the cubed tofu to the skillet, ensuring pieces are not touching for even browning. Cook for 3-4 minutes per side until golden brown.
- Remove tofu from the skillet and set aside on a plate lined with paper towels to absorb excess oil.
- In the same skillet, add the remaining 1 tbsp of oil. Stir in the minced garlic and grated ginger, cooking for 30 seconds until fragrant.
- Add the mixed vegetables to the skillet. Stir-fry for 5-6 minutes until vegetables are tender but still crisp.
- Return the tofu to the skillet with the vegetables. Pour soy sauce over the mixture and sprinkle with red pepper flakes if using. Gently toss to combine and heat through for 1-2 minutes.
When served hot, this dish offers a delightful contrast between the crispy tofu and the vibrant, crunchy vegetables. For an extra touch, garnish with sesame seeds or serve over a bed of steamed rice to soak up the savory sauce.
Whole Grain Toast with Almond Butter and Banana
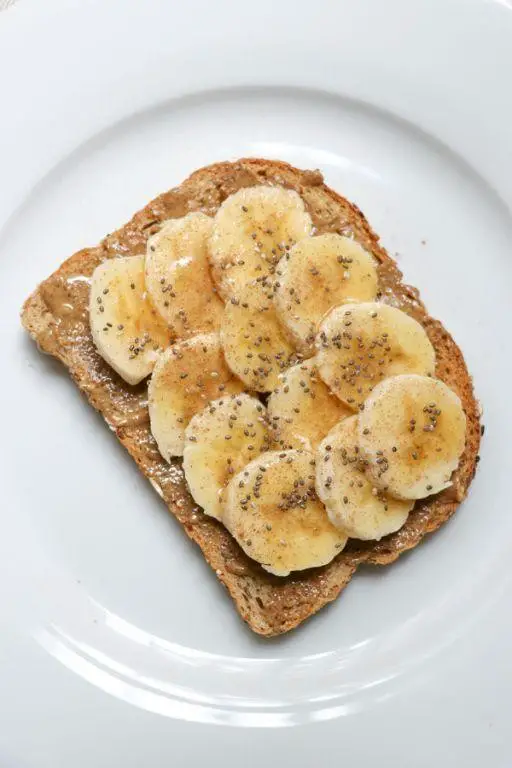
Just when you thought your morning routine couldn’t get any simpler, this whole grain toast with almond butter and banana comes along to prove you wrong. It’s a no-fuss, nutritious option that packs flavor and energy to kickstart your day.
Ingredients
- 2 slices whole grain bread (toasted to your preference)
- 2 tbsp almond butter (creamy or crunchy, based on your liking)
- 1 medium banana, sliced (ripe but firm for the best texture)
Instructions
- Place the whole grain bread slices in a toaster. Toast on medium setting until golden brown, about 2-3 minutes, depending on your toaster.
- Once toasted, immediately spread 1 tbsp of almond butter evenly on each slice. The warmth of the toast helps the almond butter spread more easily.
- Arrange the banana slices on top of the almond butter. For even distribution, slightly overlap the slices.
- Serve immediately while the toast is still warm for the best flavor and texture combination.
The contrast between the crunchy toast, creamy almond butter, and soft banana creates a delightful texture. For an extra touch, drizzle a bit of honey over the top or sprinkle with cinnamon to elevate the flavors.
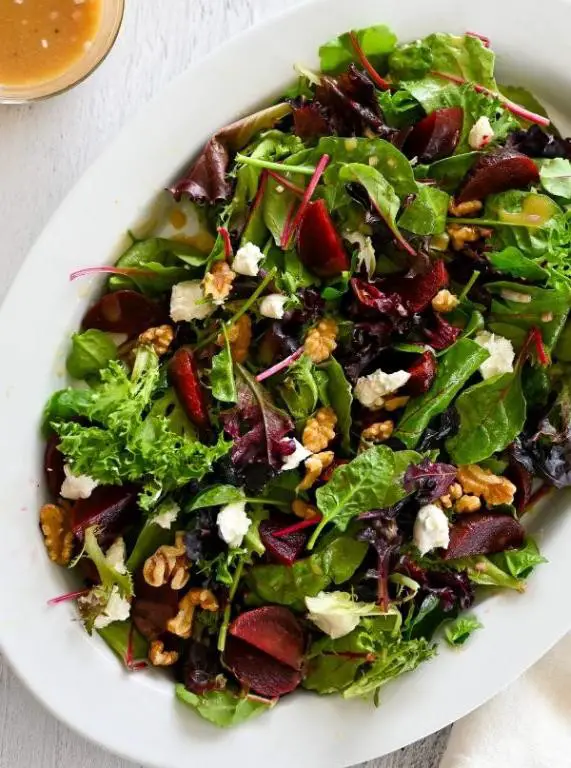
Roasted Beet and Goat Cheese Salad
Start by preheating your oven to 400°F to ensure it’s ready for roasting the beets, which will bring out their natural sweetness and tender texture.
Ingredients
- 3 medium beets, peeled and cubed (about 2 cups)
- 2 tbsp olive oil (or any neutral oil)
- 1/2 tsp salt (adjust to taste)
- 1/4 tsp black pepper (adjust to taste)
- 4 cups mixed greens (arugula adds a nice peppery flavor)
- 1/2 cup crumbled goat cheese
- 1/4 cup walnuts, toasted (for extra crunch)
- 2 tbsp balsamic vinegar (a good quality one makes a difference)
Instructions
- Preheat your oven to 400°F. This ensures even roasting of the beets.
- Toss the peeled and cubed beets with olive oil, salt, and black pepper in a bowl until evenly coated.
- Spread the beets in a single layer on a baking sheet. Roast for 25-30 minutes, stirring halfway through, until they are tender and slightly caramelized.
- While the beets roast, toast the walnuts in a dry skillet over medium heat for 3-5 minutes, shaking the pan occasionally, until fragrant and lightly browned. Tip: Watch closely to prevent burning.
- In a large bowl, combine the mixed greens, roasted beets, toasted walnuts, and crumbled goat cheese.
- Drizzle the salad with balsamic vinegar just before serving. Tip: Add the dressing right before serving to keep the greens crisp.
Key to this salad’s appeal is the contrast between the earthy sweetness of the roasted beets and the tangy creaminess of the goat cheese, all brought together with the crunch of toasted walnuts. Serve it as a vibrant side or top with grilled chicken for a hearty main dish.
Chicken and Vegetable Soup

On a chilly evening or when you’re feeling under the weather, nothing beats the comfort of a homemade chicken and vegetable soup. This recipe is straightforward, ensuring even beginners can achieve a delicious result.
Ingredients
- 1 tbsp olive oil (or any neutral oil)
- 1 lb chicken breast, diced
- 1 cup carrots, sliced (about 2 medium carrots)
- 1 cup celery, chopped (about 2 stalks)
- 1 cup onions, diced (about 1 medium onion)
- 2 cloves garlic, minced
- 6 cups chicken broth (low sodium preferred)
- 1 tsp salt (adjust to taste)
- 1/2 tsp black pepper (adjust to taste)
- 1 bay leaf
- 1 cup pasta, such as elbow or shells (optional)
Instructions
- Heat olive oil in a large pot over medium heat until shimmering, about 1 minute.
- Add diced chicken breast to the pot. Cook until no longer pink, about 5-7 minutes, stirring occasionally.
- Add carrots, celery, and onions to the pot. Cook until vegetables begin to soften, about 5 minutes, stirring occasionally.
- Stir in minced garlic and cook for 1 minute until fragrant.
- Pour in chicken broth, then add salt, pepper, and bay leaf. Bring to a boil.
- Reduce heat to low and simmer for 20 minutes, covered, to allow flavors to meld.
- If using pasta, add it to the pot and cook according to package instructions, usually about 8-10 minutes.
- Remove bay leaf before serving. Taste and adjust seasoning if necessary.
This soup boasts a rich broth with tender chicken and perfectly cooked vegetables. For a twist, serve it with a sprinkle of fresh parsley or a dash of hot sauce for extra heat.
Zucchini Noodles with Pesto
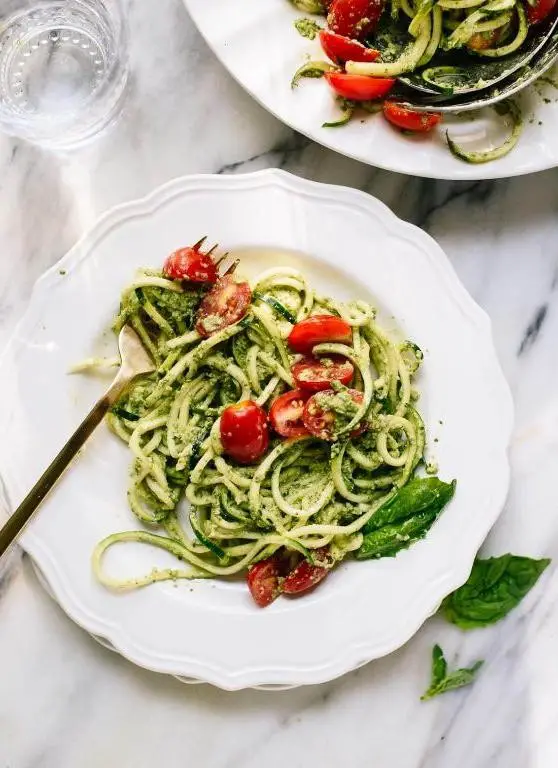
One of the simplest yet most satisfying dishes to whip up on a busy weeknight is Zucchini Noodles with Pesto. This dish is not only a breeze to prepare but also packs a flavorful punch, making it a perfect introduction to the world of healthy, vegetable-based meals.
Ingredients
- 2 medium zucchinis (spiralized into noodles)
- 1/4 cup fresh basil leaves (packed, for a vibrant pesto)
- 2 tbsp pine nuts (toasted, for a nutty flavor)
- 1/4 cup grated Parmesan cheese (plus extra for serving)
- 1 garlic clove (minced, adjust to taste)
- 1/4 cup extra virgin olive oil (or any neutral oil)
- Salt (to taste)
- Black pepper (freshly ground, to taste)
Instructions
- In a dry skillet over medium heat, toast the pine nuts until golden, about 3 minutes, stirring frequently to prevent burning.
- In a food processor, combine the toasted pine nuts, basil leaves, Parmesan cheese, and minced garlic. Pulse until finely chopped.
- With the processor running, slowly drizzle in the olive oil until the pesto is smooth. Season with salt and black pepper to taste.
- Using a spiralizer, turn the zucchinis into noodles. If you don’t have a spiralizer, a vegetable peeler can create wide ribbons.
- In a large bowl, toss the zucchini noodles with the pesto until evenly coated. Let sit for 5 minutes to allow the flavors to meld.
- Serve immediately, garnished with additional Parmesan cheese if desired.
Now you’re ready to enjoy your Zucchini Noodles with Pesto. The dish offers a delightful crunch from the fresh zucchini, balanced by the creamy, herby pesto. For an extra touch, top with cherry tomatoes or grilled chicken to make it a more substantial meal.
Berry and Yogurt Parfait
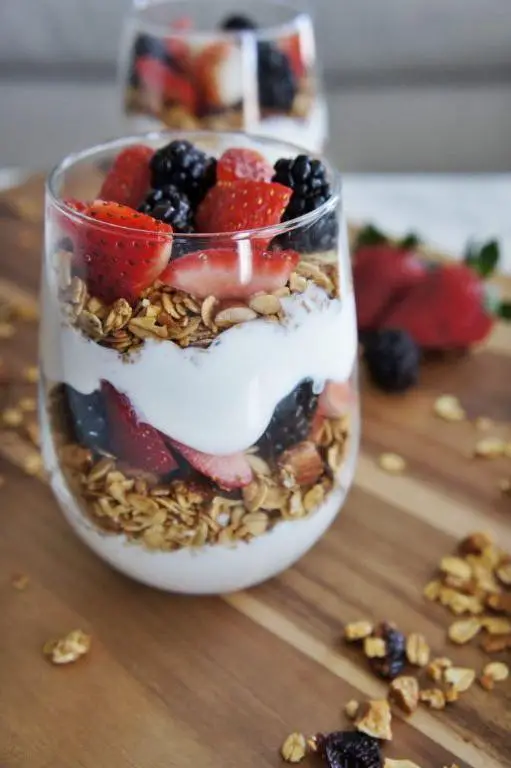
Yogurt parfaits are a delightful and healthy option for breakfast or a snack, combining creamy yogurt with fresh berries and a crunchy granola topping. This Berry and Yogurt Parfait recipe is simple to make and customizable to your taste preferences.
Ingredients
- 1 cup Greek yogurt (or any yogurt of choice for a lighter version)
- 1/2 cup mixed berries (fresh or frozen, adjust to taste)
- 1/4 cup granola (choose your favorite for added texture)
- 1 tbsp honey (optional, for sweetness)
Instructions
- In a clear glass or bowl, start by adding a layer of Greek yogurt at the bottom, about 1/3 of the cup.
- Add a layer of mixed berries on top of the yogurt, using half of the berries.
- Sprinkle half of the granola over the berries for a crunchy texture.
- Repeat the layers with the remaining yogurt, berries, and granola.
- Drizzle honey on top if you prefer a sweeter parfait.
- Serve immediately to enjoy the contrast between the creamy yogurt, juicy berries, and crunchy granola.
Now you have a beautifully layered Berry and Yogurt Parfait that’s as pleasing to the eye as it is to the palate. The combination of textures and flavors makes this dish a versatile option for any time of the day.
Conclusion
Unlock the door to quick, heart-healthy meals with our roundup of 20 delicious 30-minute recipes! Perfect for busy home cooks in North America, these nutritious dishes promise flavor without the fuss. We’d love to hear which recipes become your favorites—drop us a comment below. Loved what you saw? Share the love on Pinterest and spread the joy of easy, healthy cooking!