Got a busy schedule but still crave something delicious? You’re in luck! Our roundup of 18 Quick 5 Minute Recipes is here to save your day. Whether you’re after a speedy breakfast, a lightning-fast lunch, or a dinner that’s ready in a flash, we’ve got you covered. Dive in to discover how easy it is to whip up tasty meals that don’t keep you tied to the kitchen.
Avocado Toast with Egg
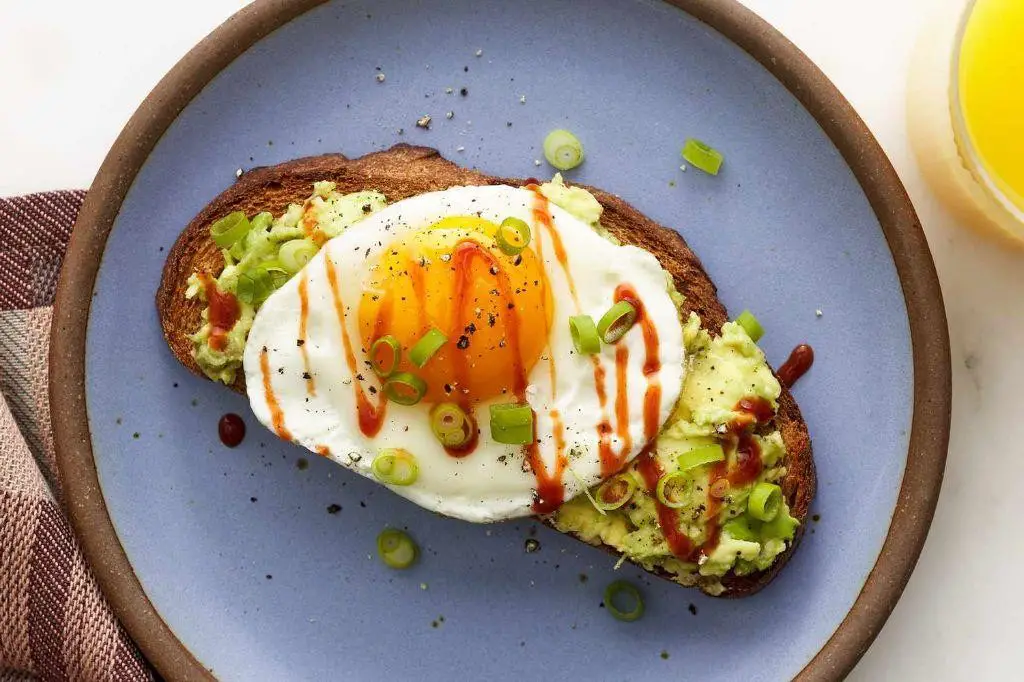
Did you ever have one of those mornings where you’re craving something simple yet utterly satisfying? That’s how I feel about avocado toast with egg—it’s my go-to breakfast that never fails to brighten my day. The creamy avocado paired with a perfectly cooked egg on crispy toast is a match made in heaven, and today, I’m sharing my foolproof way to make it.
Ingredients
- 1 ripe avocado (look for one that’s slightly soft to the touch)
- 2 slices of whole grain bread (or your favorite bread)
- 2 eggs
- 1 tbsp olive oil (or any neutral oil)
- Salt and pepper (adjust to taste)
- Red pepper flakes (optional, for a little heat)
Instructions
- Heat a non-stick skillet over medium heat and add 1 tbsp of olive oil.
- Once the oil is hot, crack 2 eggs into the skillet, being careful not to break the yolks.
- Cook the eggs for about 3 minutes for sunny-side up, or until the whites are set but the yolks are still runny. Tip: Cover the skillet with a lid for the last minute to ensure the tops of the whites are fully cooked.
- While the eggs are cooking, toast 2 slices of whole grain bread until golden and crispy.
- Cut the avocado in half, remove the pit, and scoop the flesh into a bowl. Mash it lightly with a fork, leaving some chunks for texture. Tip: Add a pinch of salt and pepper to the avocado to enhance its flavor.
- Spread the mashed avocado evenly on the toasted bread slices.
- Once the eggs are done, carefully place one on top of each avocado toast.
- Season with additional salt, pepper, and red pepper flakes if desired. Tip: A squeeze of lemon juice on the avocado can add a nice brightness to the dish.
Here’s why I love this dish: the contrast between the creamy avocado and the crispy toast, topped with the rich, runny egg yolk, is simply irresistible. For an extra touch, sprinkle some chopped cilantro or microgreens on top before serving.
Microwave Scrambled Eggs
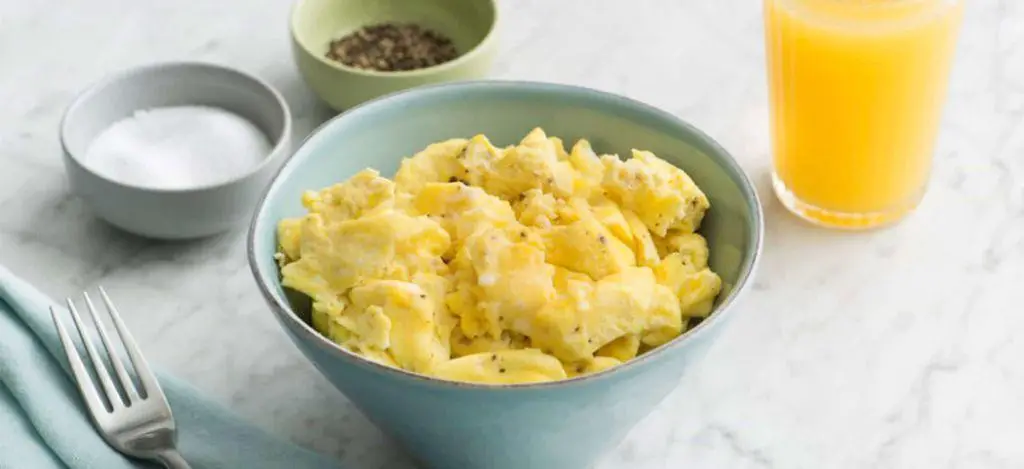
Did you ever have one of those mornings where you’re racing against the clock but still crave something hearty for breakfast? I’ve been there more times than I can count, and that’s how microwave scrambled eggs became my go-to. It’s quick, satisfying, and surprisingly fluffy if you know the tricks.
Ingredients
- 2 large eggs (farm-fresh if possible, for better flavor)
- 2 tbsp milk (whole milk for creaminess, or any milk you prefer)
- 1/4 tsp salt (adjust to taste)
- 1/8 tsp black pepper (freshly ground is best)
- 1 tsp butter (or any neutral oil, to grease the bowl)
Instructions
- Crack the eggs into a microwave-safe bowl. Tip: Using a bowl with a slightly wider base helps the eggs cook more evenly.
- Add the milk, salt, and pepper to the bowl. Whisk vigorously until the mixture is uniform and slightly frothy. Tip: Incorporating air at this stage makes the eggs fluffier.
- Place the butter in the bowl and microwave for 10 seconds to melt it, then swirl to coat the bowl evenly.
- Pour the egg mixture into the buttered bowl. Microwave on high for 45 seconds, then stir well with a fork.
- Microwave for another 30-45 seconds, or until the eggs are just set but still moist. Tip: They’ll continue to cook a bit from residual heat, so better to undercook slightly.
- Give the eggs a final stir to break up any large curds, then serve immediately.
Fluffy, creamy, and ready in under 5 minutes, these microwave scrambled eggs are a game-changer for busy mornings. Try topping them with a sprinkle of cheese or a dash of hot sauce for an extra kick. Perfect on toast or alongside avocado for a more substantial meal.
5 Minute Mug Cake
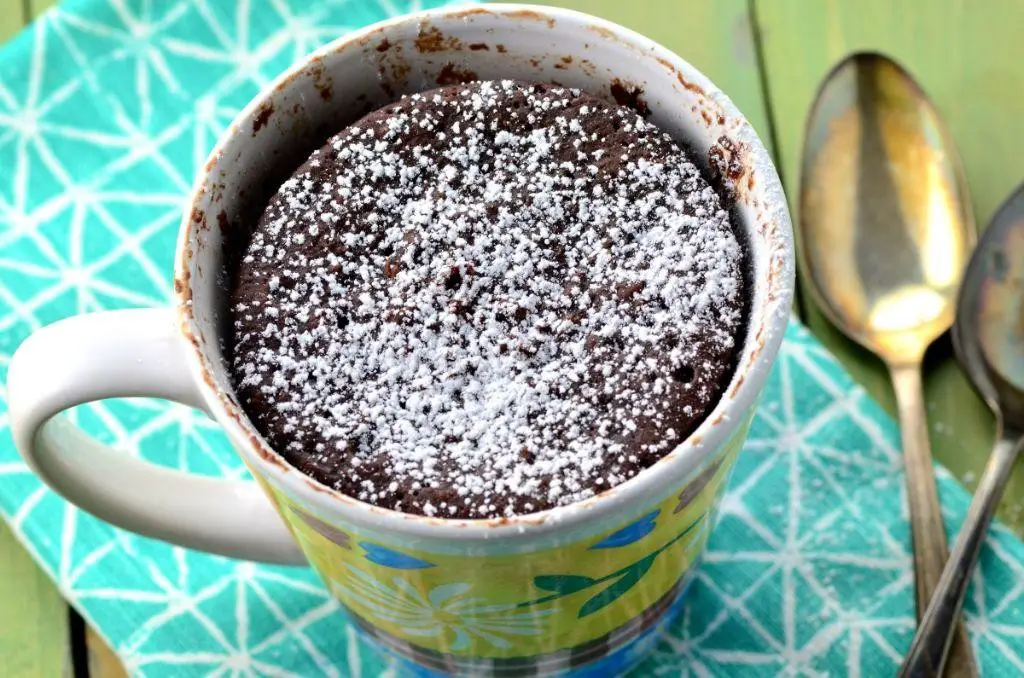
Perfect for those late-night cravings or a quick dessert fix, this 5 Minute Mug Cake has saved me more times than I can count. It’s my go-to when I need something sweet, fast, and with minimal cleanup.
Ingredients
- 4 tbsp all-purpose flour (spooned and leveled)
- 2 tbsp granulated sugar (adjust to taste)
- 1/8 tsp baking powder
- 2 tbsp milk (any kind works)
- 1 tbsp vegetable oil (or any neutral oil)
- 1/4 tsp vanilla extract (optional, for flavor)
Instructions
- In a microwave-safe mug, whisk together the flour, sugar, and baking powder until well combined.
- Add the milk, oil, and vanilla extract to the dry ingredients. Stir until the batter is smooth with no lumps.
- Microwave the mug on high for 1 minute and 30 seconds. Watch closely after 1 minute to prevent overflow.
- Let the cake cool for a minute before eating. It will be very hot right out of the microwave.
Now you’ve got a fluffy, moist cake that’s perfect straight from the mug. Top it with a scoop of ice cream or a drizzle of chocolate sauce for an extra treat.
Quick Banana Pancakes
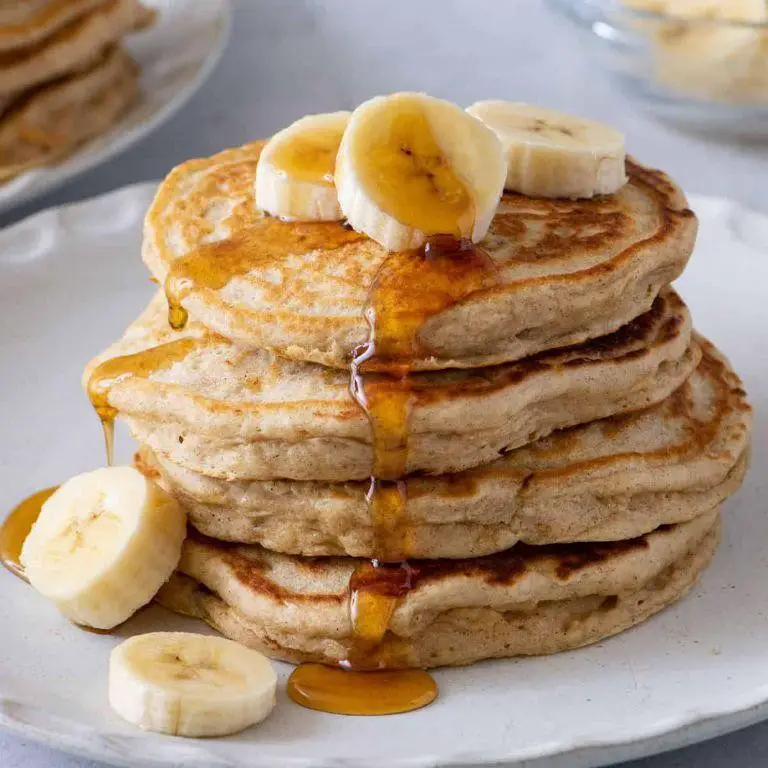
Haven’t we all had those mornings when we crave something sweet and comforting but are short on time? That’s when my go-to Quick Banana Pancakes come to the rescue. They’re fluffy, delicious, and ready in minutes, making them perfect for busy mornings or lazy weekends.
Ingredients
- 1 cup all-purpose flour (for a healthier twist, try whole wheat flour)
- 1 tbsp sugar (adjust to taste)
- 2 tsp baking powder (this ensures they’re fluffy)
- 1/4 tsp salt
- 1 cup milk (any kind works, I love using almond milk)
- 1 large egg
- 1 tbsp melted butter (or any neutral oil)
- 1 ripe banana, mashed (the riper, the sweeter)
Instructions
- In a large bowl, whisk together the flour, sugar, baking powder, and salt.
- In another bowl, beat the egg, then mix in the milk, melted butter, and mashed banana until well combined.
- Pour the wet ingredients into the dry ingredients and stir until just combined. Tip: Don’t overmix; a few lumps are okay for fluffier pancakes.
- Heat a non-stick skillet over medium heat (about 350°F) and lightly grease it with butter or oil.
- Pour 1/4 cup of batter onto the skillet for each pancake. Cook until bubbles form on the surface and the edges look set, about 2-3 minutes.
- Flip the pancakes and cook for another 1-2 minutes until golden brown. Tip: Adjust the heat if they’re browning too quickly.
- Serve warm with your favorite toppings. Tip: A drizzle of maple syrup and a sprinkle of walnuts add a delightful crunch.
Ultimate comfort in every bite, these pancakes are wonderfully soft with a hint of banana sweetness. For a fun twist, try adding chocolate chips to the batter or serving them with a dollop of peanut butter on top.
Instant Oatmeal with Fresh Fruits
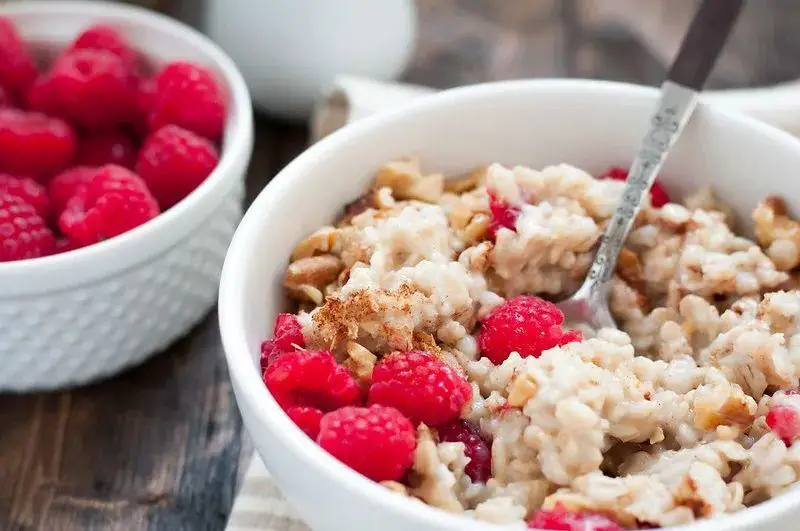
Craving something quick yet nutritious to kickstart your morning? I’ve been there, especially on those busy days when every minute counts. That’s why I swear by this Instant Oatmeal with Fresh Fruits recipe—it’s my go-to for a hassle-free, delicious breakfast that never disappoints.
Ingredients
- 1 cup instant oats (quick oats work too)
- 1 1/2 cups water (or milk for creamier texture)
- 1/2 cup mixed fresh fruits (berries, banana slices, or your favorite)
- 1 tbsp honey (adjust to taste)
- A pinch of salt (enhances flavor)
Instructions
- In a medium bowl, combine 1 cup instant oats and a pinch of salt.
- Pour 1 1/2 cups of boiling water over the oats. Tip: Using boiling water speeds up the cooking process.
- Stir the mixture well, then let it sit for 2 minutes. The oats will absorb the water and soften.
- While the oats are resting, wash and prepare 1/2 cup of your chosen fresh fruits. Tip: Cutting fruits into bite-sized pieces ensures every spoonful is flavorful.
- After the oats have rested, stir in 1 tbsp of honey for sweetness. Tip: Drizzle the honey in a circular motion for even distribution.
- Gently fold in the fresh fruits, reserving a few pieces for garnish.
- Serve immediately, topped with the reserved fruits for a fresh, vibrant look.
Nothing beats the creamy texture of perfectly cooked oats paired with the juicy burst of fresh fruits. For an extra touch, sprinkle some cinnamon or chia seeds on top before serving to add depth to every bite.
Speedy Greek Yogurt Parfait
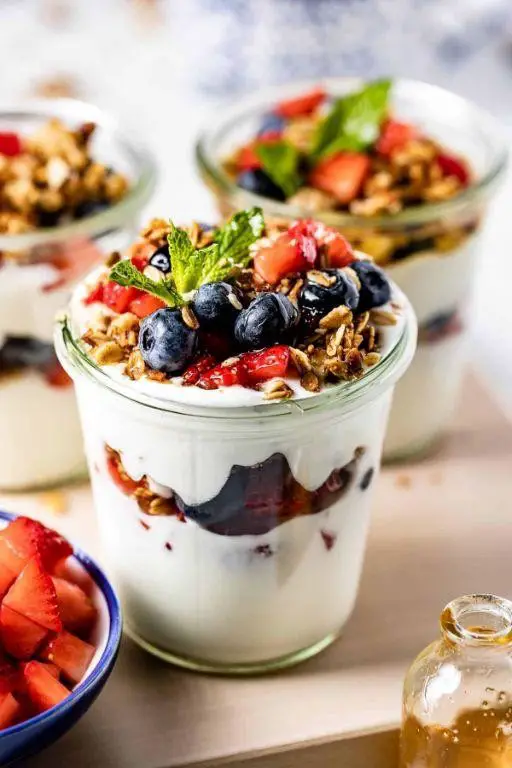
Diving into breakfast can sometimes feel like a chore, but this Speedy Greek Yogurt Parfait is my go-to when I need something quick, nutritious, and delicious. It’s a game-changer on busy mornings, and I love how customizable it is based on what’s in my pantry.
Ingredients
- 1 cup Greek yogurt (I prefer full-fat for creaminess, but any type works)
- 1/2 cup granola (homemade or store-bought, choose your favorite)
- 1/4 cup honey (adjust to taste, or use maple syrup for a vegan option)
- 1/2 cup mixed berries (fresh or frozen, whatever you have on hand)
Instructions
- Gather all your ingredients and a serving glass or bowl. This makes assembly a breeze.
- Start by adding half of the Greek yogurt to the bottom of your glass. Smooth it out with the back of a spoon for an even layer.
- Sprinkle half of the granola over the yogurt. This adds a delightful crunch.
- Drizzle half of the honey over the granola. It sweetens the parfait and adds a beautiful sheen.
- Add half of the mixed berries on top of the honey. They bring a burst of freshness and color.
- Repeat the layers with the remaining yogurt, granola, honey, and berries.
- Let the parfait sit for a minute before serving. This allows the granola to slightly soften, making it easier to eat.
How the layers come together is not just visually appealing but also creates a perfect balance of textures and flavors in every bite. Try serving it with a mint leaf on top for an extra touch of elegance.
Rapid Tuna Salad Wrap
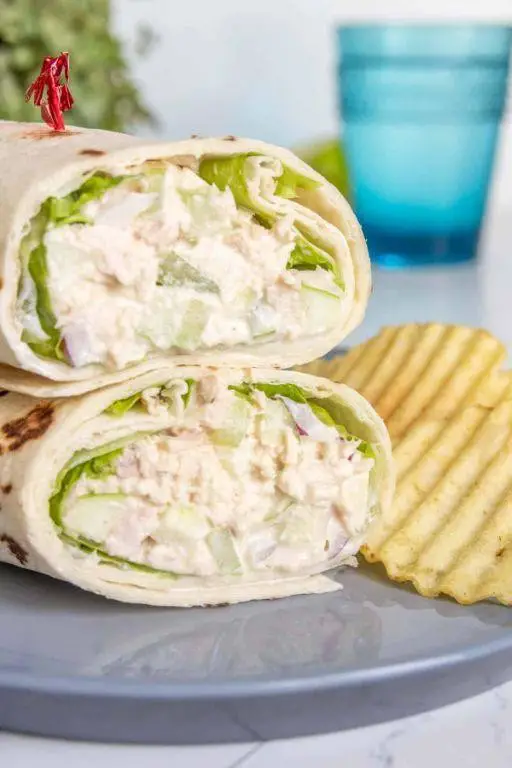
Perfect for those busy days when you’re craving something wholesome yet quick, this Rapid Tuna Salad Wrap has become my go-to lunch. I remember whipping this up during a hectic work-from-home day, and it’s been a staple ever since.
Ingredients
- 1 can (5 oz) tuna in water, drained (try chunk light for a milder flavor)
- 1/4 cup mayonnaise (or Greek yogurt for a healthier twist)
- 1 tbsp lemon juice (freshly squeezed adds a bright note)
- 1/4 tsp salt (adjust to taste)
- 1/4 tsp black pepper (freshly ground preferred)
- 1/4 cup diced celery (for a satisfying crunch)
- 2 tbsp diced red onion (soak in cold water for 5 minutes to mellow the bite)
- 2 large flour tortillas (whole wheat for extra fiber)
- 1 cup baby spinach leaves (or any greens you have on hand)
Instructions
- In a medium bowl, combine the drained tuna, mayonnaise, lemon juice, salt, and black pepper. Mix well until all ingredients are evenly incorporated.
- Add the diced celery and red onion to the tuna mixture. Stir gently to avoid breaking the tuna chunks too much.
- Lay out the flour tortillas on a clean surface. Divide the baby spinach leaves evenly between them, placing the leaves in the center of each tortilla.
- Spoon half of the tuna salad mixture onto each tortilla, spreading it over the spinach leaves but leaving a 1-inch border around the edges.
- Fold the sides of each tortilla inward, then roll tightly from the bottom to enclose the filling completely.
- Cut each wrap in half diagonally for easier eating, or leave whole if preferred. Serve immediately or wrap in parchment paper for a portable meal.
Light and refreshing with a delightful crunch from the celery, this wrap is as satisfying as it is simple. For an extra kick, a dash of hot sauce or a sprinkle of paprika can elevate the flavors beautifully.
Fast Caprese Salad
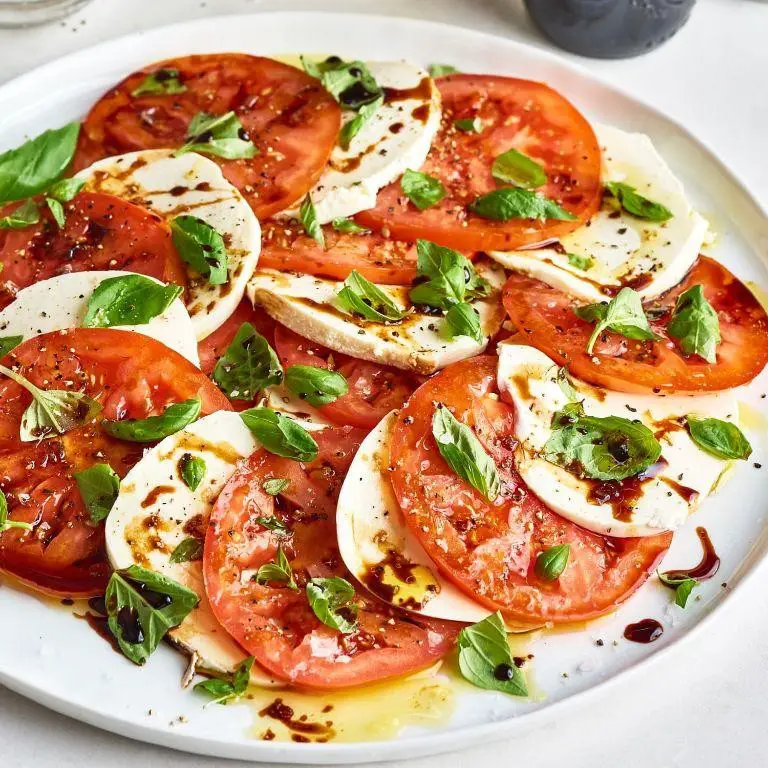
Last summer, I found myself craving something fresh, quick, and utterly satisfying after a long day at the farmers’ market. That’s when I stumbled upon the simplicity and vibrant flavors of a Fast Caprese Salad. It’s become my go-to dish for those evenings when I want something delicious without spending hours in the kitchen.
Ingredients
- 2 large ripe tomatoes, sliced 1/4 inch thick (look for ones that are firm yet give slightly to pressure)
- 8 oz fresh mozzarella cheese, sliced 1/4 inch thick (for the best flavor, use cheese packed in water)
- 1/4 cup fresh basil leaves (tear them slightly to release their aroma)
- 2 tbsp extra virgin olive oil (or any high-quality olive oil you have on hand)
- 1 tbsp balsamic glaze (adjust the amount based on your preference for sweetness and acidity)
- Salt and freshly ground black pepper to taste (I like to use flaky sea salt for extra texture)
Instructions
- Arrange the tomato and mozzarella slices alternately on a large plate, slightly overlapping them for a beautiful presentation.
- Tuck the fresh basil leaves between the tomato and mozzarella slices. This not only adds flavor but also makes the dish look more inviting.
- Drizzle the olive oil evenly over the arranged slices. The oil helps to bring out the flavors of the tomatoes and mozzarella.
- Repeat the drizzling with the balsamic glaze, aiming for a decorative pattern if you’re feeling artistic.
- Season lightly with salt and a generous grind of black pepper. Remember, you can always add more, so start with a little.
This Fast Caprese Salad is a celebration of textures and flavors—creamy mozzarella, juicy tomatoes, and the sharpness of fresh basil, all brought together with the richness of olive oil and the sweet tang of balsamic glaze. Try serving it on a warm slice of crusty bread for an open-faced sandwich that’s sure to impress.
Easy Peanut Butter Banana Smoothie
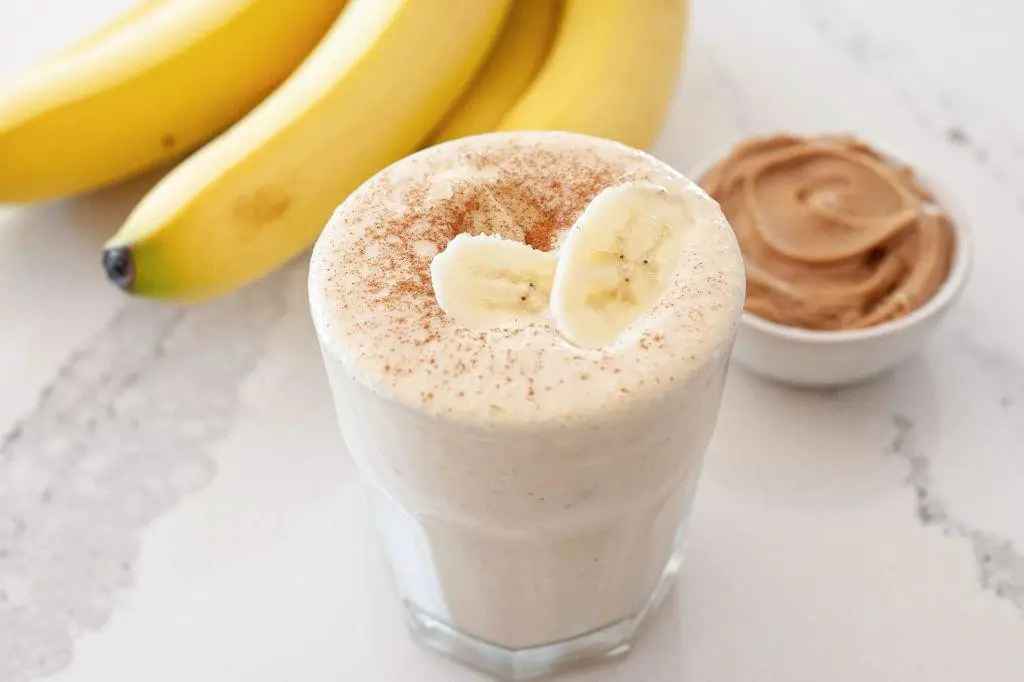
Just the other morning, I found myself staring at a bunch of overripe bananas and a nearly empty jar of peanut butter, and that’s when inspiration struck. This Easy Peanut Butter Banana Smoothie has since become my go-to breakfast—it’s quick, nutritious, and downright delicious. Plus, it’s a fantastic way to use up those bananas that are a tad too spotty for your morning cereal.
Ingredients
- 1 large ripe banana (the spottier, the sweeter)
- 2 tablespoons creamy peanut butter (or crunchy for extra texture)
- 1 cup milk (dairy or any plant-based alternative)
- 1/2 cup ice cubes (more if you like it thicker)
- 1 teaspoon honey (optional, adjust to sweetness preference)
Instructions
- Peel the banana and break it into chunks for easier blending.
- Add the banana chunks, peanut butter, milk, ice cubes, and honey (if using) into a blender.
- Blend on high speed for about 30 seconds, or until the mixture is smooth and no ice chunks remain. Tip: If the smoothie is too thick, add a splash more milk and blend again.
- Pour the smoothie into a tall glass. Tip: For an extra touch, drizzle a little peanut butter on top before serving.
- Serve immediately. Tip: If you’re not drinking it right away, give it a quick blend before serving as it may separate slightly.
You’ll love how creamy and rich this smoothie is, with the perfect balance of peanut butter and banana flavors. It’s like a liquid version of your favorite peanut butter banana sandwich, but way more refreshing. Try serving it with a sprinkle of granola on top for an added crunch.
Quick Quesadilla

After a long day, there’s nothing I crave more than something quick, cheesy, and satisfying. That’s when my go-to Quick Quesadilla comes into play, a recipe so simple yet so versatile that it’s saved me from many a hangry moment. I remember the first time I whipped this up; it was a lazy Sunday afternoon, and the fridge was nearly empty—just some tortillas and cheese staring back at me. Little did I know, that was the beginning of a beautiful friendship.
Ingredients
- 2 large flour tortillas (or corn for a gluten-free option)
- 1 cup shredded cheddar cheese (a mix of cheeses works great too)
- 1 tbsp olive oil (or any neutral oil)
- 1/2 cup cooked chicken, shredded (optional for a protein boost)
- 1/4 tsp cumin (adjust to taste)
- 1/4 tsp chili powder (for a little kick)
Instructions
- Heat a large skillet over medium heat (about 350°F) and add the olive oil, swirling to coat the bottom.
- Place one tortilla in the skillet, then sprinkle half of the cheese evenly over it. If using chicken, add it now, followed by the remaining cheese. Sprinkle the cumin and chili powder over the cheese.
- Top with the second tortilla and press down gently with a spatula. Cook for about 2-3 minutes, until the bottom is golden brown and the cheese starts to melt.
- Carefully flip the quesadilla using the spatula. Cook for another 2-3 minutes until the other side is golden brown and the cheese is fully melted.
- Remove from the skillet and let it sit for a minute before cutting into wedges. This rest time helps the cheese set slightly, making it easier to cut.
Unbelievably crispy on the outside with a gooey, melty center, this Quick Quesadilla is a testament to the beauty of simplicity. Serve it with a dollop of sour cream or a side of salsa for dipping, and you’ve got a meal that’s as fun to eat as it is easy to make.
Microwave Mac and Cheese
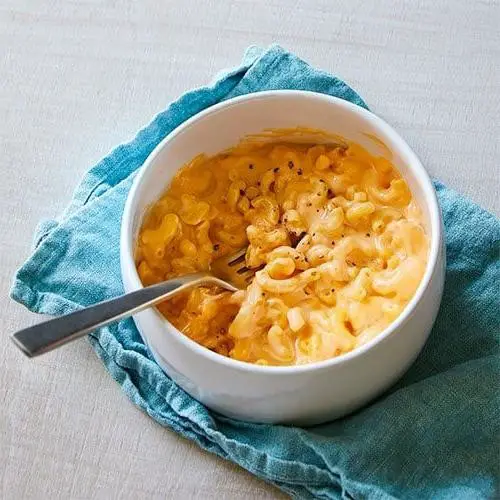
Many of us have those days when we crave something cheesy and comforting but don’t want to spend hours in the kitchen. That’s where this Microwave Mac and Cheese comes in—a quick, creamy solution that’s become my go-to on busy weeknights or lazy weekends.
Ingredients
- 1 cup elbow macaroni (or any small pasta you have on hand)
- 1 cup water (for cooking the pasta)
- 1/2 cup milk (whole milk makes it creamier)
- 1 cup shredded cheddar cheese (sharp cheddar adds more flavor)
- 1 tbsp butter (unsalted is best, but salted works too—just adjust seasoning)
- 1/4 tsp salt (adjust to taste)
- 1/8 tsp black pepper (freshly ground for the best flavor)
Instructions
- In a microwave-safe bowl, combine the macaroni and water. Microwave on high for 5 minutes, then stir. Tip: The pasta should be slightly undercooked at this stage as it will continue to cook later.
- Carefully drain any excess water from the bowl, then add the milk, butter, salt, and pepper. Stir to combine.
- Microwave on high for another 3 minutes, then stir. The mixture should start to thicken. Tip: Keep an eye on it to prevent boiling over—microwaves vary in power.
- Add the shredded cheddar cheese and stir until melted and smooth. If needed, microwave for an additional 30 seconds to help melt the cheese. Tip: For an extra creamy texture, let it sit for a minute before serving.
Delightfully creamy with just the right amount of cheesiness, this Microwave Mac and Cheese is perfect as is or jazzed up with a sprinkle of paprika or crispy bacon bits for those days you’re feeling a bit fancy.
Speedy Spinach and Feta Omelette
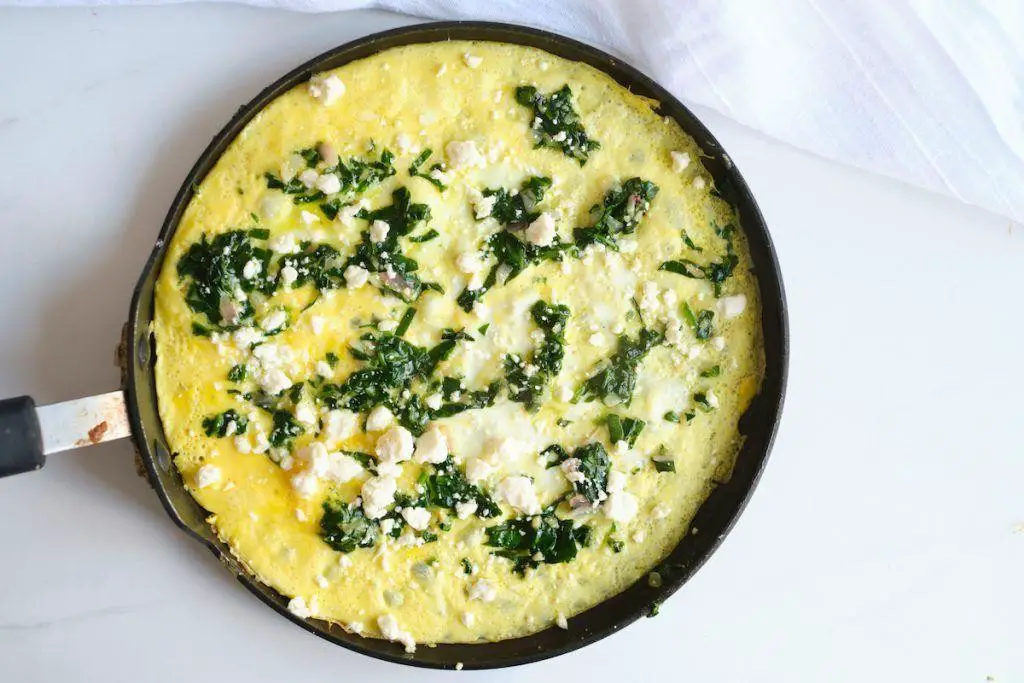
Diving into breakfast doesn’t have to be a time-consuming affair, especially when you’ve got a craving for something both nutritious and delicious. I remember those rushed mornings when only a quick, protein-packed omelette would do, and this Speedy Spinach and Feta Omelette became my go-to. It’s a dish that proves fast food can still be homemade and wholesome.
Ingredients
- 2 large eggs (room temperature for fluffier omelettes)
- 1/4 cup fresh spinach, chopped (packed tightly for more greens)
- 2 tbsp feta cheese, crumbled (or substitute with goat cheese for a tangier flavor)
- 1 tsp olive oil (or any neutral oil)
- Salt and pepper, a pinch each (adjust to taste)
Instructions
- Heat a non-stick skillet over medium heat (about 300°F) and add olive oil, swirling to coat the pan evenly.
- In a bowl, whisk the eggs vigorously for about 30 seconds until slightly frothy; this incorporates air for a lighter texture.
- Pour the whisked eggs into the skillet, tilting to spread them into an even layer. Let cook undisturbed for 1 minute.
- Sprinkle the chopped spinach and crumbled feta evenly over one half of the omelette. Season with salt and pepper.
- Using a spatula, carefully fold the other half of the omelette over the filling. Cook for another 30 seconds to 1 minute, until the cheese begins to melt.
- Slide the omelette onto a plate. For an extra touch, garnish with a sprinkle of feta or a few spinach leaves on top.
You’ll love how the creamy feta pairs with the earthy spinach, all wrapped in a soft, fluffy egg blanket. Try serving it with a side of toasted whole-grain bread or a fresh fruit salad for a complete meal. Yum, it’s mornings like these that make waking up early totally worth it.
Instant Chocolate Pudding
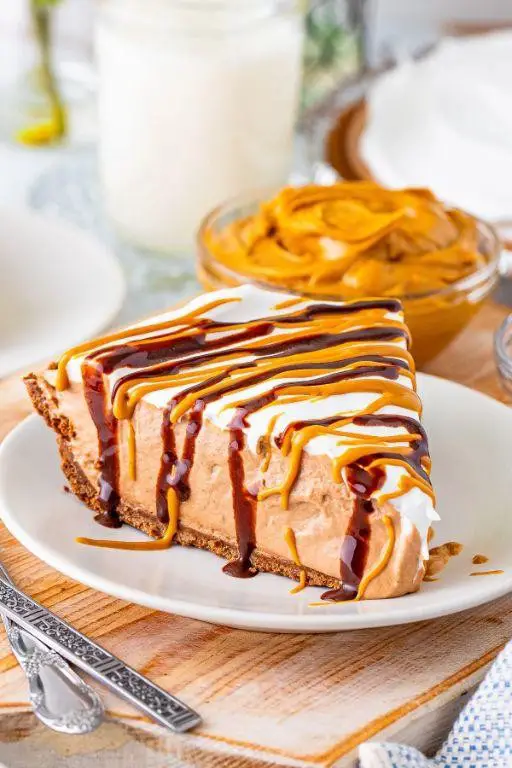
Zesty mornings call for something sweet and effortless, and that’s where my Instant Chocolate Pudding comes into play. I remember whipping this up during a lazy Sunday when my sweet tooth was calling the shots, and it’s been a go-to ever since for its foolproof simplicity and rich flavor.
Ingredients
- 2 cups whole milk (for a creamier texture, or substitute with almond milk for a lighter version)
- 1/2 cup granulated sugar (adjust to taste if you prefer it less sweet)
- 1/4 cup unsweetened cocoa powder (use high-quality for the best flavor)
- 3 tbsp cornstarch (this is your thickening agent, don’t skip it)
- 1/4 tsp salt (just a pinch to balance the sweetness)
- 1 tsp vanilla extract (pure extract makes a difference)
- 2 tbsp unsalted butter (adds richness, optional but recommended)
Instructions
- In a medium saucepan, whisk together the milk, sugar, cocoa powder, cornstarch, and salt until no lumps remain. Tip: Sifting the cocoa powder and cornstarch can help avoid lumps.
- Place the saucepan over medium heat and cook, stirring constantly with a wooden spoon, until the mixture thickens and begins to bubble, about 5-7 minutes. Tip: Constant stirring prevents the pudding from sticking to the bottom of the pan.
- Once bubbling, reduce the heat to low and continue to cook for 1 more minute, still stirring, to ensure the cornstarch is fully cooked.
- Remove the saucepan from the heat and stir in the vanilla extract and butter until the butter is completely melted and the pudding is smooth. Tip: For an extra silky texture, you can strain the pudding through a fine-mesh sieve.
- Pour the pudding into serving dishes and cover with plastic wrap directly on the surface to prevent a skin from forming. Chill in the refrigerator for at least 2 hours before serving.
Out of all the desserts I’ve made, this pudding stands out for its velvety texture and deep chocolate flavor. Serve it with a dollop of whipped cream and a sprinkle of cocoa powder for an elegant touch, or enjoy it straight from the bowl for a simple treat.
Fast Fruit and Nut Bar
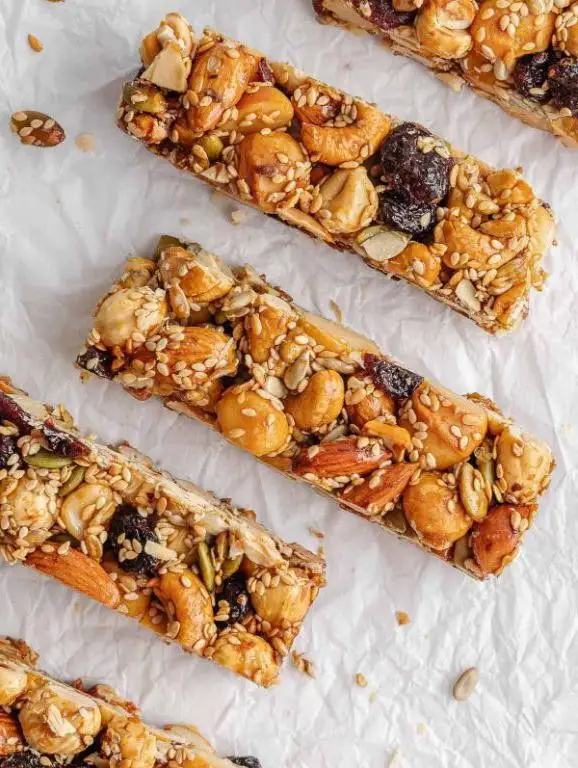
Last weekend, I found myself staring at my pantry, craving something sweet but not wanting to spend hours in the kitchen. That’s when the idea for these Fast Fruit and Nut Bars came to me—quick, no-bake, and packed with all the good stuff. Perfect for those busy mornings or as a midday pick-me-up!
Ingredients
- 1 cup rolled oats (quick oats work too)
- 1/2 cup almond butter (or any nut butter you prefer)
- 1/4 cup honey (adjust to taste)
- 1/2 cup mixed nuts, chopped (I love almonds and walnuts)
- 1/2 cup dried fruit, chopped (apricots and cranberries are my go-to)
- 1 tbsp chia seeds (for an extra nutrient boost)
- 1/2 tsp vanilla extract (optional, but adds a nice depth)
Instructions
- In a large mixing bowl, combine the rolled oats, chopped nuts, dried fruit, and chia seeds. Mix well to distribute evenly.
- In a small saucepan over low heat, warm the almond butter and honey until it’s easy to stir. Add the vanilla extract if using. This should take about 2-3 minutes—don’t let it boil.
- Pour the warm almond butter mixture over the dry ingredients. Stir until everything is well coated and sticky.
- Line a small baking dish (8×8 inches works great) with parchment paper. Transfer the mixture into the dish, pressing down firmly with the back of a spoon to compact it evenly.
- Chill in the refrigerator for at least 1 hour, or until set. This is the perfect time to clean up or prep your coffee for tomorrow!
- Once set, lift the parchment paper out of the dish and cut into bars or squares. For extra neat cuts, warm your knife under hot water before slicing.
Perfectly chewy with a satisfying crunch from the nuts, these bars are a dream. I love wrapping them individually for grab-and-go snacks or crumbling them over yogurt for a quick breakfast.
Quick Hummus and Veggie Wrap
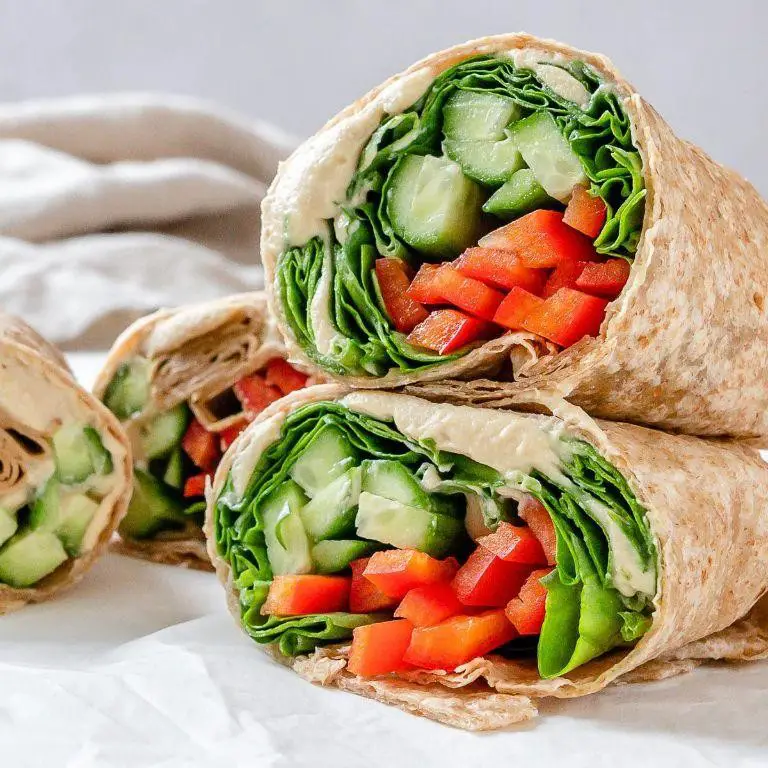
Wrapping up a busy day with something quick, healthy, and satisfying is my go-to, and this Quick Hummus and Veggie Wrap has never let me down. It’s the perfect blend of creamy, crunchy, and fresh, and the best part? It comes together in minutes, making it ideal for those nights when cooking feels like too much.
Ingredients
- 1 large whole wheat tortilla (or any wrap of choice)
- 1/2 cup hummus (store-bought or homemade, garlic flavor works great here)
- 1/2 cup shredded carrots (for a sweet crunch)
- 1/2 cup thinly sliced cucumber (peeled if you prefer)
- 1/4 cup sliced red bell pepper (adds a nice color and crunch)
- 1/4 cup baby spinach leaves (or any greens you have on hand)
- 1 tbsp olive oil (or any neutral oil)
- 1 tsp lemon juice (freshly squeezed for the best flavor)
- Salt and pepper to taste (adjust to your liking)
Instructions
- Lay the whole wheat tortilla flat on a clean surface.
- Spread the hummus evenly over the tortilla, leaving about an inch border around the edges.
- Layer the shredded carrots, sliced cucumber, red bell pepper, and baby spinach leaves on top of the hummus.
- Drizzle the olive oil and lemon juice over the veggies, then season with salt and pepper.
- Carefully fold the sides of the tortilla in, then roll it up tightly from the bottom to enclose the filling.
- Cut the wrap in half diagonally for easier eating, or leave it whole if you’re on the go.
Perfect for a quick lunch or a light dinner, this wrap is as versatile as it is delicious. The creamy hummus pairs beautifully with the crisp veggies, and the whole wheat tortilla adds a hearty touch. Try serving it with a side of sweet potato fries or a simple salad for a complete meal.
Easy Tomato Basil Bruschetta

Last summer, I found myself with an abundance of ripe tomatoes from my garden and a craving for something fresh and easy. That’s when this Easy Tomato Basil Bruschetta became my go-to snack. It’s perfect for those lazy afternoons when you want something delicious without much fuss.
Ingredients
- 1 French baguette, sliced into 1/2 inch pieces (about 24 slices)
- 4 ripe tomatoes, diced (about 2 cups)
- 1/4 cup fresh basil leaves, chopped (pack them lightly when measuring)
- 2 cloves garlic, minced (or 1/2 tsp garlic powder if fresh isn’t available)
- 2 tbsp extra virgin olive oil (or any neutral oil)
- 1 tbsp balsamic vinegar (adjust to taste)
- 1/2 tsp salt (adjust to taste)
- 1/4 tsp black pepper (freshly ground preferred)
Instructions
- Preheat your oven to 375°F (190°C) to get it ready for toasting the bread.
- While the oven heats, place the baguette slices on a baking sheet in a single layer. Lightly brush each slice with olive oil on one side. Tip: For extra flavor, rub a cut garlic clove on the bread before toasting.
- Toast the bread in the preheated oven for 5-7 minutes, or until the edges are golden and crisp. Keep an eye on them to prevent burning.
- In a medium bowl, combine the diced tomatoes, chopped basil, minced garlic, remaining olive oil, balsamic vinegar, salt, and pepper. Mix gently to avoid crushing the tomatoes. Tip: Let the mixture sit for 10 minutes to allow the flavors to meld.
- Once the bread is toasted, let it cool for a minute before topping each slice with the tomato mixture. Tip: For a neat presentation, use a slotted spoon to drain excess liquid from the tomato mixture before serving.
Great for gatherings or a quiet night in, this bruschetta offers a delightful crunch from the toast contrasted with the juicy, flavorful topping. Try serving it alongside a glass of chilled white wine for an extra touch of elegance.
Rapid Rice Cake with Avocado
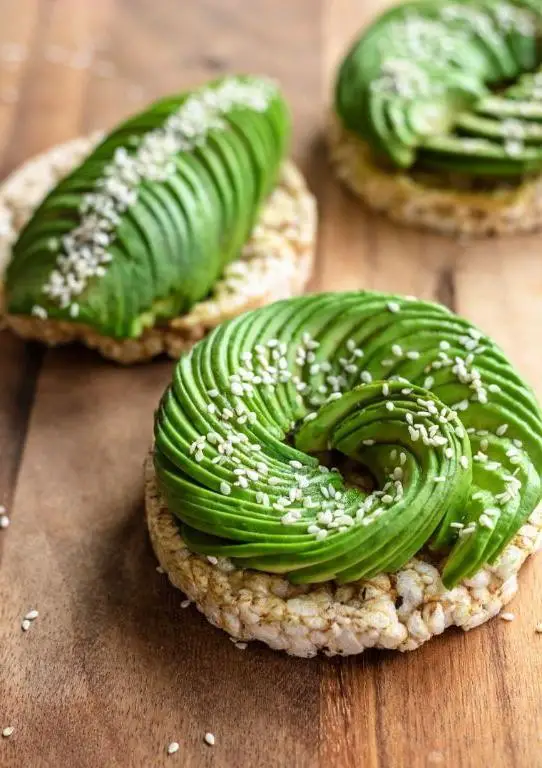
Most mornings, I’m scrambling to put together something quick yet satisfying for breakfast, and that’s how this Rapid Rice Cake with Avocado came to be. It’s a testament to how simple ingredients can transform into something delicious with just a little creativity and minimal effort.
Ingredients
- 1 cup cooked rice (leftover rice works great here)
- 1 ripe avocado (look for one that’s slightly soft to the touch)
- 1 tbsp olive oil (or any neutral oil)
- 1/4 tsp salt (adjust to taste)
- 1/4 tsp black pepper (freshly ground preferred)
- 1 tbsp sesame seeds (for a nutty crunch)
Instructions
- Heat a non-stick skillet over medium heat and add the olive oil, ensuring the pan is evenly coated.
- Press the cooked rice into a flat, round shape directly in the skillet, about 1/2 inch thick. Cook for 5 minutes or until the bottom is golden and crispy.
- Carefully flip the rice cake using a spatula. Cook the other side for another 5 minutes until equally crispy.
- While the rice cake cooks, slice the avocado in half, remove the pit, and scoop the flesh into a bowl. Mash lightly with a fork, leaving some chunks for texture.
- Season the mashed avocado with salt and black pepper, mixing well to combine.
- Once the rice cake is crispy on both sides, transfer it to a plate. Spread the seasoned avocado evenly over the top.
- Sprinkle sesame seeds over the avocado for an added crunch and flavor.
The contrast between the crispy rice cake and the creamy avocado is nothing short of magical. For an extra kick, drizzle with a little sriracha or top with a fried egg to make it even more hearty.
5 Minute Chocolate Covered Strawberries

Zesty and quick, these chocolate-covered strawberries are my go-to when I need a fast yet fancy dessert. I remember whipping these up last minute for a friend’s surprise party, and they were a hit!
Ingredients
- 1 cup semi-sweet chocolate chips (or dark chocolate for a richer taste)
- 1 tbsp coconut oil (helps the chocolate melt smoothly)
- 12 fresh strawberries, washed and dried thoroughly (wet strawberries will cause the chocolate to seize)
Instructions
- Line a baking sheet with parchment paper and set aside.
- In a microwave-safe bowl, combine the chocolate chips and coconut oil.
- Microwave the mixture in 30-second intervals, stirring after each, until fully melted (about 1-2 minutes total). Tip: Avoid overheating to prevent the chocolate from burning.
- Hold each strawberry by the stem and dip into the melted chocolate, swirling to coat evenly.
- Allow excess chocolate to drip off, then place the strawberry on the prepared baking sheet. Tip: For a decorative touch, drizzle any remaining chocolate over the strawberries with a fork.
- Refrigerate the strawberries for at least 5 minutes, or until the chocolate hardens. Tip: For quicker setting, place them in the freezer for 2-3 minutes.
Creamy chocolate encases each juicy strawberry, creating a perfect bite of sweetness and tartness. Serve them on a platter with a dusting of powdered sugar for an extra touch of elegance.
Conclusion
Fantastic! This roundup of 18 quick 5-minute recipes is your ticket to delicious, hassle-free meals any day of the week. Whether you’re in a pinch or just craving something tasty, these recipes are sure to delight. Don’t forget to try them out, leave a comment with your favorite, and share the love by pinning this article on Pinterest. Happy cooking!