Nothing brings a community together quite like the sweet smell of baked goods wafting through the air at a bake sale. Whether you’re a seasoned baker or just starting out, our roundup of 18 Delicious Bake Sale Recipes Everyone Loves is packed with crowd-pleasers that are sure to sell out fast. From classic cookies to inventive treats, these recipes will make your next bake sale a hit. Let’s get baking!
Classic Chocolate Chip Cookies
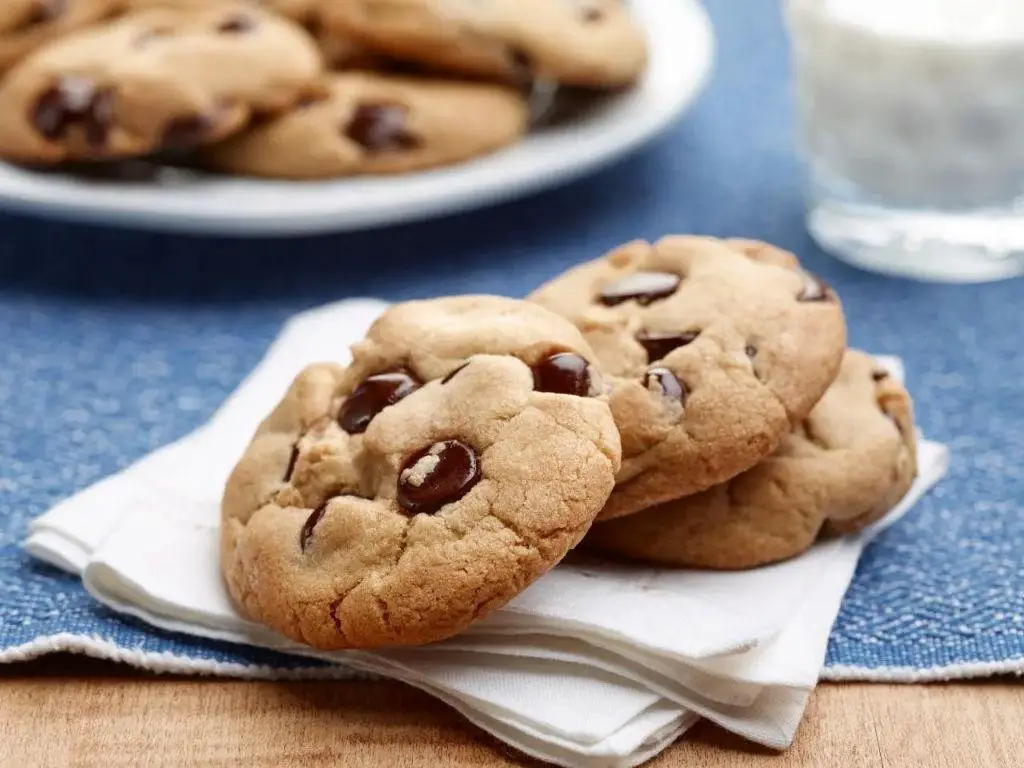
Oh, the joy of biting into a warm, gooey chocolate chip cookie straight from the oven! It’s a simple pleasure that never gets old, and today, I’m sharing my foolproof recipe that’s been a hit at every gathering. Whether it’s a rainy afternoon or a sunny picnic, these cookies are my go-to treat.
Ingredients
- 1 cup unsalted butter, softened to room temperature
- 3/4 cup granulated sugar, for that perfect sweetness
- 3/4 cup packed brown sugar, adding a deep molasses flavor
- 2 large farm-fresh eggs, bringing richness and structure
- 1 teaspoon pure vanilla extract, for aromatic warmth
- 2 1/4 cups all-purpose flour, sifted for lightness
- 1 teaspoon baking soda, ensuring a perfect rise
- 1/2 teaspoon fine sea salt, to balance the sweetness
- 2 cups semi-sweet chocolate chips, for melty pockets of joy
Instructions
- Preheat your oven to 375°F (190°C) and line baking sheets with parchment paper for easy cleanup.
- In a large bowl, cream together the softened butter, granulated sugar, and brown sugar until light and fluffy, about 3 minutes. Tip: Scrape down the sides of the bowl to ensure even mixing.
- Beat in the eggs one at a time, then stir in the vanilla extract until well combined.
- In a separate bowl, whisk together the sifted flour, baking soda, and sea salt. Gradually add this to the wet ingredients, mixing just until incorporated. Tip: Overmixing can lead to tough cookies, so stop as soon as the flour disappears.
- Fold in the chocolate chips evenly throughout the dough.
- Drop rounded tablespoons of dough onto the prepared baking sheets, spacing them about 2 inches apart. Tip: For uniform cookies, use a cookie scoop.
- Bake for 9 to 11 minutes, or until the edges are golden but the centers are still soft. They’ll firm up as they cool.
- Let the cookies cool on the baking sheets for 5 minutes before transferring to wire racks to cool completely.
Delight in the contrast of the crisp edges against the chewy centers, with bursts of chocolate in every bite. These cookies are perfect with a glass of cold milk or crumbled over vanilla ice cream for an indulgent dessert.
Peanut Butter Blossoms
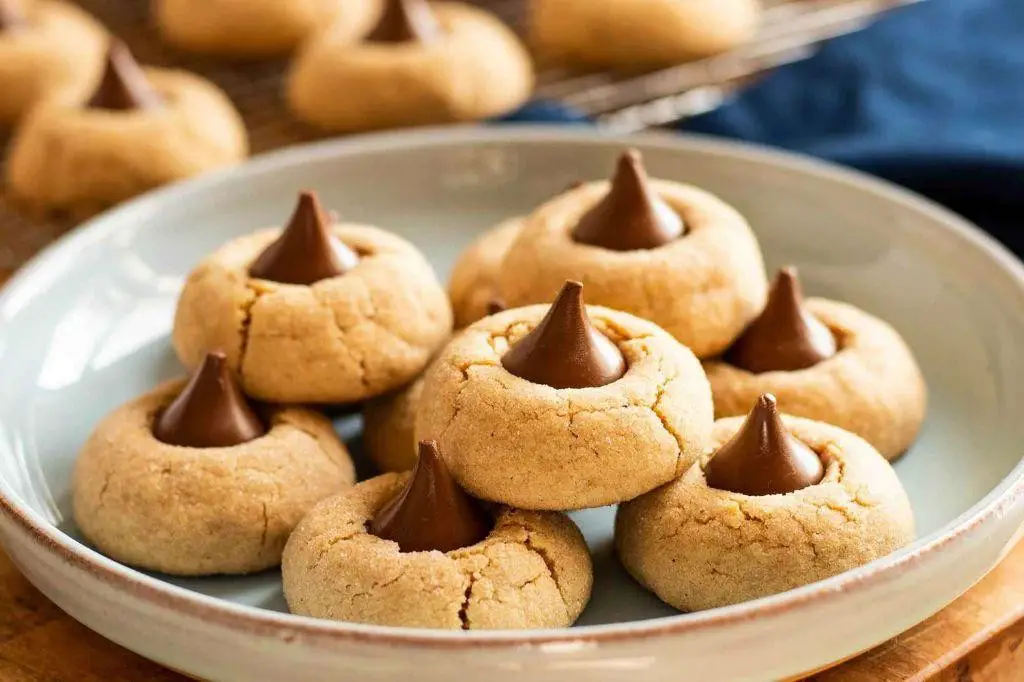
Last weekend, I found myself craving something sweet but not overly complicated to bake, and that’s when I remembered my grandma’s Peanut Butter Blossoms. These little cookies are a perfect blend of peanut butter goodness and chocolate, making them a hit at any gathering or just a cozy night in.
Ingredients
- 1 cup creamy peanut butter, smooth and rich
- 1 cup granulated sugar, for that perfect sweetness
- 1 large farm-fresh egg, to bind everything together
- 24 milk chocolate kisses, unwrapped and ready to melt
- 1/4 cup granulated sugar, extra for rolling the dough
Instructions
- Preheat your oven to 375°F (190°C) to ensure it’s perfectly heated for baking.
- In a medium bowl, mix together the creamy peanut butter, 1 cup of granulated sugar, and the egg until the mixture is smooth and well combined.
- Roll the dough into 1-inch balls, then roll each ball in the extra granulated sugar to coat lightly.
- Place the sugar-coated dough balls on an ungreased baking sheet, spacing them about 2 inches apart.
- Bake for 8 minutes, or until the cookies are lightly golden around the edges but still soft in the center.
- Immediately press a milk chocolate kiss into the center of each cookie as soon as they come out of the oven. The heat will slightly melt the chocolate, making it perfectly gooey.
- Allow the cookies to cool on the baking sheet for 2 minutes before transferring them to a wire rack to cool completely.
So there you have it, Peanut Butter Blossoms that are irresistibly soft with a melt-in-your-mouth chocolate center. Serve them at your next party or enjoy them with a glass of cold milk for a simple, satisfying treat.
Oatmeal Raisin Cookies
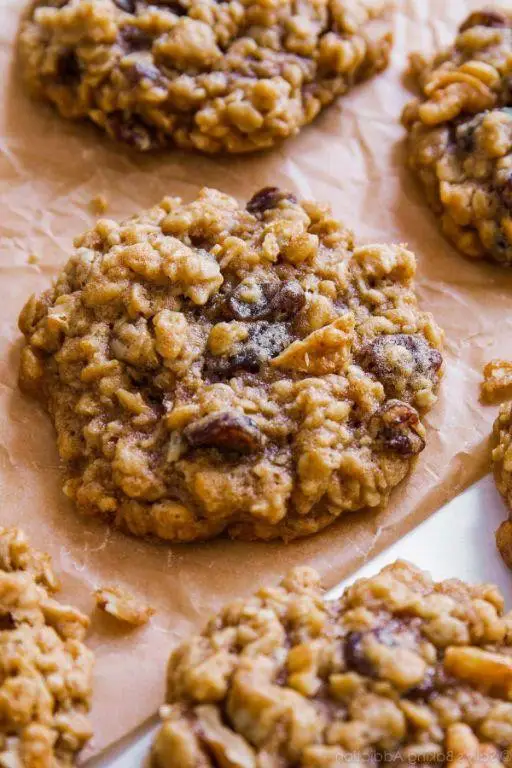
Many mornings, I find myself craving something sweet yet wholesome to start the day, and that’s when I turn to these oatmeal raisin cookies. They’re the perfect blend of chewy and crispy, with just the right amount of sweetness to satisfy without overdoing it. Plus, they’re packed with hearty oats and plump raisins, making them a somewhat guilt-free treat.
Ingredients
- 1 cup unsalted butter, softened to room temperature
- 1 cup packed light brown sugar, for a deep molasses flavor
- 1/2 cup granulated sugar, for that perfect sweetness
- 2 large farm-fresh eggs, at room temperature
- 1 teaspoon pure vanilla extract, for aromatic warmth
- 1 1/2 cups all-purpose flour, spooned and leveled
- 1 teaspoon baking soda, to ensure a perfect rise
- 1 teaspoon ground cinnamon, for a hint of spice
- 1/2 teaspoon fine sea salt, to balance the sweetness
- 3 cups old-fashioned rolled oats, for texture and heartiness
- 1 cup raisins, plumped in warm water for 10 minutes then drained
Instructions
- Preheat your oven to 350°F (175°C) and line two baking sheets with parchment paper for easy cleanup.
- In a large bowl, cream together the softened butter, brown sugar, and granulated sugar until light and fluffy, about 3 minutes. Tip: Scrape down the sides of the bowl to ensure even mixing.
- Beat in the eggs one at a time, then stir in the vanilla extract until well combined.
- In a separate bowl, whisk together the flour, baking soda, cinnamon, and sea salt. Gradually add this to the butter mixture, mixing just until incorporated.
- Fold in the rolled oats and drained raisins until evenly distributed throughout the dough. Tip: Don’t overmix to keep the cookies tender.
- Drop rounded tablespoons of dough onto the prepared baking sheets, spacing them about 2 inches apart. Tip: Flatten each slightly with the back of a spoon for even baking.
- Bake for 10-12 minutes, or until the edges are golden but the centers are still soft. Let cool on the baking sheets for 5 minutes before transferring to a wire rack to cool completely.
Oatmeal raisin cookies are best enjoyed when they’re slightly warm, with the raisins still soft and the oats providing a delightful chew. For an extra special touch, serve them with a glass of cold milk or crumble them over vanilla ice cream for a simple yet decadent dessert.
Double Chocolate Brownies
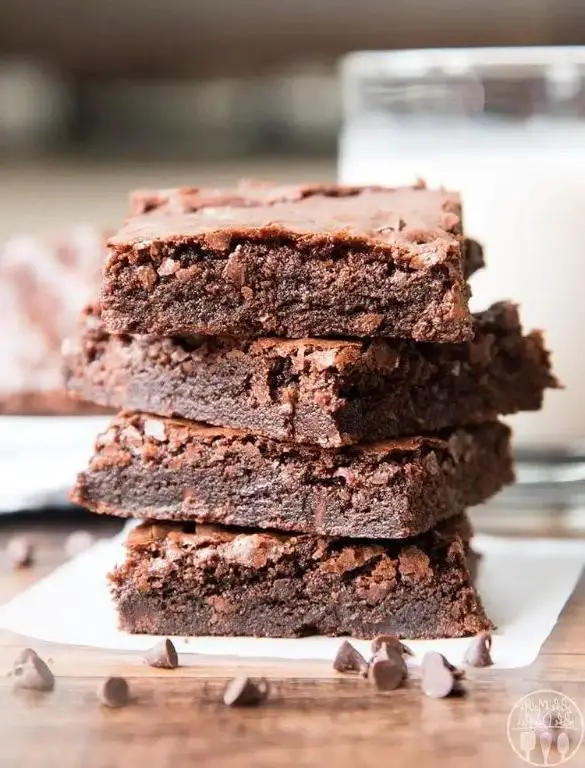
Yesterday, I found myself craving something deeply chocolatey and comforting, and that’s when I decided to whip up a batch of these irresistible double chocolate brownies. There’s something about the combination of melted chocolate and cocoa powder that creates a depth of flavor you just can’t resist.
Ingredients
- 1 cup unsalted butter, melted and slightly cooled
- 2 cups granulated sugar, for that perfect sweetness
- 4 large farm-fresh eggs, at room temperature
- 2 teaspoons pure vanilla extract, for a hint of warmth
- 1 cup all-purpose flour, sifted for lightness
- 1 cup unsweetened cocoa powder, rich and dark
- 1/2 teaspoon salt, to balance the sweetness
- 1 cup semi-sweet chocolate chips, for those melty pockets
Instructions
- Preheat your oven to 350°F (175°C) and line a 9×13 inch baking pan with parchment paper, leaving an overhang for easy removal.
- In a large bowl, whisk together the melted butter and granulated sugar until well combined. Tip: The mixture should look shiny and smooth.
- Add the eggs one at a time, whisking well after each addition, then stir in the vanilla extract. This ensures a silky batter.
- Sift in the flour, cocoa powder, and salt, folding gently until just combined. Overmixing can lead to tough brownies.
- Fold in the chocolate chips, saving a handful to sprinkle on top before baking for an extra chocolatey finish.
- Pour the batter into the prepared pan, smoothing the top with a spatula. Sprinkle the reserved chocolate chips evenly over the top.
- Bake for 25-30 minutes, or until a toothpick inserted into the center comes out with a few moist crumbs. Tip: The brownies will continue to set as they cool, so don’t overbake.
- Allow the brownies to cool completely in the pan before lifting them out using the parchment overhang and cutting into squares.
So, these brownies are the perfect balance of fudgy and cakey, with a crackly top that gives way to a moist, chocolate-packed interior. Serve them slightly warm with a scoop of vanilla ice cream for an indulgent dessert that’s sure to impress.
Lemon Bars
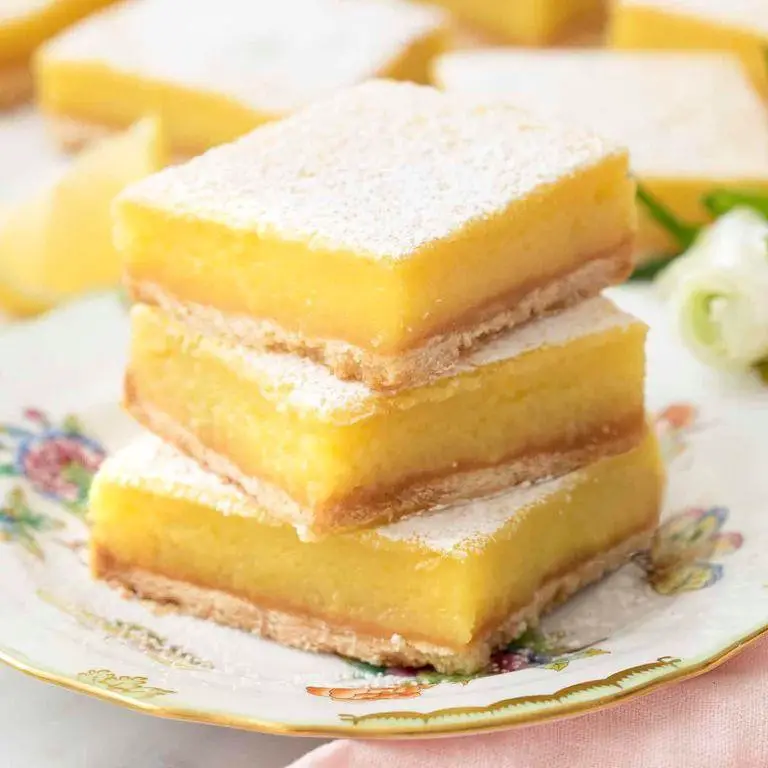
Sometimes, the simplest desserts bring the most joy, and for me, lemon bars are the epitome of this truth. I remember the first time I made them; the kitchen was filled with the zesty aroma of lemons, and the buttery crust was just golden enough to promise a perfect crunch.
Ingredients
- 1 cup unsalted butter, cold and cubed
- 2 cups all-purpose flour, sifted
- 1/2 cup powdered sugar, plus extra for dusting
- 4 large farm-fresh eggs
- 1 1/2 cups granulated sugar
- 1/4 cup freshly squeezed lemon juice, strained
- 1 tbsp lemon zest, finely grated
- 1/2 tsp baking powder
- Pinch of salt
Instructions
- Preheat your oven to 350°F (175°C) and line a 9×13 inch baking pan with parchment paper, leaving an overhang on the sides for easy removal.
- In a large bowl, combine the cold cubed butter, sifted flour, and powdered sugar. Use your fingers to work the butter into the flour until the mixture resembles coarse crumbs.
- Press the mixture firmly into the bottom of the prepared pan to form an even layer. Bake for 20 minutes, or until the edges are just starting to turn golden.
- While the crust bakes, whisk together the eggs, granulated sugar, lemon juice, lemon zest, baking powder, and salt in a medium bowl until smooth.
- Pour the lemon mixture over the hot crust as soon as it comes out of the oven. Return the pan to the oven and bake for an additional 25 minutes, or until the filling is set and slightly golden on top.
- Allow the lemon bars to cool completely in the pan on a wire rack. Once cooled, lift them out using the parchment overhang and dust with powdered sugar before cutting into squares.
Golden and luscious, these lemon bars strike the perfect balance between tangy and sweet. Serve them chilled for a refreshing treat, or enjoy them at room temperature to fully appreciate their creamy texture.
Banana Bread
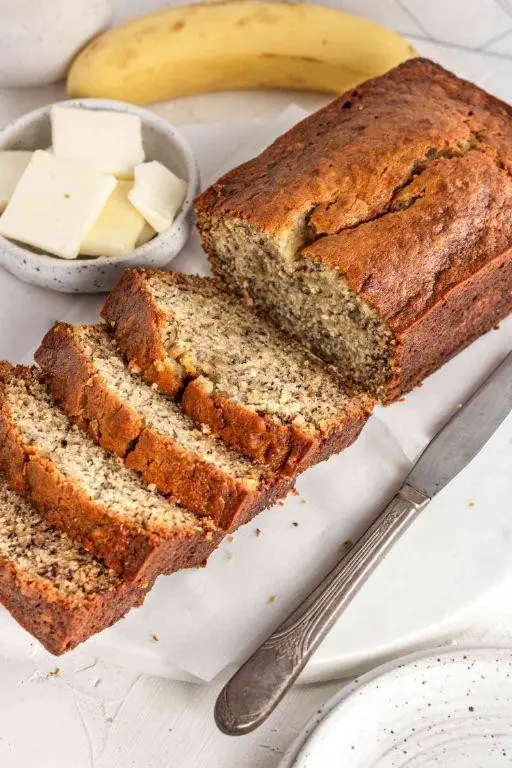
There’s something incredibly comforting about the smell of banana bread wafting through the house. It reminds me of lazy Sunday mornings and the joy of baking with overripe bananas that would otherwise go to waste. Today, I’m sharing my go-to banana bread recipe that’s perfect for any day of the week.
Ingredients
- 3 ripe bananas, mashed until smooth
- 1/2 cup unsalted butter, melted and slightly cooled
- 1 cup granulated sugar, for a sweet touch
- 2 large farm-fresh eggs, beaten
- 1 teaspoon pure vanilla extract, for aromatic depth
- 1 1/2 cups all-purpose flour, sifted
- 1 teaspoon baking soda, for the perfect rise
- 1/2 teaspoon salt, to balance the sweetness
- 1/2 cup chopped walnuts, for a crunchy texture (optional)
Instructions
- Preheat your oven to 350°F (175°C) and grease a 9×5 inch loaf pan with butter or cooking spray.
- In a large mixing bowl, combine the mashed bananas and melted butter, stirring until well mixed.
- Add the sugar, beaten eggs, and vanilla extract to the banana mixture, stirring until smooth.
- Tip: For an extra fluffy texture, let the mixture sit for a minute to allow the sugar to dissolve slightly.
- Sift together the flour, baking soda, and salt, then gradually fold into the wet ingredients until just combined.
- Tip: Overmixing can lead to dense bread, so stir until you no longer see flour streaks.
- If using, gently fold in the chopped walnuts.
- Pour the batter into the prepared loaf pan, smoothing the top with a spatula.
- Bake for 60-65 minutes, or until a toothpick inserted into the center comes out clean.
- Tip: If the top browns too quickly, loosely cover with aluminum foil to prevent burning.
- Let the bread cool in the pan for 10 minutes, then transfer to a wire rack to cool completely.
Velvety and moist, this banana bread is a delight with its tender crumb and rich banana flavor. Serve it warm with a dollop of whipped cream or toasted with a smear of butter for an extra indulgent treat.
Pumpkin Spice Muffins
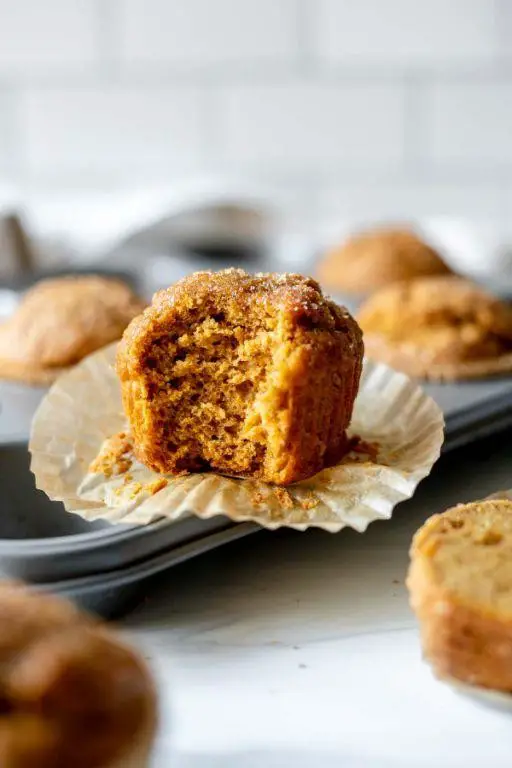
Unbelievably, it’s already that time of year again when the air gets crisp, and all I can think about is baking something that fills the house with the warm, comforting aromas of fall. These Pumpkin Spice Muffins are my go-to recipe for cozy mornings or when I need a quick treat to share with friends. They’re incredibly moist, packed with flavor, and just the right amount of sweet.
Ingredients
- 1 3/4 cups all-purpose flour, sifted for lightness
- 1 cup granulated sugar, for that perfect sweetness
- 1/2 cup packed brown sugar, adding a deep molasses flavor
- 1 teaspoon baking soda, to ensure they rise beautifully
- 1/2 teaspoon salt, to balance the sweetness
- 2 teaspoons ground cinnamon, for that essential warmth
- 1/2 teaspoon ground nutmeg, adding a hint of nuttiness
- 1/4 teaspoon ground cloves, for a subtle spice kick
- 1/4 teaspoon ground ginger, bringing a little zing
- 2 large farm-fresh eggs, at room temperature
- 1 cup pure pumpkin puree, smooth and vibrant
- 1/2 cup melted unsalted butter, rich and golden
- 1 teaspoon pure vanilla extract, for aromatic depth
Instructions
- Preheat your oven to 375°F (190°C) and line a muffin tin with paper liners or grease it lightly.
- In a large bowl, whisk together the flour, granulated sugar, brown sugar, baking soda, salt, cinnamon, nutmeg, cloves, and ginger until well combined.
- In another bowl, beat the eggs lightly, then stir in the pumpkin puree, melted butter, and vanilla extract until smooth.
- Pour the wet ingredients into the dry ingredients and fold gently until just combined. Tip: Overmixing can lead to dense muffins, so stop when you no longer see dry flour.
- Divide the batter evenly among the muffin cups, filling each about 3/4 full. Tip: An ice cream scoop makes this step mess-free and ensures uniform muffins.
- Bake for 20-25 minutes, or until a toothpick inserted into the center of a muffin comes out clean. Tip: Rotate the pan halfway through baking for even browning.
- Allow the muffins to cool in the pan for 5 minutes, then transfer to a wire rack to cool completely.
How these muffins turn out is nothing short of magical—moist, fluffy, and bursting with the quintessential flavors of fall. I love serving them warm with a dab of butter or a drizzle of honey for an extra touch of sweetness. They’re also fantastic with a cup of spiced chai tea on a chilly morning.
Red Velvet Cupcakes
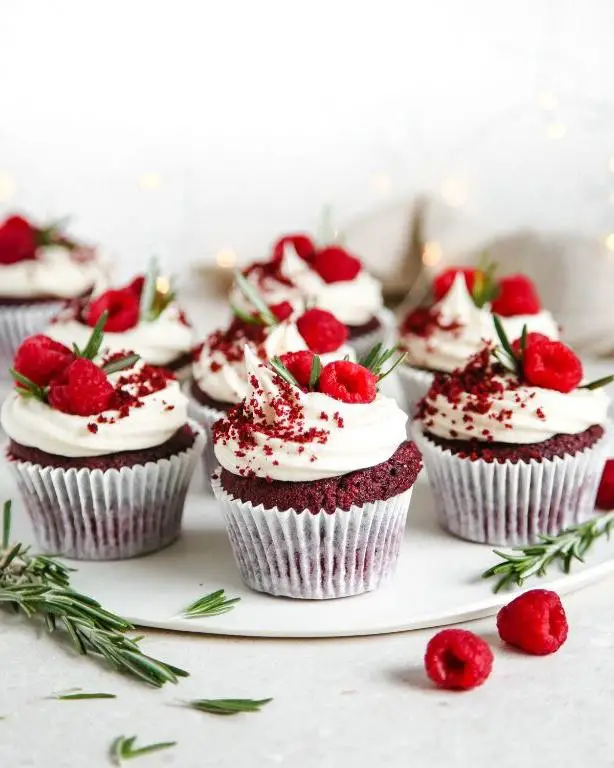
Perfect for any occasion, these Red Velvet Cupcakes are a delightful treat that combines the richness of cocoa with the tanginess of buttermilk, all wrapped up in a stunning red hue. I remember the first time I baked these; the kitchen was filled with an irresistible aroma that had everyone asking for a taste before they even cooled!
Ingredients
- 1 1/4 cups all-purpose flour, sifted for a light texture
- 1/2 cup unsweetened cocoa powder, rich and dark
- 1 teaspoon baking soda, for the perfect rise
- 1/2 teaspoon salt, to balance the sweetness
- 1 cup granulated sugar, for that sweet crunch
- 1 cup buttermilk, tangy and smooth
- 1/2 cup unsalted butter, softened to room temperature
- 2 large farm-fresh eggs, for binding
- 1 tablespoon pure vanilla extract, for aromatic depth
- 1 tablespoon red food coloring, vibrant and bold
- 1 teaspoon distilled white vinegar, to enhance the red color
Instructions
- Preheat your oven to 350°F (175°C) and line a muffin tin with cupcake liners.
- In a medium bowl, whisk together the sifted flour, cocoa powder, baking soda, and salt until well combined.
- In a large bowl, beat the softened butter and granulated sugar together on medium speed until light and fluffy, about 2 minutes.
- Add the eggs one at a time to the butter mixture, beating well after each addition, then stir in the vanilla extract.
- Alternately add the dry ingredients and buttermilk to the butter mixture, starting and ending with the dry ingredients. Mix until just combined.
- Gently stir in the red food coloring and white vinegar until the batter is uniformly red.
- Divide the batter evenly among the prepared cupcake liners, filling each about 2/3 full.
- Bake for 18-20 minutes, or until a toothpick inserted into the center of a cupcake comes out clean.
- Allow the cupcakes to cool in the pan for 5 minutes, then transfer to a wire rack to cool completely.
Creating these cupcakes is as much a joy as eating them. The moist, velvety texture paired with the slight tang from the buttermilk makes each bite unforgettable. For an extra special touch, try topping them with a dollop of cream cheese frosting and a sprinkle of red velvet crumbs.
Snickerdoodle Cookies
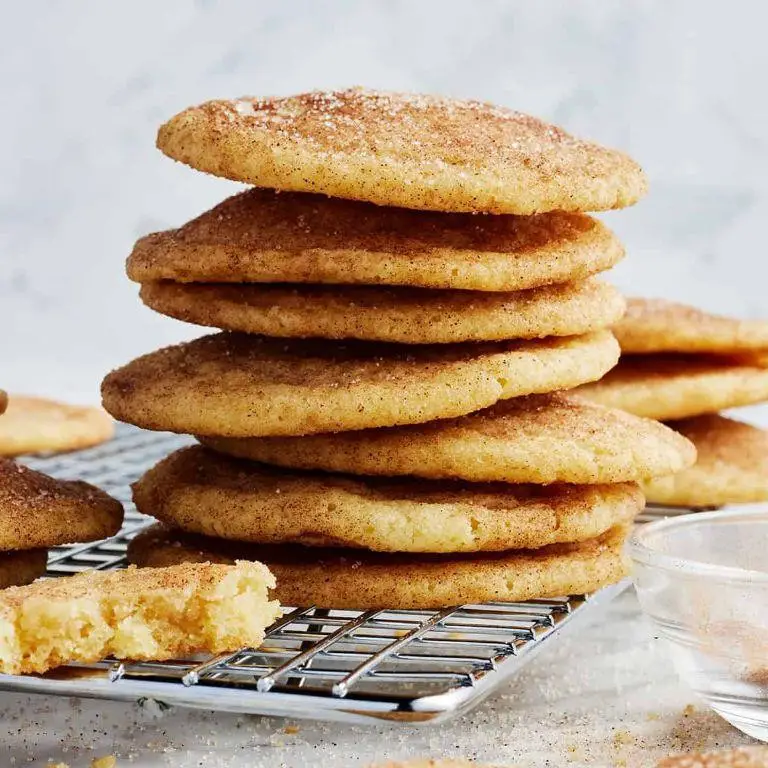
Craving something sweet but not overly complicated? Let me share my go-to Snickerdoodle Cookies recipe that never fails to bring comfort and joy. These cookies, with their perfect blend of cinnamon and sugar, are a hit at every gathering, and today, I’ll walk you through how to make them just right.
Ingredients
- 1 cup of unsalted butter, softened to room temperature
- 1 1/2 cups of granulated sugar, plus 2 tablespoons for rolling
- 2 large farm-fresh eggs
- 2 3/4 cups of all-purpose flour, sifted
- 2 teaspoons of cream of tartar
- 1 teaspoon of baking soda
- 1/4 teaspoon of fine sea salt
- 2 teaspoons of ground cinnamon, plus 1 tablespoon for rolling
Instructions
- Preheat your oven to 350°F (175°C) and line two baking sheets with parchment paper for easy cleanup.
- In a large mixing bowl, cream together the softened butter and 1 1/2 cups of granulated sugar until light and fluffy, about 3 minutes. Tip: Scrape down the sides of the bowl halfway through to ensure even mixing.
- Beat in the eggs one at a time, ensuring each is fully incorporated before adding the next.
- In a separate bowl, whisk together the sifted flour, cream of tartar, baking soda, and sea salt. Gradually add this to the butter mixture, mixing just until combined. Tip: Overmixing can lead to tough cookies, so stop as soon as the flour disappears.
- In a small bowl, mix the remaining 2 tablespoons of sugar with 1 tablespoon of cinnamon for rolling.
- Shape the dough into 1-inch balls, then roll each in the cinnamon-sugar mixture until fully coated. Place them 2 inches apart on the prepared baking sheets. Tip: For uniformly sized cookies, use a small ice cream scoop.
- Bake for 10-12 minutes, or until the edges are set but the centers are still soft. They’ll firm up as they cool.
- Allow the cookies to cool on the baking sheets for 5 minutes before transferring to a wire rack to cool completely.
Absolutely divine when warm, these Snickerdoodle Cookies boast a soft, chewy center with a slightly crisp edge, enveloped in a sweet, cinnamon-kissed crust. Try serving them with a cold glass of milk or crumbled over vanilla ice cream for an extra special treat.
Apple Cinnamon Scones
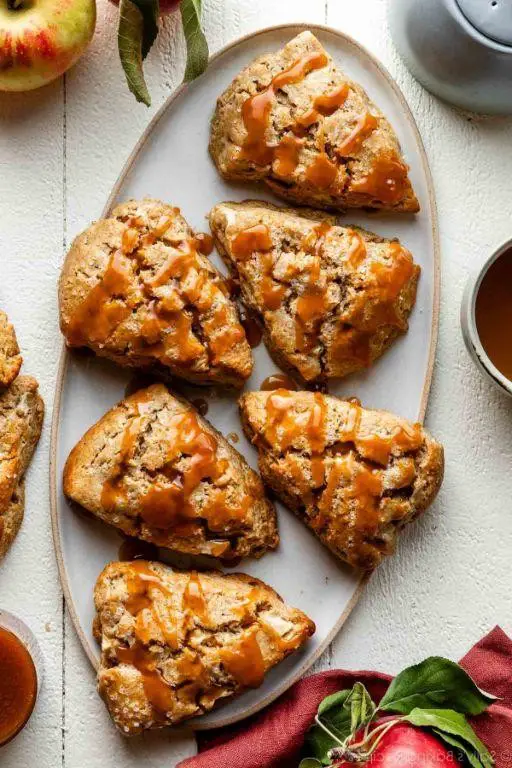
Baking these Apple Cinnamon Scones takes me back to crisp autumn mornings, though they’re perfect any time of year. The combination of tart apples and warm cinnamon wrapped in a buttery, flaky scone is simply irresistible.
Ingredients
- 2 cups all-purpose flour, sifted for lightness
- 1/3 cup granulated sugar, for a subtle sweetness
- 1 tbsp baking powder, to ensure a perfect rise
- 1/2 tsp salt, to enhance all the flavors
- 1/2 cup unsalted butter, cold and cubed for flakiness
- 1 large egg, farm-fresh for richness
- 1/2 cup heavy cream, plus extra for brushing
- 1 tsp pure vanilla extract, for aromatic depth
- 1 cup diced apples, tart and crisp
- 1 tbsp ground cinnamon, for that warm spice kick
Instructions
- Preheat your oven to 400°F (200°C) and line a baking sheet with parchment paper.
- In a large bowl, whisk together the sifted flour, granulated sugar, baking powder, salt, and ground cinnamon.
- Add the cold, cubed butter to the dry ingredients. Use your fingertips to rub the butter into the flour until the mixture resembles coarse crumbs.
- In a separate bowl, whisk together the egg, heavy cream, and vanilla extract until well combined.
- Pour the wet ingredients into the dry ingredients, along with the diced apples. Stir gently until just combined—overmixing leads to tough scones.
- Turn the dough out onto a lightly floured surface and shape it into a 1-inch thick circle. Cut into 8 wedges.
- Transfer the wedges to the prepared baking sheet, brush the tops with a little heavy cream for a golden finish, and bake for 15-18 minutes, or until the scones are lightly golden and a toothpick inserted comes out clean.
- Let the scones cool on the baking sheet for 5 minutes before transferring to a wire rack.
Just out of the oven, these scones are wonderfully crisp on the outside, tender and moist inside, with pockets of juicy apple and a hint of cinnamon. Serve them warm with a dollop of clotted cream or a drizzle of caramel sauce for an extra indulgent treat.
Carrot Cake with Cream Cheese Frosting
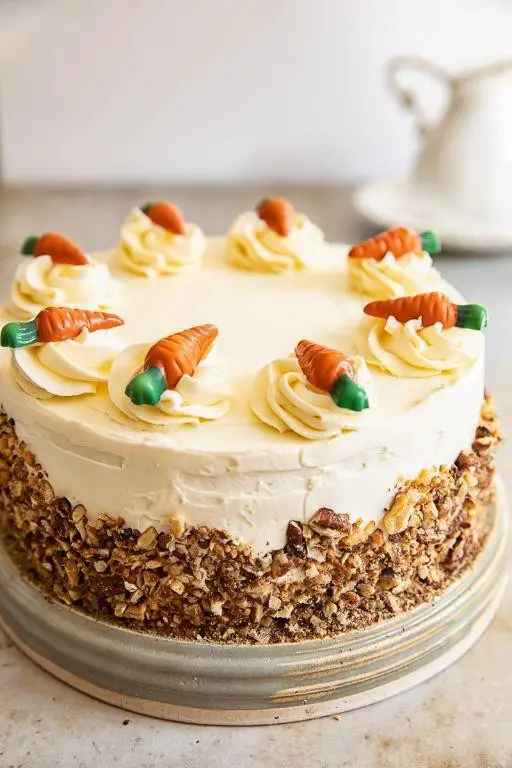
Baking this carrot cake reminds me of the cozy autumn afternoons at my grandma’s house, where the scent of spices would fill the air, promising a slice of heaven. It’s a recipe that’s been passed down, tweaked, and perfected, and now, I’m thrilled to share it with you.
Ingredients
- 2 cups all-purpose flour, sifted for a light texture
- 2 teaspoons baking soda, to ensure a perfect rise
- 1/2 teaspoon salt, to enhance all the flavors
- 2 teaspoons ground cinnamon, for that warm, spicy note
- 1 cup granulated sugar, for just the right sweetness
- 1 cup packed light brown sugar, adding a deep molasses flavor
- 4 large farm-fresh eggs, at room temperature for better incorporation
- 1 cup vegetable oil, for moisture and richness
- 3 cups grated carrots, about 4 medium, for natural sweetness and texture
- 8 ounces cream cheese, softened, for a smooth and tangy frosting
- 1/2 cup unsalted butter, softened, to create a fluffy frosting base
- 4 cups powdered sugar, sifted, to avoid lumps in the frosting
- 2 teaspoons pure vanilla extract, for a hint of floral sweetness
Instructions
- Preheat your oven to 350°F (175°C) and grease two 9-inch round cake pans, lining the bottoms with parchment paper for easy removal.
- In a large bowl, whisk together the sifted flour, baking soda, salt, and cinnamon until well combined.
- In another bowl, beat the granulated sugar, brown sugar, eggs, and vegetable oil on medium speed until the mixture is light and fluffy, about 2 minutes.
- Gradually add the dry ingredients to the wet ingredients, mixing just until incorporated to avoid overworking the batter.
- Fold in the grated carrots with a spatula, ensuring they’re evenly distributed throughout the batter.
- Divide the batter evenly between the prepared pans and bake for 25-30 minutes, or until a toothpick inserted into the center comes out clean.
- Allow the cakes to cool in the pans for 10 minutes, then transfer to a wire rack to cool completely, which prevents the frosting from melting.
- For the frosting, beat the softened cream cheese and butter together on high speed until smooth and creamy, about 3 minutes.
- Reduce the speed to low and gradually add the sifted powdered sugar, then the vanilla extract, beating until the frosting is smooth and spreadable.
- Once the cakes are completely cool, spread a layer of frosting on top of one cake, place the second cake on top, and frost the top and sides of the entire cake.
Carrot cake with cream cheese frosting is a delightful contrast of moist, spiced cake and creamy, tangy frosting. Serve it with a dusting of cinnamon or chopped walnuts on top for an extra crunch and visual appeal.
Blueberry Lemon Loaf
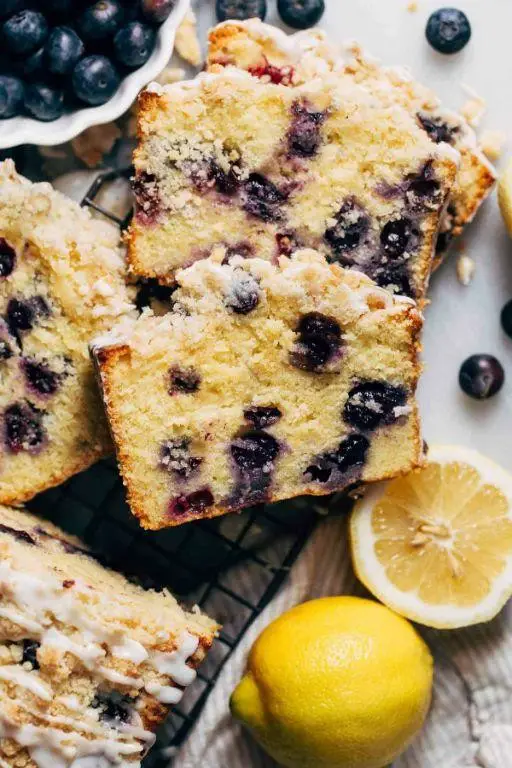
Nothing says summer quite like the combination of blueberries and lemon, and this Blueberry Lemon Loaf is my go-to when I want something sweet, tangy, and utterly satisfying. I remember the first time I baked this loaf; the aroma filled my kitchen, and I knew it was going to be a staple in my recipe collection.
Ingredients
- 1 1/2 cups all-purpose flour, sifted for lightness
- 1 teaspoon baking powder, for that perfect rise
- 1/2 teaspoon salt, to balance the sweetness
- 1/2 cup unsalted butter, softened to room temperature
- 1 cup granulated sugar, for a sweet, delicate crumb
- 2 large farm-fresh eggs, at room temperature
- 1/2 cup whole milk, for moisture
- 1 tablespoon lemon zest, for a bright, citrusy punch
- 2 tablespoons fresh lemon juice, to enhance the flavor
- 1 cup fresh blueberries, washed and dried
- 1 tablespoon all-purpose flour, to coat the blueberries
Instructions
- Preheat your oven to 350°F (175°C) and grease a 9×5 inch loaf pan, lining it with parchment paper for easy removal.
- In a medium bowl, whisk together 1 1/2 cups sifted flour, baking powder, and salt until well combined.
- In a large bowl, beat the softened butter and granulated sugar together until light and fluffy, about 3 minutes. Tip: Ensure your butter is at room temperature for a smoother mix.
- Add the eggs one at a time to the butter mixture, beating well after each addition. Stir in the milk, lemon zest, and lemon juice.
- Gradually fold the dry ingredients into the wet ingredients until just combined. Be careful not to overmix to keep the loaf tender.
- Toss the blueberries with 1 tablespoon of flour to prevent them from sinking to the bottom of the loaf, then gently fold them into the batter.
- Pour the batter into the prepared loaf pan and smooth the top with a spatula. Bake for 50-60 minutes, or until a toothpick inserted into the center comes out clean. Tip: Check the loaf at 50 minutes to avoid overbaking.
- Let the loaf cool in the pan for 10 minutes, then transfer to a wire rack to cool completely. Tip: This patience-testing step ensures the loaf sets properly.
You’ll love the moist, tender crumb of this loaf, speckled with juicy blueberries and zesty lemon flavors. Serve it with a dollop of whipped cream or a drizzle of lemon glaze for an extra special treat.
Cherry Almond Biscotti
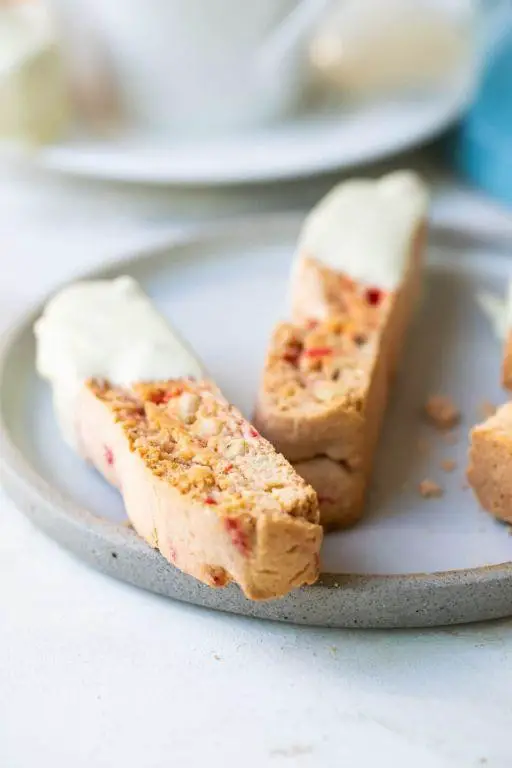
Very few things bring me as much joy as the crunch of a perfectly baked biscotti with my morning coffee. This Cherry Almond Biscotti recipe is a delightful twist on the classic, combining the tartness of dried cherries with the nutty richness of almonds for a treat that’s as beautiful as it is delicious.
Ingredients
- 1 3/4 cups all-purpose flour, sifted for lightness
- 1/2 cup granulated sugar, for a subtle sweetness
- 1/2 cup dried cherries, plump and tangy
- 1/2 cup almonds, roughly chopped for texture
- 2 large eggs, farm-fresh and room temperature
- 1 tsp pure vanilla extract, for aromatic depth
- 1 tsp baking powder, to ensure a perfect rise
- 1/4 tsp salt, to balance the flavors
Instructions
- Preheat your oven to 350°F (175°C) and line a baking sheet with parchment paper for easy cleanup.
- In a large bowl, whisk together the sifted flour, sugar, baking powder, and salt until well combined.
- Add the eggs and vanilla extract to the dry ingredients, mixing until a dough begins to form. Tip: If the dough feels too sticky, a light dusting of flour on your hands can help.
- Fold in the dried cherries and chopped almonds, distributing them evenly throughout the dough.
- On the prepared baking sheet, shape the dough into a log about 12 inches long and 4 inches wide. Tip: Wetting your hands slightly can prevent the dough from sticking as you shape it.
- Bake for 25 minutes, or until the log is firm and lightly golden. Remove from the oven and let cool for 10 minutes.
- Reduce the oven temperature to 325°F (165°C). Using a serrated knife, slice the log diagonally into 1/2-inch thick pieces. Tip: For cleaner slices, use a gentle sawing motion.
- Arrange the slices cut-side down on the baking sheet and bake for an additional 10 minutes on each side, until they’re crisp and golden.
Crunchy on the outside with a slightly chewy center, these biscotti are a textural dream. The bursts of cherry and the crunch of almonds make each bite a delightful surprise. Serve them alongside a cup of espresso for a truly Italian experience, or wrap them up as a thoughtful homemade gift.
Pecan Pie Bars
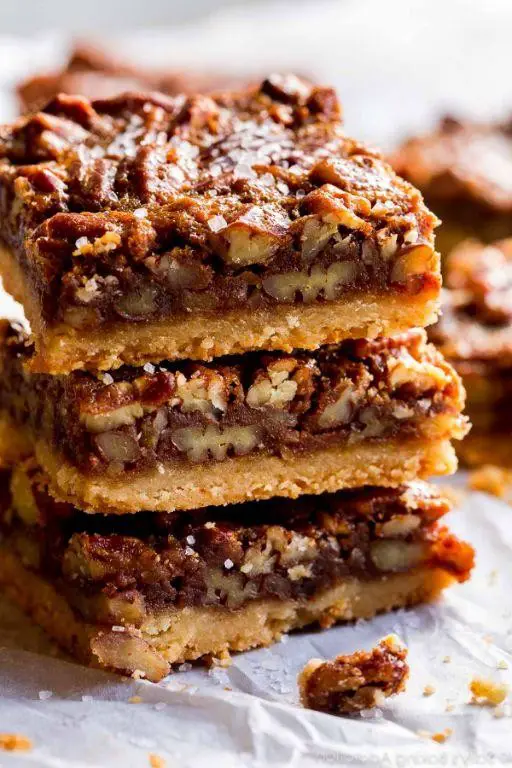
There’s something about the combination of buttery crust and gooey pecan filling that makes pecan pie bars a year-round favorite in my kitchen. Whether it’s a holiday gathering or a casual weekend treat, these bars never fail to bring smiles. I remember the first time I made them, the aroma alone was enough to convince me they’d become a staple.
Ingredients
- 1 cup unsalted butter, cold and cubed
- 2 cups all-purpose flour, sifted
- 1/2 cup granulated sugar, for a subtle sweetness
- 1/4 tsp salt, to enhance flavors
- 3 large eggs, room temperature for better mixing
- 1 cup light corn syrup, for that signature sticky texture
- 1 cup packed brown sugar, for a deep molasses note
- 2 tbsp pure vanilla extract, for aromatic warmth
- 2 cups pecans, roughly chopped for a satisfying crunch
Instructions
- Preheat your oven to 350°F (175°C) and line a 9×13 inch baking pan with parchment paper, leaving an overhang for easy removal.
- In a large bowl, combine the cold cubed butter, sifted flour, granulated sugar, and salt. Use your fingers or a pastry cutter to blend until the mixture resembles coarse crumbs.
- Press the crumb mixture firmly into the prepared pan to form an even layer. Bake for 20 minutes, or until the edges are just starting to turn golden.
- While the crust bakes, whisk together the eggs, corn syrup, brown sugar, and vanilla extract in a medium bowl until smooth. Stir in the chopped pecans.
- Pour the pecan mixture over the hot crust, spreading it evenly. Return to the oven and bake for 25-30 minutes, or until the filling is set and slightly puffed.
- Allow the bars to cool completely in the pan on a wire rack before lifting out using the parchment overhang and cutting into squares.
Unbelievably rich and decadent, these pecan pie bars offer a perfect balance of textures from the crisp crust to the chewy filling. Serve them slightly warmed with a scoop of vanilla ice cream for an indulgent twist.
Vanilla Bean Shortbread Cookies
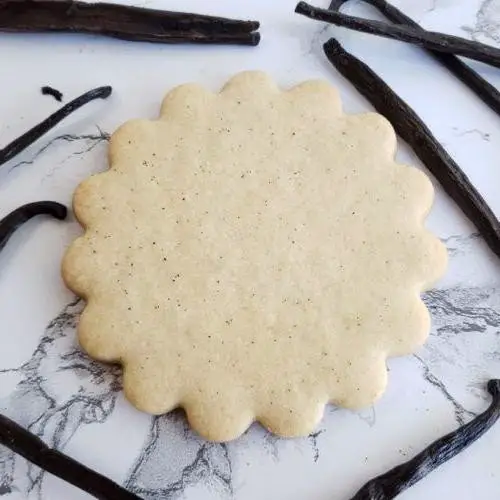
Baking these Vanilla Bean Shortbread Cookies takes me back to my grandmother’s kitchen, where the scent of vanilla and butter was a constant comfort. Today, I’m sharing my twist on this classic, ensuring each bite is as memorable as those childhood moments.
Ingredients
- 1 cup unsalted butter, softened to room temperature
- 1/2 cup granulated sugar, fine and sparkling
- 2 cups all-purpose flour, sifted for lightness
- 1 vanilla bean, seeds scraped for intense aroma
- 1/4 teaspoon salt, to balance the sweetness
Instructions
- Preheat your oven to 325°F (163°C) and line a baking sheet with parchment paper for easy cleanup.
- In a large bowl, cream together the softened unsalted butter and granulated sugar until the mixture is light and fluffy, about 3 minutes. Tip: Scrape down the sides of the bowl to ensure even mixing.
- Slice the vanilla bean lengthwise and scrape out the seeds with the back of a knife. Add the seeds to the butter mixture, reserving the pod for another use.
- Gradually add the sifted all-purpose flour and salt to the bowl, mixing just until the dough comes together. Overmixing can lead to tough cookies.
- Turn the dough onto a lightly floured surface and gently knead into a smooth ball. Tip: If the dough is too sticky, chill it for 10 minutes for easier handling.
- Roll the dough to a 1/2-inch thickness and cut into desired shapes using cookie cutters. Place the cookies on the prepared baking sheet, spacing them about 1 inch apart.
- Bake for 18-20 minutes, or until the edges are just starting to turn golden. Tip: Rotate the baking sheet halfway through for even browning.
- Allow the cookies to cool on the baking sheet for 5 minutes before transferring to a wire rack to cool completely.
Perfectly crisp with a melt-in-your-mouth texture, these Vanilla Bean Shortbread Cookies are a testament to simplicity. Serve them alongside a cup of Earl Grey tea for an afternoon treat that feels both indulgent and wholesome.
Coconut Macaroons
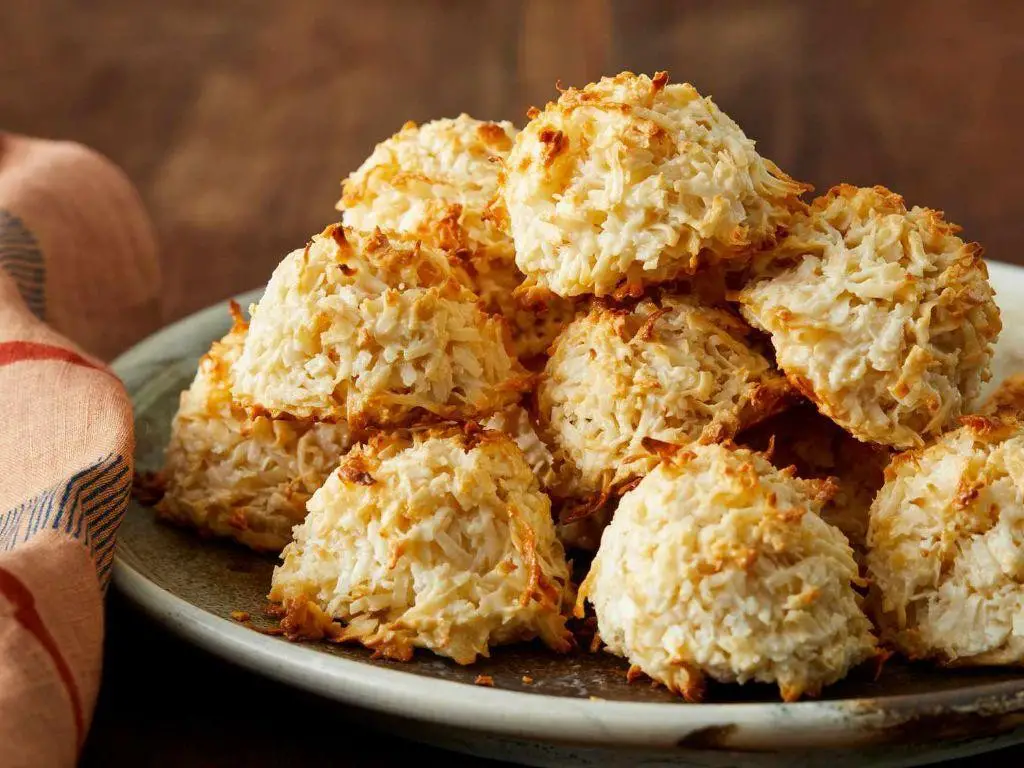
Nothing brings back memories of my grandma’s kitchen quite like the sweet, chewy goodness of coconut macaroons. I remember sneaking bites of the shredded coconut when she wasn’t looking, and now, making them myself, I’ve come to appreciate the simplicity and joy they bring to any occasion.
Ingredients
- 3 cups sweetened shredded coconut (lightly packed for that perfect chew)
- 3/4 cup granulated sugar (for just the right amount of sweetness)
- 2 large egg whites (at room temperature for optimal volume)
- 1/2 teaspoon pure vanilla extract (for a hint of warmth)
- 1/4 teaspoon salt (to balance the flavors)
Instructions
- Preheat your oven to 325°F (163°C) and line a baking sheet with parchment paper to prevent sticking.
- In a large mixing bowl, combine the sweetened shredded coconut, granulated sugar, and salt, stirring until well mixed.
- Add the room temperature egg whites and pure vanilla extract to the bowl, mixing thoroughly until the coconut is evenly coated and the mixture holds together when pressed.
- Using a tablespoon or a small cookie scoop, form the mixture into tight mounds and place them on the prepared baking sheet, spacing them about 2 inches apart.
- Bake in the preheated oven for 20-25 minutes, or until the macaroons are golden brown on the edges and bottoms.
- Allow the macaroons to cool on the baking sheet for 5 minutes before transferring them to a wire rack to cool completely.
With their crispy exterior and soft, chewy center, these coconut macaroons are a delightful treat. For an extra special touch, drizzle them with melted dark chocolate or serve alongside a cup of strong coffee for the ultimate indulgence.
Raspberry Thumbprint Cookies
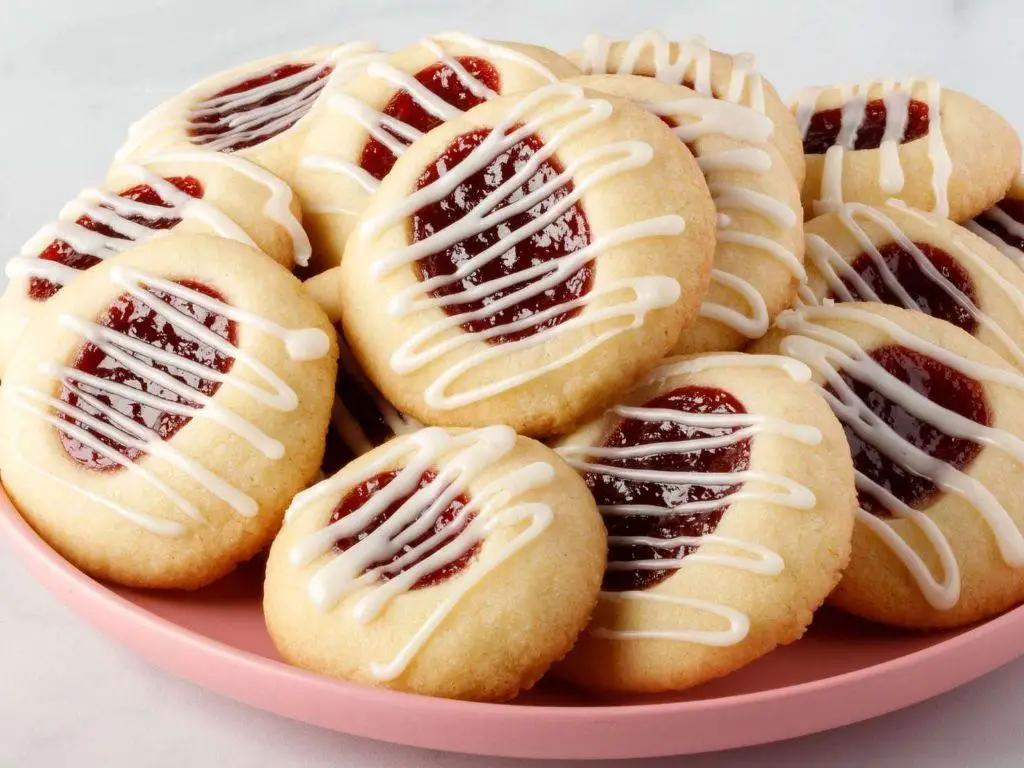
Remember those lazy Sunday afternoons when grandma would pull out her baking sheets, and the whole house would smell like sweet, buttery goodness? That’s exactly the vibe I’m channeling today with these Raspberry Thumbprint Cookies. They’re not just cookies; they’re little jars of joy, perfect for brightening up any day.
Ingredients
- 1 cup unsalted butter, softened to room temperature
- 1/2 cup granulated sugar, fine and sparkling like morning dew
- 2 large farm-fresh eggs, yolks and whites separated
- 2 tsp pure vanilla extract, aromatic and rich
- 2 1/2 cups all-purpose flour, sifted for lightness
- 1/2 cup raspberry jam, vibrant and tangy
Instructions
- Preheat your oven to 350°F (175°C), ensuring it’s perfectly heated for even baking.
- In a large mixing bowl, cream together the softened butter and granulated sugar until the mixture is light and fluffy, about 3 minutes. Tip: Scrape down the sides of the bowl halfway through to ensure everything is evenly mixed.
- Beat in the egg yolks and vanilla extract until fully incorporated, creating a smooth, velvety base.
- Gradually add the sifted flour to the wet ingredients, mixing just until the dough comes together. Overmixing can lead to tough cookies, so stop as soon as the flour disappears.
- Roll the dough into 1-inch balls, then place them on a parchment-lined baking sheet, spacing them about 2 inches apart.
- Use your thumb or the back of a teaspoon to make an indentation in the center of each cookie. Tip: If the dough sticks, lightly flour your thumb or the spoon.
- Fill each indentation with about 1/2 tsp of raspberry jam, being careful not to overfill. The jam will spread slightly during baking.
- Bake for 12-15 minutes, or until the edges are just starting to turn golden. Tip: Rotate the baking sheet halfway through baking for even color.
- Allow the cookies to cool on the baking sheet for 5 minutes before transferring to a wire rack to cool completely.
Unbelievably tender with a melt-in-your-mouth texture, these cookies strike the perfect balance between buttery and sweet, with the raspberry jam adding a delightful tang. Serve them alongside a cup of Earl Grey tea for a truly elegant afternoon treat, or pack them in a pretty box as a heartfelt homemade gift.
Glazed Donut Holes
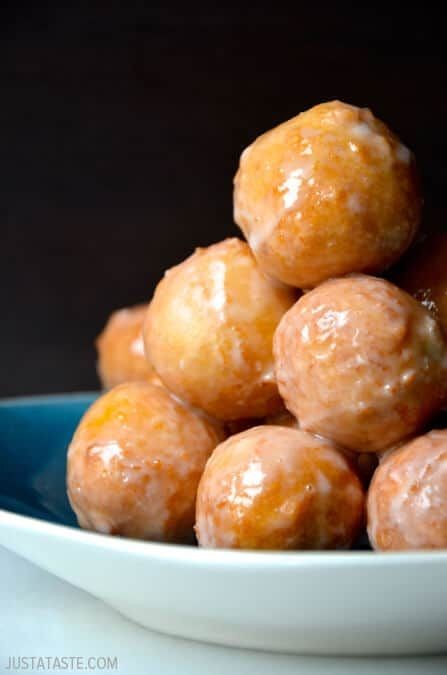
Kicking off the weekend with something sweet always sets the right tone, and these Glazed Donut Holes are my go-to for a quick, indulgent treat. I remember the first time I made them; the kitchen smelled like a bakery, and that’s when I knew they’d become a staple.
Ingredients
- 1 cup all-purpose flour, sifted for lightness
- 1/4 cup granulated sugar, for a subtle sweetness
- 1 tsp baking powder, to ensure they’re perfectly puffy
- 1/4 tsp salt, to balance the flavors
- 1/2 cup whole milk, at room temperature for smooth mixing
- 1 large farm-fresh egg, beaten
- 2 tbsp unsalted butter, melted and slightly cooled
- 1 tsp pure vanilla extract, for aromatic depth
- 1 cup powdered sugar, for the glossy glaze
- 2 tbsp warm water, to achieve the perfect glaze consistency
Instructions
- Preheat your oven to 350°F (175°C) and lightly grease a mini muffin tin.
- In a large bowl, whisk together the sifted flour, granulated sugar, baking powder, and salt.
- In another bowl, mix the whole milk, beaten egg, melted butter, and vanilla extract until well combined.
- Gently fold the wet ingredients into the dry ingredients until just combined; avoid overmixing to keep the donut holes tender.
- Fill each mini muffin cup halfway with the batter, ensuring even distribution for uniform cooking.
- Bake for 10-12 minutes, or until the edges are golden and a toothpick inserted comes out clean.
- While the donut holes cool, whisk together powdered sugar and warm water until smooth for the glaze.
- Dip each cooled donut hole into the glaze, allowing excess to drip off, then set on a wire rack to harden slightly.
With their fluffy interior and sweet, crackly glaze, these donut holes are irresistible. Try stacking them high on a platter for a playful presentation at your next brunch.
Conclusion
Kickstart your next bake sale with these 18 crowd-pleasing recipes that promise to delight every palate! Whether you’re a seasoned baker or just starting out, there’s something here for everyone. We’d love to hear which recipes stole your heart—drop us a comment below. And if you found this roundup helpful, why not share the sweetness? Pin this article on Pinterest to spread the joy of baking!