Unwrap the joy of mornings with our collection of 18 Delicious Breakfast Pastry Recipes for Every Morning! Whether you’re craving something sweet to start your day or a savory treat to pair with your coffee, we’ve got you covered. From flaky croissants to hearty scones, these recipes promise to turn your breakfast into the best part of your day. Keep reading to find your new favorite morning indulgence!
Classic Croissants
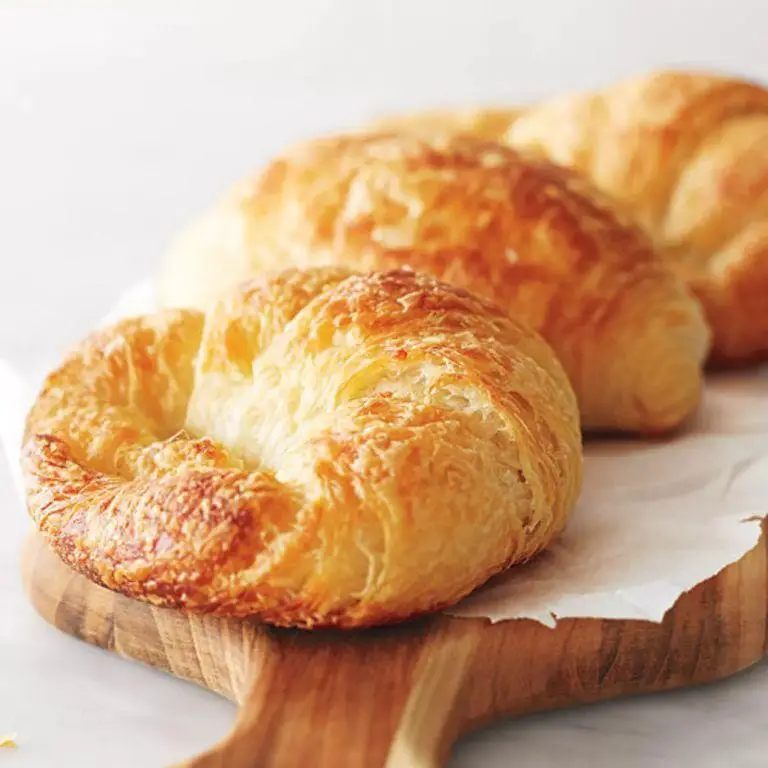
A classic croissant is a buttery, flaky pastry that’s perfect for breakfast or a snack. Achieving the perfect layers takes patience and precision, but the result is worth every minute.
Ingredients
– 4 cups all-purpose flour (I like to sift mine for extra fluffiness)
– 1 1/4 cups cold unsalted butter (European-style butter works best for its higher fat content)
– 1 cup cold whole milk (the colder, the better for dough consistency)
– 1/4 cup granulated sugar (just enough to sweeten without overpowering)
– 1 tbsp active dry yeast (check the expiration date to ensure it’s active)
– 2 tsp salt (I prefer sea salt for its subtle crunch)
– 1 large egg, room temperature (for that golden glaze)
Instructions
1. In a large bowl, whisk together flour, sugar, yeast, and salt.2. Gradually add cold milk, mixing until a dough forms.3. On a floured surface, knead the dough for 5 minutes until smooth.4. Wrap the dough in plastic and refrigerate for 1 hour.5. Roll out the chilled dough into a large rectangle.6. Spread cold butter over two-thirds of the dough, leaving a border.7. Fold the unbuttered third over the middle, then the remaining third on top.8. Roll out the dough again and fold into thirds. Repeat this process twice more.9. After the final fold, wrap the dough and chill for at least 4 hours or overnight.10. Preheat oven to 400°F and line baking sheets with parchment paper.11. Roll out the dough to 1/4-inch thickness and cut into triangles.12. Roll each triangle from the base to the tip to form croissants.13. Place croissants on baking sheets, brush with beaten egg.14. Bake for 15-18 minutes until golden and puffed.15. Cool on a wire rack before serving.The croissants should be crisp on the outside, with soft, buttery layers inside. Serve warm with jam or enjoy them plain for a truly classic experience.
Blueberry Scones
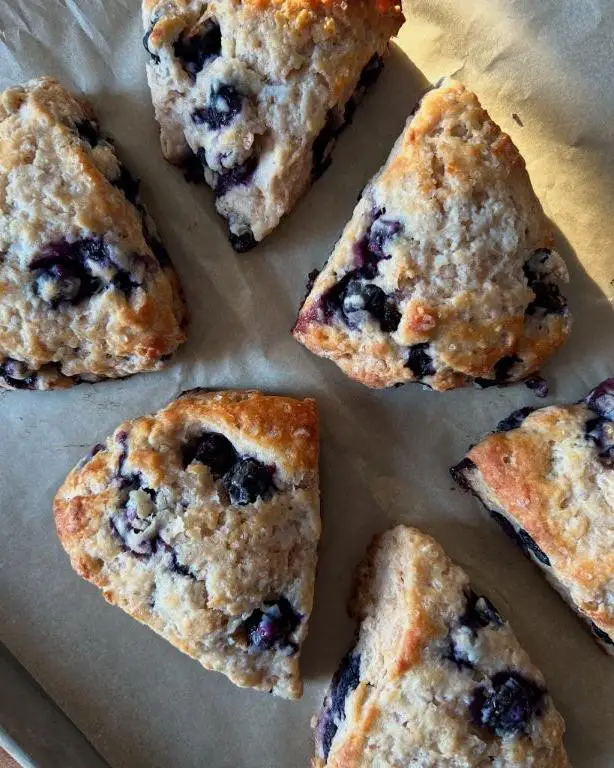
Let’s bake blueberry scones that are buttery, tender, and bursting with juicy berries. Perfect for breakfast or a midday treat.
Ingredients
- 2 cups all-purpose flour (I like to sift mine for extra fluffiness)
- 1/3 cup granulated sugar (adjust if you prefer less sweet)
- 1 tbsp baking powder (freshness matters here)
- 1/2 tsp salt (I use fine sea salt for even distribution)
- 1/2 cup unsalted butter, cold and cubed (the colder, the flakier)
- 1/2 cup heavy cream (plus extra for brushing)
- 1 large egg (room temp blends better)
- 1 tsp vanilla extract (pure extract makes a difference)
- 1 cup fresh blueberries (frozen works, but don’t thaw)
Instructions
- Preheat oven to 400°F. Line a baking sheet with parchment paper.
- In a large bowl, whisk flour, sugar, baking powder, and salt.
- Add cold butter. Use your fingers to rub it into the flour until pea-sized crumbs form.
- In another bowl, whisk cream, egg, and vanilla. Pour into flour mixture.
- Gently fold with a spatula until just combined. Tip: Overmixing makes tough scones.
- Carefully fold in blueberries. Tip: Dust them with flour to prevent sinking.
- Turn dough onto a floured surface. Pat into a 1-inch thick circle.
- Cut into 8 wedges. Place on baking sheet, 2 inches apart.
- Brush tops with cream. Bake for 18-20 minutes until golden. Tip: Rotate pan halfway for even browning.
- Cool on a wire rack for 5 minutes before serving.
Delightfully crumbly with a slight crisp outside, these scones are best warm. Try them with clotted cream or a drizzle of honey for extra indulgence.
Cinnamon Rolls

Baking cinnamon rolls fills your home with an irresistible aroma that promises comfort in every bite. Perfect for weekend brunches or a sweet treat any day.
Ingredients
- 1 cup warm milk (110°F, it should feel like a warm bath)
- 1/2 cup granulated sugar (I like to use organic cane sugar for a slight molasses hint)
- 1/3 cup unsalted butter, melted (extra points for using European-style butter)
- 1 packet active dry yeast (check the expiration date to ensure it’s alive and kicking)
- 4 cups all-purpose flour (I sometimes swap half for bread flour for extra chew)
- 1 tsp salt (fine sea salt dissolves evenly)
- 2 large eggs (room temp eggs incorporate better)
- 1/2 cup brown sugar (pack it tight for maximum sweetness)
- 2 tbsp ground cinnamon (freshly ground from sticks if you’re feeling fancy)
- 1/3 cup butter, softened (for spreading, not melting)
Instructions
- In a large bowl, combine warm milk, granulated sugar, and melted butter. Sprinkle yeast on top and let sit for 5 minutes until frothy.
- Stir in flour, salt, and eggs one at a time, mixing until a dough forms. Tip: If the dough sticks to your hands, add a tablespoon of flour at a time until manageable.
- Knead dough on a floured surface for 5 minutes until smooth and elastic. Place in a greased bowl, cover, and let rise in a warm spot for 1 hour or until doubled.
- Roll dough into a 16×21 inch rectangle. Spread softened butter evenly over the surface.
- Mix brown sugar and cinnamon in a bowl, then sprinkle over the buttered dough. Tip: Leave a 1-inch border to prevent spillage when rolling.
- Roll dough tightly from the long side, pinch seam to seal, and cut into 12 slices with a sharp knife. Tip: Use dental floss for clean cuts without squashing the rolls.
- Place rolls in a greased 9×13 inch baking dish, cover, and let rise for 30 minutes until puffy.
- Preheat oven to 350°F. Bake rolls for 20-25 minutes until golden brown. Tip: Tent with foil if tops brown too quickly.
Serve warm for gooey centers and crisp edges. Drizzle with cream cheese frosting or enjoy as is for a less sweet option. These rolls reheat beautifully, making them a make-ahead dream.
Apple Turnovers

Mouthwatering apple turnovers are a classic treat that combines flaky pastry with sweet, spiced apples. Perfect for breakfast or dessert, they’re surprisingly simple to make at home.
Ingredients
– 2 cups all-purpose flour (I like to sift mine for extra flakiness)
– 1/2 cup unsalted butter, chilled and cubed (keep it cold for the best texture)
– 1/4 cup ice water (just enough to bring the dough together)
– 2 large apples, peeled and diced (Granny Smiths are my go-to for their tartness)
– 1/2 cup granulated sugar (adjust based on your sweet tooth)
– 1 tsp ground cinnamon (a little extra never hurts)
– 1 egg, beaten (for that golden shine)
Instructions
1. Preheat your oven to 375°F (190°C) to ensure it’s ready for baking.
2. In a large bowl, mix flour and butter until the mixture resembles coarse crumbs. Tip: Use a pastry cutter or your fingers for this step.
3. Gradually add ice water, stirring until the dough just comes together. Overworking makes tough pastry.
4. Roll the dough on a floured surface to 1/8-inch thickness. Cut into 6-inch squares.
5. Toss apples with sugar and cinnamon in a bowl. Spoon onto the center of each dough square.
6. Fold the dough over the filling to form a triangle. Seal edges with a fork. Tip: Don’t overfill to prevent leaks.
7. Brush each turnover with beaten egg for a glossy finish.
8. Bake on a parchment-lined tray for 25 minutes or until golden brown. Tip: Rotate the tray halfway for even baking.
9. Let cool slightly before serving. They’re best warm, with the filling just set and the pastry crisp. Not too sweet, these turnovers pair wonderfully with a sharp cheddar or a dollop of whipped cream.
Chocolate Chip Muffins

Deliciously simple, these chocolate chip muffins are a quick fix for your sweet cravings. Perfect for breakfast or a snack, they’re universally loved.
Ingredients
- 2 cups all-purpose flour (I swear by King Arthur for consistent results)
- 1/2 cup granulated sugar (adjust slightly if you prefer less sweet)
- 1 tbsp baking powder (freshness is key—check the date)
- 1/2 tsp salt (I use sea salt for a cleaner taste)
- 1 cup milk (whole milk makes them richer, but any works)
- 1/3 cup vegetable oil (or melted butter for extra flavor)
- 1 large egg (room temp blends smoother)
- 1 tsp vanilla extract (pure extract makes a difference)
- 1 cup chocolate chips (semi-sweet is my go-to)
Instructions
- Preheat your oven to 375°F. Line a muffin tin with papers or grease well.
- In a large bowl, whisk flour, sugar, baking powder, and salt together.
- In another bowl, mix milk, oil, egg, and vanilla until fully combined.
- Pour wet ingredients into dry. Stir until just mixed—overmixing leads to tough muffins.
- Fold in chocolate chips gently. Tip: Reserve a few chips to sprinkle on top before baking.
- Divide batter evenly among muffin cups, filling each 2/3 full.
- Bake for 20-25 minutes, until tops are golden and a toothpick comes out clean.
- Cool in pan for 5 minutes, then transfer to a wire rack. Tip: They’re best eaten warm.
Heavenly when warm, these muffins boast a tender crumb and melty chocolate pockets. Try serving with a dollop of whipped cream for an extra treat.
Banana Bread

Few things beat the comforting aroma of banana bread wafting through the kitchen. This recipe is straightforward, delivering moist, flavorful results every time.
Ingredients
- 3 ripe bananas – the spottier, the better for sweetness.
- 1/2 cup unsalted butter, melted – I find it blends smoother when slightly cooled.
- 1 cup sugar – white or brown, depending on your preference for depth.
- 2 large eggs – room temperature eggs incorporate more evenly.
- 2 cups all-purpose flour – spooned and leveled to avoid dense bread.
- 1 tsp baking soda – fresh for maximum rise.
- 1/2 tsp salt – just enough to balance the sweetness.
- 1 tsp vanilla extract – pure extract makes a noticeable difference.
- 1/2 cup chopped walnuts – optional, but adds a nice crunch.
Instructions
- Preheat your oven to 350°F. Grease a 9×5 inch loaf pan.
- In a large bowl, mash the bananas with a fork until smooth.
- Stir in the melted butter, then the sugar, eggs, and vanilla extract.
- In another bowl, whisk together the flour, baking soda, and salt.
- Gradually fold the dry ingredients into the banana mixture. Avoid overmixing to keep the bread tender.
- If using, gently stir in the walnuts.
- Pour the batter into the prepared loaf pan. Smooth the top with a spatula.
- Bake for 60-65 minutes, or until a toothpick inserted into the center comes out clean.
- Let the bread cool in the pan for 10 minutes, then transfer to a wire rack to cool completely.
Moist and rich, this banana bread is perfect as is or toasted with a smear of butter. For a twist, try adding chocolate chips or a cinnamon swirl before baking.
Pumpkin Spice Donuts
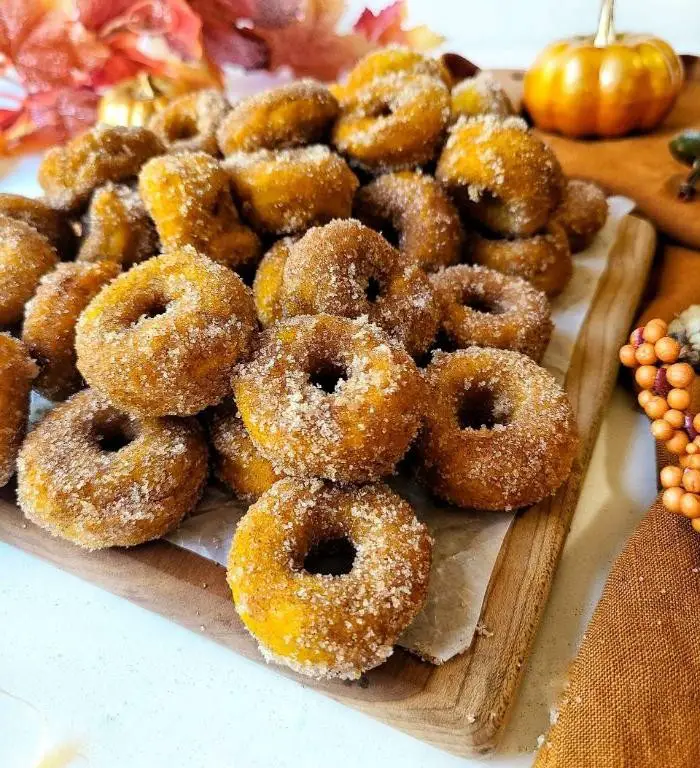
Get ready to bake the coziest pumpkin spice donuts this fall. These treats are perfect with your morning coffee or as a sweet afternoon snack.
Ingredients
- 1 1/2 cups all-purpose flour (I like to sift mine for extra fluffiness)
- 1/2 cup granulated sugar (a little extra for sprinkling never hurts)
- 1 1/2 tsp baking powder (fresh is key for the best rise)
- 1/2 tsp salt (I always use fine sea salt)
- 1 tsp pumpkin pie spice (homemade blend preferred)
- 1/2 cup pumpkin puree (not pie filling)
- 1/4 cup milk (whole milk makes them richer)
- 1 large egg (room temp blends better)
- 2 tbsp unsalted butter, melted (cooled slightly)
- 1 tsp vanilla extract (pure, not imitation)
Instructions
- Preheat your oven to 350°F. Grease a donut pan with butter or non-stick spray.
- In a large bowl, whisk together flour, sugar, baking powder, salt, and pumpkin pie spice.
- In another bowl, mix pumpkin puree, milk, egg, melted butter, and vanilla until smooth.
- Pour wet ingredients into dry ingredients. Stir until just combined; don’t overmix.
- Spoon batter into a piping bag or ziplock with a corner cut off. Fill each donut mold 3/4 full.
- Bake for 10-12 minutes, until a toothpick comes out clean. Tip: They spring back when lightly touched.
- Cool in pan for 5 minutes, then transfer to a wire rack. Tip: Sprinkle with sugar while still warm.
- Serve warm or at room temperature. Tip: Dip in melted chocolate for extra decadence.
Moist and spiced just right, these donuts are a fall favorite. Try them with a caramel drizzle or alongside a scoop of vanilla ice cream for dessert.
Raspberry Danish
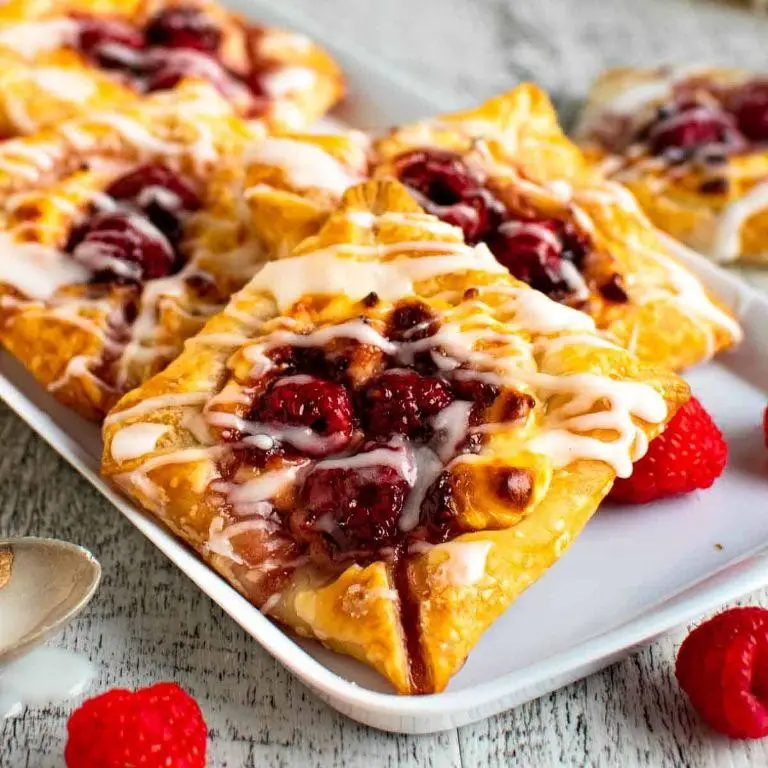
Unbelievably easy to make, this Raspberry Danish is a perfect blend of sweet and tart, with a flaky crust that’s irresistible. Ideal for breakfast or a snack, it’s a crowd-pleaser every time.
Ingredients
- 2 cups all-purpose flour (I like to sift mine for extra fluffiness)
- 1/2 cup unsalted butter, cold and cubed (the colder, the flakier the pastry)
- 1/4 cup granulated sugar (adjust if you prefer less sweet)
- 1/2 tsp salt (fine sea salt blends best)
- 1/2 cup cold water (ice-cold works wonders)
- 1 cup fresh raspberries (frozen can work in a pinch, but fresh is best)
- 1 tbsp lemon zest (brightens the whole dish)
- 1 egg, beaten (for that golden shine)
Instructions
- Preheat your oven to 375°F (190°C). A properly heated oven is key to a flaky crust.
- In a large bowl, mix flour, sugar, and salt. Add cubed butter and blend until the mixture resembles coarse crumbs.
- Gradually add cold water, stirring until the dough just comes together. Overmixing leads to tough pastry.
- Roll the dough on a floured surface to a 12-inch circle. Fold edges to create a rustic border.
- Spread raspberries evenly over the dough, leaving a 2-inch border. Sprinkle lemon zest over the berries.
- Fold the edges over the berries, pleating as you go. Brush the crust with beaten egg for a glossy finish.
- Bake for 25-30 minutes, until the crust is golden and the berries are bubbly. Let cool slightly before serving.
Heavenly when warm, the Danish offers a crisp crust with a juicy, tangy center. Serve with a dollop of whipped cream or a drizzle of honey for an extra treat.
Lemon Poppy Seed Bread
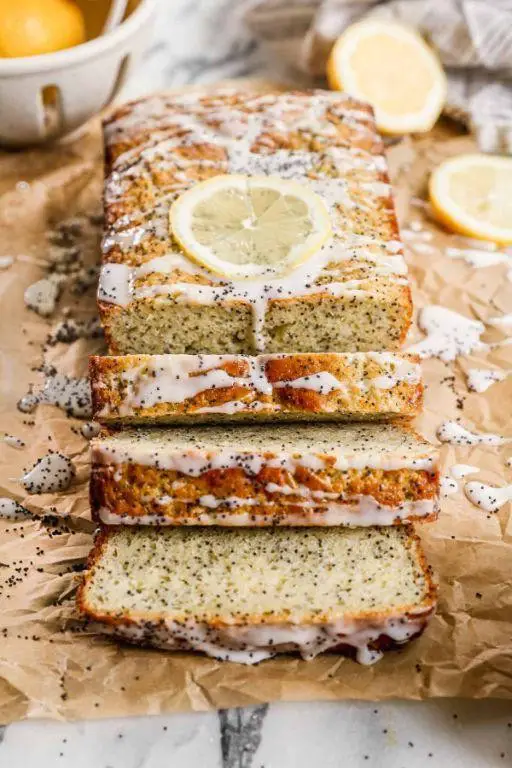
Kickstart your morning with this zesty Lemon Poppy Seed Bread, a perfect blend of tangy and sweet that’s irresistibly moist. Ideal for brunch or a quick snack, it’s a crowd-pleaser every time.
Ingredients
– 1 1/2 cups all-purpose flour (I swear by King Arthur for consistent results)
– 1/2 tsp baking soda (freshness matters, so check the date)
– 1/4 tsp salt (I prefer fine sea salt for even distribution)
– 1 cup granulated sugar (for that perfect sweetness)
– 2 large eggs (room temp eggs blend smoother)
– 1/2 cup sour cream (full fat gives the best texture)
– 1/2 cup unsalted butter, melted (cooled slightly to avoid cooking the eggs)
– 2 tbsp lemon zest (from about 2 lemons, the more the zestier)
– 2 tbsp fresh lemon juice (bottled just doesn’t compare)
– 1 tbsp poppy seeds (for that classic crunch)
– 1 tsp vanilla extract (pure extract makes a difference)
Instructions
1. Preheat your oven to 350°F. Grease a 9×5 inch loaf pan. A light spray of baking spray works wonders.
2. In a medium bowl, whisk together flour, baking soda, and salt. This ensures no lumps and even baking.
3. In a large bowl, beat sugar and eggs until light and fluffy, about 2 minutes. Room temp eggs incorporate better.
4. Mix in sour cream, melted butter, lemon zest, lemon juice, and vanilla extract until just combined. Overmixing leads to tough bread.
5. Gently fold in the dry ingredients until no flour streaks remain. A spatula is your best friend here.
6. Stir in poppy seeds evenly throughout the batter. They should be distributed, not clumped.
7. Pour batter into the prepared loaf pan. Smooth the top with the back of a spoon for an even bake.
8. Bake for 50-55 minutes, or until a toothpick inserted comes out clean. Ovens vary, so start checking at 50 minutes.
9. Let cool in the pan for 10 minutes, then transfer to a wire rack to cool completely. Patience prevents crumbling.
Buttery and moist, this bread has a delightful crunch from the poppy seeds and a bright lemon flavor. Serve it toasted with a smear of cream cheese for an extra indulgent treat.
Strawberry Cream Cheese Pastries

Perfect for summer picnics, these Strawberry Cream Cheese Pastries combine sweet strawberries with creamy cheese in a flaky crust.
Ingredients
- 1 sheet puff pastry, thawed (I keep mine in the fridge overnight for best results)
- 4 oz cream cheese, softened (room temp blends smoother)
- 1/4 cup granulated sugar (adjust if your strawberries are very sweet)
- 1 tsp vanilla extract (pure vanilla makes a difference)
- 1 cup fresh strawberries, diced (ripe but firm works best)
- 1 egg, beaten (for that golden glaze)
Instructions
- Preheat oven to 400°F. Line a baking sheet with parchment paper.
- Roll out the puff pastry on a lightly floured surface to a 12×12 inch square. Cut into 9 equal squares.
- In a bowl, mix cream cheese, sugar, and vanilla until smooth. Tip: A hand mixer makes this effortless.
- Place a tablespoon of the cream cheese mixture in the center of each pastry square. Top with diced strawberries.
- Fold the corners of each square towards the center, pressing lightly to seal. Brush with beaten egg.
- Bake for 15-18 minutes, until pastries are puffed and golden. Tip: Rotate the tray halfway for even browning.
- Let cool on the baking sheet for 5 minutes before serving. Tip: They’re best enjoyed the same day.
Out of the oven, these pastries offer a delightful contrast between the crispy crust and the soft, juicy filling. Serve them warm with a dusting of powdered sugar for extra sweetness.
Maple Pecan Sticky Buns

Craving something sweet and indulgent? These Maple Pecan Sticky Buns are your answer. Perfect for a weekend treat or a special breakfast.
Ingredients
- 2 cups all-purpose flour (I like to sift mine for extra fluffiness)
- 1/2 cup whole milk, warmed to 110°F (just a tad warmer than body temperature)
- 1/4 cup granulated sugar (for that perfect sweetness)
- 1/4 cup unsalted butter, melted (I always use unsalted to control the saltiness)
- 1 large egg, room temperature (it blends better when not cold)
- 1 tsp active dry yeast (the backbone of our buns)
- 1/2 tsp salt (just enough to enhance the flavors)
- 1/2 cup pure maple syrup (the real deal makes all the difference)
- 1 cup pecans, chopped (for that crunchy texture)
- 1/4 cup brown sugar (adds a deep, molasses-like sweetness)
- 2 tbsp unsalted butter, softened (for greasing the pan)
Instructions
- In a large bowl, combine warmed milk, granulated sugar, and yeast. Let sit for 5 minutes until frothy.
- Add melted butter, egg, and salt to the yeast mixture. Stir until well combined.
- Gradually mix in flour until a soft dough forms. Tip: If the dough sticks to your hands, it’s perfect.
- Knead the dough on a floured surface for 5 minutes until smooth and elastic.
- Place dough in a greased bowl, cover, and let rise in a warm place for 1 hour until doubled in size.
- Preheat oven to 350°F. Grease a 9-inch round pan with softened butter.
- In a small bowl, mix maple syrup, brown sugar, and pecans. Spread evenly in the prepared pan.
- Punch down the dough and roll into a 12×9-inch rectangle on a floured surface.
- Spread remaining softened butter over the dough. Sprinkle with a mix of brown sugar and chopped pecans.
- Roll the dough tightly from the long side and cut into 12 equal pieces. Tip: Use a sharp knife for clean cuts.
- Place rolls cut side down in the pan. Cover and let rise for 30 minutes until puffy.
- Bake for 25 minutes until golden brown. Tip: Check at 20 minutes to avoid overbaking.
- Let cool for 5 minutes, then invert onto a serving plate.
Lusciously sticky and packed with crunch, these buns are best served warm. Drizzle with extra maple syrup for an indulgent twist.
Cherry Almond Croissants

Every baker needs a showstopper, and these Cherry Almond Croissants are just that. Easy to love, hard to resist.
Ingredients
- 2 cups all-purpose flour (I swear by King Arthur for consistency)
- 1/2 cup unsalted butter, cold and cubed (European-style butter makes a difference)
- 1/4 cup granulated sugar (organic gives a cleaner taste)
- 1/2 tsp salt (fine sea salt dissolves evenly)
- 1/2 cup whole milk, lukewarm (not hot, to keep the yeast happy)
- 1 large egg, room temp (for a smoother dough)
- 1 tsp active dry yeast (check the expiry date for best rise)
- 1/2 cup cherry jam (homemade or a high-quality store brand)
- 1/4 cup sliced almonds (toasted for extra crunch)
- 1 egg yolk, for glaze (gives that golden shine)
Instructions
- In a large bowl, whisk together flour, sugar, salt, and yeast.
- Add cubed butter, using your fingers to press it into the flour until pea-sized crumbs form.
- Pour in lukewarm milk and add the egg, mixing until a shaggy dough forms.
- Turn dough onto a floured surface and knead for 5 minutes until smooth and elastic.
- Place dough in a greased bowl, cover with a damp towel, and let rise in a warm spot for 1 hour or until doubled.
- Roll dough into a rectangle, spread cherry jam evenly, and sprinkle with almonds.
- Roll tightly from the long side, then slice into 8 equal pieces.
- Place rolls on a parchment-lined baking sheet, cover, and let rise for 30 minutes.
- Preheat oven to 375°F (190°C). Brush rolls with egg yolk glaze.
- Bake for 20-25 minutes until golden and puffed.
Absolutely irresistible when warm, the flaky layers give way to sweet cherry and nutty almond. Try serving with a dollop of mascarpone for extra indulgence.
Peach Cobbler Muffins
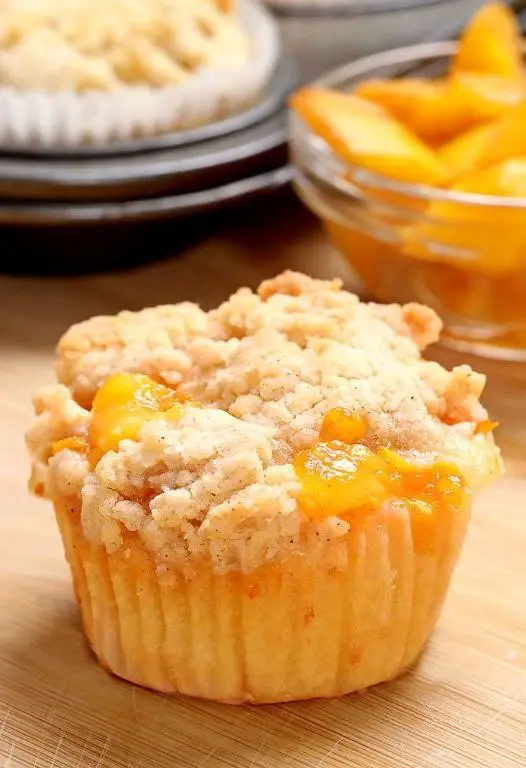
Let’s dive into making Peach Cobbler Muffins, a delightful twist on the classic dessert that’s perfect for breakfast or a snack.
Ingredients
- 2 cups all-purpose flour (I always sift mine for extra fluffiness)
- 1 cup granulated sugar (adjust if your peaches are super sweet)
- 1 tbsp baking powder (freshness matters here)
- 1/2 tsp salt (I use sea salt for a subtle crunch)
- 1/2 cup unsalted butter, melted (cooled slightly to avoid cooking the eggs)
- 1 cup milk (whole milk makes them richer)
- 1 large egg (room temp blends better)
- 2 cups diced peaches (fresh or thawed frozen work)
- 1 tsp vanilla extract (pure extract makes a difference)
Instructions
- Preheat your oven to 375°F. Line a muffin tin with liners or grease well.
- In a large bowl, whisk together flour, sugar, baking powder, and salt.
- In another bowl, mix melted butter, milk, egg, and vanilla until smooth.
- Pour the wet ingredients into the dry. Stir until just combined; don’t overmix.
- Fold in the diced peaches gently to keep the batter light.
- Divide the batter evenly among the muffin cups, filling each 3/4 full.
- Bake for 20-25 minutes, until golden and a toothpick comes out clean.
- Let cool in the pan for 5 minutes, then transfer to a wire rack.
Perfectly moist with juicy peach bits, these muffins are a hit. Try serving them warm with a scoop of vanilla ice cream for an extra treat.
Savory Spinach and Feta Pastry

Let’s dive into making a flaky, flavorful pastry that’s perfect for any time of day. This savory spinach and feta combo is a crowd-pleaser.
Ingredients
- 1 sheet puff pastry, thawed (I keep mine in the fridge overnight for best results)
- 1 cup fresh spinach, chopped (packed tight for maximum flavor)
- 1/2 cup feta cheese, crumbled (go for the block and crumble yourself for better texture)
- 1 tbsp extra virgin olive oil (my go-to for its fruity notes)
- 1/4 tsp garlic powder (trust me, it makes a difference)
- 1 egg, beaten (room temp eggs mix better)
Instructions
- Preheat your oven to 400°F. Line a baking sheet with parchment paper.
- Roll out the puff pastry on a lightly floured surface to a 12-inch square.
- In a bowl, mix spinach, feta, olive oil, and garlic powder until well combined.
- Spread the spinach mixture evenly over the pastry, leaving a 1-inch border.
- Brush the edges with the beaten egg. This helps seal the pastry.
- Carefully roll the pastry into a log, starting from one end. Seal the edge with a bit more egg.
- Place the log seam-side down on the baking sheet. Brush the top with the remaining egg.
- Bake for 25 minutes, or until golden brown and puffed.
- Let cool for 5 minutes before slicing. This ensures the filling sets.
Unbelievably flaky and rich, this pastry pairs wonderfully with a crisp salad. Try serving it warm for the best flavor experience.
Glazed Donut Holes

Zesty little bites, these glazed donut holes are a crowd-pleaser. Perfect for breakfast or a sweet snack, they’re irresistibly soft and sugary.
Ingredients
- 2 cups all-purpose flour (I swear by King Arthur for consistent results)
- 1/2 cup granulated sugar (a little extra for dusting never hurts)
- 1 tbsp baking powder (freshness is key—check the date)
- 1/2 tsp salt (I prefer fine sea salt for even distribution)
- 3/4 cup whole milk (room temp blends smoother)
- 2 large eggs (room temp eggs incorporate better)
- 2 tbsp unsalted butter, melted (cooled slightly to avoid cooking the eggs)
- 1 tsp vanilla extract (pure extract makes a difference)
- 2 cups powdered sugar (for that perfect glaze)
- 1/4 cup water (adjust for desired glaze thickness)
Instructions
- Preheat your oven to 375°F. A properly heated oven ensures even cooking.
- In a large bowl, whisk together flour, sugar, baking powder, and salt. Sifting avoids lumps.
- In another bowl, mix milk, eggs, melted butter, and vanilla until smooth. Room temp ingredients blend easier.
- Combine wet and dry ingredients gently. Overmixing leads to tough donuts.
- Fill a greased mini muffin tin 2/3 full. This prevents overflow and ensures uniform size.
- Bake for 10-12 minutes until golden. A toothpick should come out clean.
- Cool in the tin for 5 minutes, then transfer to a wire rack. They firm up as they cool.
- For the glaze, whisk powdered sugar and water until smooth. Dip each donut hole while warm for best adhesion.
- Let glaze set for 10 minutes before serving. Patience rewards with a shiny finish.
Pillowy soft inside with a crisp glaze shell, these donut holes vanish quickly. Try stacking them high with a drizzle of chocolate for extra decadence.
Caramel Apple Strudel
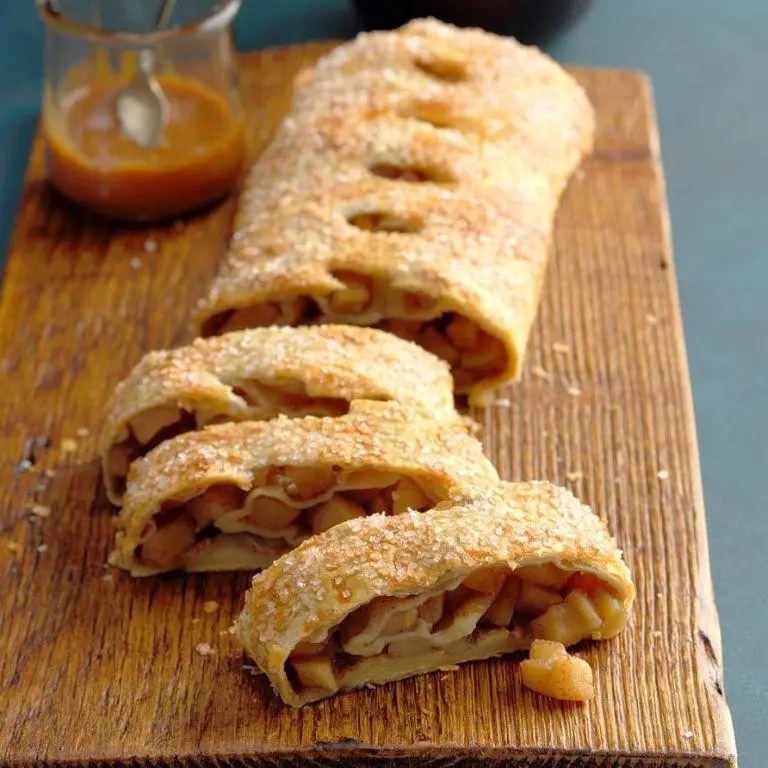
Perfect for fall, this Caramel Apple Strudel combines sweet, tart apples with rich caramel in a flaky pastry. It’s a crowd-pleaser that’s easier to make than it looks.
Ingredients
- 2 cups thinly sliced apples (I like a mix of Granny Smith and Honeycrisp for balance)
- 1/2 cup granulated sugar (adjust based on your apple’s sweetness)
- 1 tsp cinnamon (freshly ground if you have it)
- 1/4 cup caramel sauce (homemade or store-bought, but thick is key)
- 6 sheets phyllo dough (keep covered with a damp towel to prevent drying)
- 1/2 cup melted butter (unsalted gives you control over the saltiness)
- 1/4 cup breadcrumbs (toasted adds a nice crunch)
Instructions
- Preheat your oven to 375°F. Line a baking sheet with parchment paper.
- In a bowl, mix apples, sugar, and cinnamon. Let sit for 10 minutes to draw out juices.
- Drain the apples slightly, then mix in caramel sauce. Tip: A little cornstarch can thicken the filling if it’s too wet.
- Layer phyllo sheets on your work surface, brushing each with melted butter and sprinkling lightly with breadcrumbs.
- Spread the apple mixture along one long edge of the phyllo, leaving a 1-inch border.
- Roll the phyllo tightly around the filling, tucking in the ends as you go. Tip: Use a sharp knife to score the top for even baking.
- Brush the strudel with more butter and bake for 25-30 minutes, until golden and crisp. Tip: Let it cool slightly before slicing to keep the layers intact.
Buttery layers give way to a juicy, spiced apple filling with caramel undertones. Serve warm with a scoop of vanilla ice cream for an extra indulgent treat.
Pecan Pie Bars
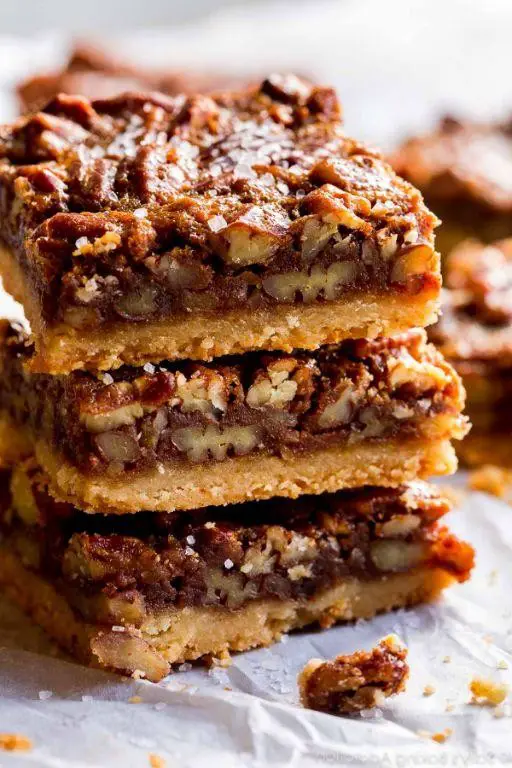
These pecan pie bars are a simpler, sliceable version of the classic dessert. They’re perfect for gatherings where you want to impress without the fuss.
Ingredients
– 1 cup all-purpose flour (I like to sift mine for a lighter crust) – 1/2 cup unsalted butter, chilled and cubed (cold butter is key for a flaky crust) – 1/4 cup granulated sugar (just enough to sweeten the crust) – 1/4 tsp salt (balances the sweetness) – 2 large eggs (room temp blends smoother) – 1 cup brown sugar, packed (for that deep molasses flavor) – 1/2 cup light corn syrup (my go-to for that classic pecan pie texture) – 2 tbsp unsalted butter, melted (adds richness to the filling) – 1 tsp vanilla extract (pure extract makes a difference) – 1 1/2 cups pecans, chopped (toasted pecans add extra crunch)
Instructions
1. Preheat your oven to 350°F (175°C) and line an 8-inch square baking pan with parchment paper. 2. In a food processor, pulse flour, chilled butter, granulated sugar, and salt until the mixture resembles coarse crumbs. Tip: Don’t over-process; you want to see small butter pieces. 3. Press the mixture firmly into the prepared pan and bake for 15 minutes until lightly golden. 4. While the crust bakes, whisk eggs, brown sugar, corn syrup, melted butter, and vanilla in a bowl until smooth. Tip: Whisk vigorously to ensure no sugar lumps remain. 5. Stir in the pecans, then pour the filling over the hot crust. 6. Bake for 25 minutes until the filling is set but still slightly jiggly in the center. Tip: The bars will firm up as they cool. 7. Cool completely in the pan on a wire rack before slicing into bars. The bars offer a buttery crust with a gooey, nutty filling. Serve them with a dollop of whipped cream or a scoop of vanilla ice cream for an extra treat.
Double Chocolate Scones

Craving a decadent breakfast or afternoon treat? These Double Chocolate Scones are rich, tender, and packed with chocolate in every bite.
Ingredients
- 2 cups all-purpose flour (I like to sift mine for extra fluffiness)
- 1/3 cup granulated sugar (adjust slightly if you prefer less sweet)
- 1/2 cup unsweetened cocoa powder (the darker, the better for chocolate lovers)
- 1 tbsp baking powder (freshness is key for the perfect rise)
- 1/2 tsp salt (balances the sweetness)
- 1/2 cup cold unsalted butter, cubed (keep it cold for flaky layers)
- 1/2 cup heavy cream (plus extra for brushing)
- 1 large egg (room temp blends easier)
- 1 tsp vanilla extract (pure extract makes a difference)
- 3/4 cup chocolate chips (I use a mix of dark and milk for complexity)
Instructions
- Preheat oven to 400°F. Line a baking sheet with parchment paper.
- In a large bowl, whisk together flour, sugar, cocoa powder, baking powder, and salt.
- Add cold butter cubes. Use your fingers to rub the butter into the flour until it resembles coarse crumbs.
- In a small bowl, whisk together heavy cream, egg, and vanilla extract.
- Pour the wet ingredients into the dry. Stir until just combined. Tip: Overmixing leads to tough scones.
- Fold in chocolate chips gently.
- Turn dough onto a floured surface. Pat into an 8-inch circle. Cut into 8 wedges.
- Place wedges on the prepared baking sheet. Brush tops with heavy cream.
- Bake for 15-18 minutes, until edges are firm. Tip: A toothpick should come out clean, but it’s okay if there’s a bit of chocolate.
- Cool on a wire rack for 5 minutes before serving. Tip: They’re best warm, with the chocolate slightly melted.
Serve these scones with a dollop of clotted cream or a drizzle of melted chocolate for extra indulgence. The texture is perfectly crumbly, with a deep chocolate flavor that’s not overly sweet.
Conclusion
Great mornings start with great pastries, and our roundup of 18 delicious breakfast recipes offers something for every taste. Whether you’re craving something sweet, savory, or somewhere in between, these recipes are sure to brighten your day. We’d love to hear which ones become your favorites—leave a comment below and don’t forget to share the love on Pinterest!