Oh, the joy of finding meals that not only delight your taste buds but also soothe your gut! If you’re navigating the choppy waters of diverticulitis, you know how crucial it is to eat right. That’s why we’ve whipped up 18 comforting, gut-friendly recipes that promise to keep your digestive system happy. From hearty soups to gentle grains, each dish is a step toward a happier, healthier you. Let’s dig in!
Soft Scrambled Eggs with Spinach

Very few things beat the simplicity and comfort of soft scrambled eggs with spinach. It’s your go-to for a quick, nutritious breakfast that feels a bit fancy without the fuss.
Ingredients
- 3 large eggs
- A handful of fresh spinach, roughly chopped
- A splash of milk
- A couple of tablespoons of butter
- A pinch of salt
- A dash of black pepper
Instructions
- Crack the eggs into a bowl, add a splash of milk, and whisk until just combined. Tip: Don’t overbeat; you want them fluffy, not tough.
- Heat a non-stick skillet over low heat and melt a couple of tablespoons of butter. Tip: Low heat is key for soft, creamy eggs.
- Add the eggs to the skillet. Let them sit for a moment, then gently stir with a spatula. Keep the motion slow and steady.
- When the eggs are halfway set, toss in the chopped spinach. Continue stirring gently. Tip: The spinach wilts quickly, so add it at the right moment.
- Season with a pinch of salt and a dash of black pepper right before the eggs are fully set. They’ll finish cooking off the heat.
- Remove from the skillet immediately to prevent overcooking.
Mmm, you’ll love how creamy these eggs are, with the spinach adding a fresh, slightly earthy note. Try them on toast with a sprinkle of cheese for an extra treat.
Baked Salmon with Steamed Carrots

Salmon is one of those dishes that feels fancy but is surprisingly simple to make at home. You’ll love how the flavors come together with minimal effort, and the steamed carrots add a sweet, healthy side.
Ingredients
- 1 lb salmon fillet
- A couple of carrots, sliced
- A splash of olive oil
- 1 tbsp lemon juice
- 1 tsp garlic powder
- Salt and pepper, just a pinch
- A handful of fresh dill, chopped
Instructions
- Preheat your oven to 375°F. This ensures your salmon cooks evenly.
- While the oven heats, place the salmon on a baking sheet lined with parchment paper. Drizzle with olive oil and lemon juice, then sprinkle with garlic powder, salt, and pepper.
- Bake the salmon for 12-15 minutes. You’ll know it’s done when it flakes easily with a fork.
- Meanwhile, bring a pot of water to boil and add the sliced carrots. Steam for about 5 minutes until they’re tender but still crisp.
- Garnish the salmon with fresh dill before serving. Tip: Let the salmon rest for a couple of minutes after baking for juicier results.
- Serve the salmon with the steamed carrots on the side. Tip: A squeeze of extra lemon juice brightens up the dish.
Zesty and fresh, this baked salmon pairs perfectly with the sweetness of the carrots. Try serving it over a bed of quinoa for an extra protein boost.
Mashed Sweet Potatoes

Back in the day, my grandma would whip up the creamiest mashed sweet potatoes, and now I’m sharing her secret with you. It’s the perfect side dish that’s both sweet and savory, and guess what? It’s super easy to make.
Ingredients
- 3 large sweet potatoes, peeled and cubed
- A splash of whole milk
- A couple of tablespoons of butter
- A pinch of salt
- A dash of cinnamon
Instructions
- Preheat your oven to 400°F. This high heat will help caramelize the sweet potatoes, deepening their flavor.
- Toss the cubed sweet potatoes with a tiny bit of oil and spread them out on a baking sheet. Roast for about 25 minutes, or until they’re fork-tender.
- Transfer the roasted sweet potatoes to a large bowl. Add the butter, milk, salt, and cinnamon.
- Mash everything together until smooth. If you like yours extra creamy, a hand mixer works wonders here.
- Taste and adjust the seasoning if needed. Sometimes a little extra cinnamon makes all the difference.
Here’s the deal: these mashed sweet potatoes are so velvety and rich, they might just steal the show at your next dinner. Try topping them with a sprinkle of brown sugar or a handful of toasted pecans for an extra special touch.
Oatmeal with Bananas and Honey

Feeling like a cozy breakfast that’s both simple and satisfying? You can’t go wrong with oatmeal jazzed up with bananas and honey. It’s the kind of meal that feels like a hug in a bowl, perfect for those lazy mornings or when you need a quick energy boost.
Ingredients
- 1 cup of old-fashioned oats
- 2 cups of water (or a mix of water and milk for creaminess)
- A pinch of salt
- 1 ripe banana, sliced
- A drizzle of honey
- A sprinkle of cinnamon (if you’re into that)
Instructions
- Grab a medium saucepan and toss in the oats, water (or water-milk combo), and that pinch of salt.
- Bring the mix to a boil over medium-high heat, then dial it back to a simmer. Let it bubble away for about 5 minutes, stirring occasionally to prevent sticking. Tip: If it gets too thick, just splash in a bit more liquid.
- While the oatmeal is doing its thing, slice up your banana. Tip: The riper the banana, the sweeter your oatmeal will be.
- Once the oatmeal reaches your desired consistency (creamy is the goal here), take it off the heat.
- Stir in most of the banana slices, saving a few for topping. Drizzle with honey and a sprinkle of cinnamon if you’re feeling fancy. Tip: The honey not only adds sweetness but a lovely floral note that pairs perfectly with the banana.
So there you have it—creamy, comforting oatmeal with the natural sweetness of bananas and honey. The bananas add a soft texture and a hint of tropical flavor, making every bite a little adventure. Try it with a dollop of peanut butter for an extra protein kick!
Pureed Pumpkin Soup

Unbelievably cozy and simple to whip up, this pureed pumpkin soup is your go-to for chilly evenings. You’ll love how the flavors come together with minimal fuss.
Ingredients
- a couple of tablespoons of olive oil
- 1 medium onion, chopped
- 2 cloves of garlic, minced
- 4 cups of pumpkin puree (not pie filling)
- 4 cups of vegetable broth
- a splash of heavy cream
- salt and pepper, just enough to season
- a pinch of nutmeg for that warm spice kick
Instructions
- Heat the olive oil in a large pot over medium heat until it shimmers, about 2 minutes.
- Add the chopped onion and minced garlic, sautéing until they’re soft and fragrant, roughly 5 minutes.
- Stir in the pumpkin puree and vegetable broth, bringing the mixture to a gentle boil.
- Reduce the heat to low, letting it simmer uncovered for 20 minutes to meld the flavors.
- Use an immersion blender to puree the soup until it’s completely smooth. Tip: If you don’t have an immersion blender, a regular blender works—just blend in batches.
- Stir in the heavy cream and season with salt, pepper, and nutmeg. Tip: Start with a little seasoning; you can always add more.
- Cook for another 5 minutes on low heat, stirring occasionally. Tip: Keep the heat low to prevent the cream from separating.
Out of this world creamy with a hint of spice, this soup pairs wonderfully with crusty bread or a dollop of sour cream on top for extra richness.
Steamed Chicken with Rice

Hey, you know those days when you crave something comforting but don’t want to spend hours in the kitchen? This steamed chicken with rice is your go-to. It’s simple, flavorful, and feels like a hug in a bowl.
Ingredients
- 2 cups of white rice
- 4 chicken thighs, bone-in and skin-on
- A splash of soy sauce
- A couple of garlic cloves, minced
- 1 tbsp of ginger, grated
- 2 cups of chicken broth
- A pinch of salt
- A drizzle of sesame oil
Instructions
- Rinse the rice under cold water until the water runs clear. This removes excess starch and prevents clumping.
- Place the rice in a steamer basket and set aside. Tip: Soaking the rice for 30 minutes before cooking can make it fluffier.
- Season the chicken thighs with salt, then rub them with the minced garlic and grated ginger.
- Arrange the chicken on top of the rice in the steamer basket. Tip: Leaving space between the pieces ensures even cooking.
- Pour the chicken broth into the steamer’s water compartment. The broth will steam the chicken and rice, infusing them with flavor.
- Cover and steam over medium heat for 25 minutes. Tip: Resist the urge to peek; keeping the lid on traps the steam.
- After 25 minutes, check the chicken’s internal temperature with a thermometer; it should read 165°F.
- Drizzle the cooked dish with soy sauce and sesame oil before serving.
Perfectly steamed, the chicken is juicy, and the rice has absorbed all the savory flavors. Try serving it with a side of steamed greens for a complete meal.
Avocado and Yogurt Smoothie

Oh, you’re going to love this creamy, dreamy avocado and yogurt smoothie. It’s the perfect blend of rich and refreshing, and it’s super easy to whip up for a quick breakfast or snack.
Ingredients
- 1 ripe avocado, pitted and scooped
- 1 cup of plain Greek yogurt
- A splash of almond milk (about 1/4 cup)
- A couple of ice cubes
- 1 tbsp of honey
- A pinch of salt
Instructions
- Grab your blender and toss in the avocado, Greek yogurt, almond milk, ice cubes, honey, and a pinch of salt.
- Blend on high for about 30 seconds, or until everything is smooth and creamy. If it’s too thick, add a little more almond milk.
- Give it a quick taste. Want it sweeter? Add a bit more honey and blend for another 5 seconds.
- Pour into your favorite glass and enjoy immediately for the best texture and flavor.
Delightfully smooth with a hint of sweetness, this smoothie is like a hug in a glass. Try topping it with a sprinkle of granola for a crunchy contrast or a drizzle of honey for extra decadence.
Boiled Beets with Olive Oil

Got a bunch of beets and not sure what to do with them? You’re in luck because boiling them with a drizzle of olive oil is not only easy but brings out their natural sweetness in the simplest way possible.
Ingredients
- 4 medium beets, scrubbed clean
- A couple of cups of water, enough to cover the beets
- A splash of olive oil
- A pinch of salt
Instructions
- Fill a pot with enough water to cover the beets and bring it to a boil over high heat.
- Once boiling, add the beets and reduce the heat to medium-low, letting them simmer for about 45 minutes. Tip: The beets are done when a fork slides in easily.
- Drain the beets and let them cool until they’re comfortable to handle, about 10 minutes.
- Peel the beets by rubbing the skin off with your fingers or a paper towel. Tip: Wearing gloves can save your hands from staining.
- Slice the beets into your preferred size and drizzle with olive oil and a pinch of salt. Tip: For extra flavor, let them sit for a few minutes to absorb the oil and salt.
Cool and creamy with a hint of earthiness, these beets are perfect on their own or tossed into a salad for a pop of color and sweetness.
Lentil Soup with Soft Vegetables
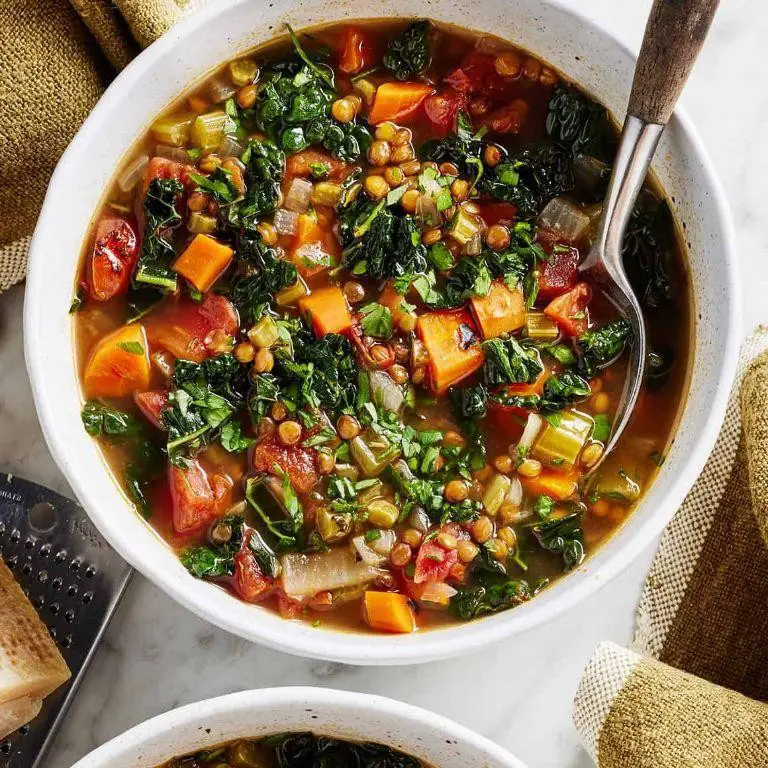
Nothing beats a warm bowl of lentil soup on a chilly evening, especially when it’s packed with soft, comforting vegetables. You’ll love how simple it is to throw together, and the flavors? Absolutely divine.
Ingredients
- 1 cup of dried lentils, rinsed
- A couple of carrots, diced
- 2 celery stalks, chopped
- 1 medium onion, finely chopped
- A splash of olive oil
- 4 cups of vegetable broth
- 1 bay leaf
- A pinch of salt and pepper
- A handful of spinach, roughly chopped
Instructions
- Heat a splash of olive oil in a large pot over medium heat.
- Add the chopped onion, carrots, and celery. Cook until they start to soften, about 5 minutes.
- Tip in the rinsed lentils, vegetable broth, and bay leaf. Bring to a boil, then reduce heat to simmer.
- Let it simmer uncovered for about 25 minutes, or until the lentils are tender. Stir occasionally to prevent sticking.
- Season with a pinch of salt and pepper. Remember, you can always add more later.
- Throw in the handful of spinach during the last 5 minutes of cooking. It’ll wilt perfectly into the soup.
- Remove the bay leaf before serving. Taste and adjust seasoning if needed.
Warm, hearty, and packed with nutrients, this lentil soup is a bowl of comfort. The vegetables add a lovely softness, making every spoonful a delight. Try topping it with a drizzle of olive oil or a squeeze of lemon for an extra zing.
Poached Pears with Cinnamon

Delightfully simple yet elegant, poached pears with cinnamon is the kind of dessert that feels fancy without any fuss. You’ll love how the spices warm up the sweet fruit, making it perfect for cozy nights in.
Ingredients
- 4 ripe but firm pears
- 2 cups of water
- 1 cup of sugar
- a splash of vanilla extract
- a couple of cinnamon sticks
- a pinch of salt
Instructions
- Peel the pears, leaving the stems on for a pretty presentation.
- In a large pot, combine the water, sugar, vanilla extract, cinnamon sticks, and salt. Bring to a simmer over medium heat, stirring until the sugar dissolves.
- Gently place the pears in the simmering liquid. If they’re not fully submerged, add a bit more water until they are.
- Cover the pot and let the pears poach for about 20 minutes, turning them halfway through to ensure even color.
- Check for doneness by piercing a pear with a knife; it should slide in easily but the pear should still hold its shape.
- Once done, remove the pears from the liquid and let them cool slightly.
- Meanwhile, increase the heat and reduce the poaching liquid by half until it’s syrupy, about 10 minutes.
- Serve the pears warm or at room temperature, drizzled with the cinnamon syrup.
Mmm, the pears turn wonderfully tender, soaking up all the spicy-sweet flavors. Try serving them with a scoop of vanilla ice cream for an extra indulgent treat.
Quinoa Porridge with Almond Milk

Got a chilly morning and craving something warm and nutritious? You’re in luck! This quinoa porridge with almond milk is your go-to comfort food that’s both easy to make and packed with goodness.
Ingredients
- 1 cup of quinoa
- 2 cups of almond milk, plus a splash more for serving
- A couple of tablespoons of maple syrup
- A pinch of salt
- A dash of cinnamon
- Handful of your favorite nuts for topping
Instructions
- Rinse the quinoa under cold water in a fine mesh strainer to remove any bitterness.
- In a medium saucepan, combine the rinsed quinoa, almond milk, and a pinch of salt. Bring to a boil over medium-high heat.
- Once boiling, reduce the heat to low and cover. Let it simmer for about 15 minutes, or until the quinoa is tender and the liquid is mostly absorbed. Tip: Stir occasionally to prevent sticking.
- Remove from heat and let it sit covered for 5 minutes to thicken up. Tip: This resting time is key for the perfect porridge texture.
- Stir in a couple of tablespoons of maple syrup and a dash of cinnamon. Adjust sweetness to your liking. Tip: For a richer flavor, toast the cinnamon in a dry pan before adding.
- Serve warm with a splash of almond milk and a handful of your favorite nuts on top.
Velvety smooth with a hint of sweetness and crunch, this porridge is a cozy bowl of happiness. Try drizzling with a bit more maple syrup or adding fresh fruit for a colorful twist.
Steamed Zucchini with Feta Cheese
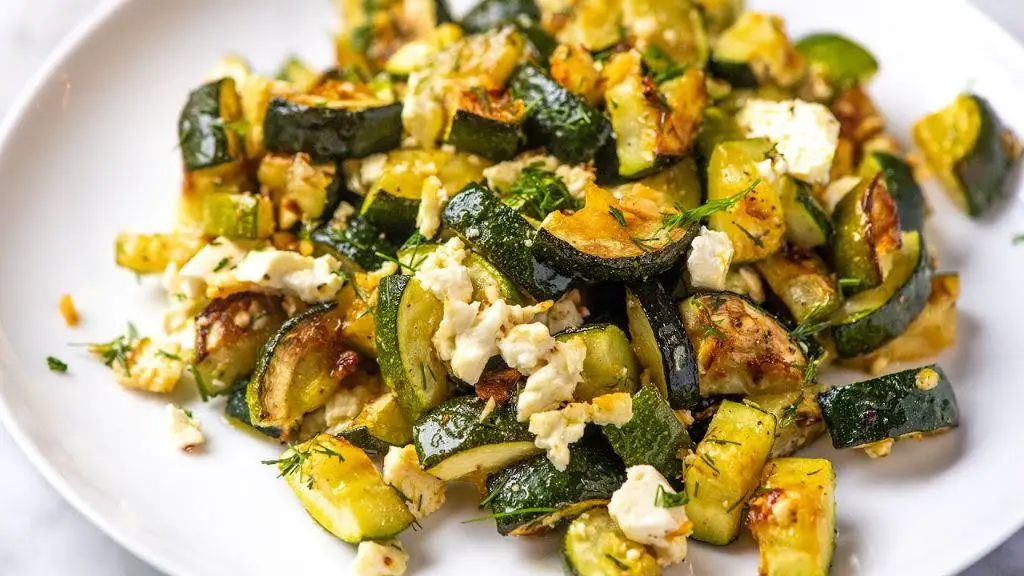
Ready to whip up something light yet flavorful? Steamed zucchini with feta cheese is your go-to for a quick, healthy side that’s bursting with freshness and a creamy tang.
Ingredients
- 2 medium zucchinis, sliced into half-moons
- A couple of tablespoons of crumbled feta cheese
- A splash of olive oil
- A pinch of salt
- A sprinkle of black pepper
- A dash of lemon juice
Instructions
- Grab your zucchinis and slice them into even half-moons, about 1/4 inch thick. Uniform slices mean even cooking.
- Heat a steamer over medium heat until the water’s boiling. Tip: If you don’t have a steamer, a colander over a pot of boiling water works just fine.
- Toss the zucchini slices into the steamer. Cover and let them steam for about 3-4 minutes. You’ll know they’re done when they’re bright green and just tender.
- Transfer the steamed zucchini to a bowl. Drizzle with a splash of olive oil and a dash of lemon juice. Tip: The lemon juice not only adds flavor but also helps keep the zucchini vibrant.
- Sprinkle with a pinch of salt and a sprinkle of black pepper. Give everything a gentle toss to coat.
- Top with a couple of tablespoons of crumbled feta cheese. Tip: For extra flavor, try using herbed feta.
This dish comes out with the zucchini perfectly tender-crisp, the feta adding a creamy saltiness, and the lemon giving it a fresh zing. Try serving it alongside grilled chicken or fish for a complete meal.
Turkey Meatballs in Tomato Sauce

Zesty and comforting, these turkey meatballs in tomato sauce are your next weeknight dinner hero. You’ll love how they’re light yet satisfying, perfect with pasta or crusty bread.
Ingredients
- 1 lb ground turkey
- 1/2 cup breadcrumbs
- 1/4 cup grated Parmesan
- 1 egg
- 2 cloves garlic, minced
- A splash of olive oil
- 1 can (28 oz) crushed tomatoes
- A couple of basil leaves, torn
- Salt and pepper, just enough to season
Instructions
- Preheat your oven to 375°F and line a baking sheet with parchment paper.
- In a bowl, mix the ground turkey, breadcrumbs, Parmesan, egg, and half the minced garlic. Season with salt and pepper.
- Roll the mixture into 1-inch balls and place them on the baking sheet. Tip: Wet your hands to prevent sticking.
- Bake for 20 minutes or until golden and firm to the touch.
- While the meatballs bake, heat a splash of olive oil in a pan over medium. Add the remaining garlic and sauté for 30 seconds until fragrant.
- Pour in the crushed tomatoes and bring to a simmer. Let it cook for 10 minutes, stirring occasionally.
- Add the baked meatballs to the sauce, gently stirring to coat. Simmer for another 5 minutes. Tip: Don’t stir too hard or the meatballs might break.
- Toss in the torn basil leaves right before serving. Tip: Fresh basil adds a bright flavor, so don’t skip it.
Light and flavorful, these meatballs are tender with a slight crisp from baking. Serve them over spaghetti or as a hearty sub sandwich filling for a twist.
Baked Apples with Raisins

Ready to dive into a cozy, comforting dessert that’s as easy to make as it is delicious? Baked apples with raisins are your go-to for a sweet treat that feels like a hug in a dish.
Ingredients
- 4 large apples (go for something firm like Honeycrisp or Granny Smith)
- A couple of tablespoons of brown sugar
- A handful of raisins
- A splash of vanilla extract
- A teaspoon of cinnamon
- A tablespoon of butter, cut into little pieces
- Half a cup of water
Instructions
- Preheat your oven to 375°F. This ensures your apples bake evenly and get that perfect tenderness.
- Core the apples carefully, leaving the bottom intact to hold all the good stuff inside. A melon baller works great for this!
- Mix the brown sugar, raisins, vanilla extract, and cinnamon in a small bowl. This combo is the heart of your dish, so make sure it’s well mixed.
- Stuff each apple with the sugar and raisin mixture. Pack it in there, but don’t overfill—they’ll expand a bit as they bake.
- Top each apple with a piece of butter. This adds a rich flavor and helps the filling get all gooey and delicious.
- Pour the water into the bottom of your baking dish. It keeps the apples moist and prevents them from drying out.
- Bake for about 30-40 minutes, until the apples are tender when poked with a fork but still hold their shape. Keep an eye on them after the 30-minute mark.
- Let them cool for a few minutes before serving. They’ll be piping hot, and this rest time lets the flavors meld even more.
Velvety soft apples with a sweet, spiced filling make this dish a winner. Serve it with a scoop of vanilla ice cream for an extra indulgent treat, or enjoy it as is for a lighter dessert.
Creamy Polenta with Parmesan

Wondering what to make for a cozy dinner that feels both fancy and comforting? You’ve got to try this creamy polenta with Parmesan—it’s like a warm hug in a bowl, and it’s easier to make than you might think.
Ingredients
- 4 cups of water
- 1 cup of polenta (not instant)
- A generous pinch of salt
- A couple of tablespoons of butter
- A splash of milk
- About a cup of grated Parmesan cheese
- Freshly ground black pepper, to finish
Instructions
- Bring the water to a boil in a medium saucepan over high heat. Tip: A heavy-bottomed pan prevents sticking.
- Once boiling, whisk in the polenta and salt. Reduce heat to low to maintain a gentle simmer.
- Cook for 25-30 minutes, stirring every 5 minutes. The polenta should thicken and pull away from the sides of the pan when it’s ready.
- Stir in the butter and milk until fully incorporated. This adds richness and creaminess.
- Remove from heat and fold in the Parmesan cheese. Tip: Freshly grated Parmesan melts better than pre-shredded.
- Season with freshly ground black pepper right before serving. Tip: A little extra Parmesan on top never hurts.
Silky smooth with a rich, cheesy flavor, this polenta is perfect as is or topped with a saucy ragù for a heartier meal. It’s also great the next day—just thin it out with a bit of water or milk when reheating.
Steamed Cod with Dill
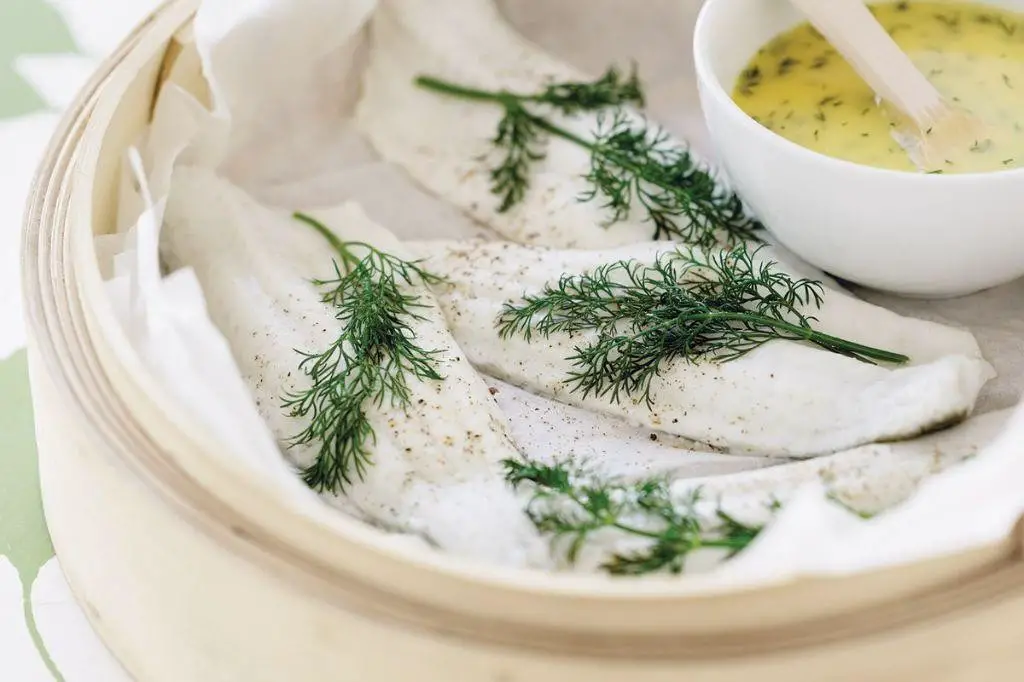
Let’s talk about a dish that’s as easy to make as it is delicious—steamed cod with dill. Perfect for those nights when you want something light yet satisfying, without spending hours in the kitchen.
Ingredients
- 1 lb cod fillets
- A couple of tablespoons of olive oil
- A splash of lemon juice
- A handful of fresh dill, chopped
- Salt and pepper, just enough to season
- A pinch of garlic powder
Instructions
- Preheat your steamer to 212°F. You want it nice and hot before the fish goes in.
- While the steamer heats up, rub the cod fillets with olive oil. This keeps them moist.
- Squeeze a splash of lemon juice over the fillets. It adds a bright flavor.
- Sprinkle the chopped dill, salt, pepper, and garlic powder over the cod. Don’t be shy with the dill—it’s the star here.
- Place the fillets in the steamer. Cover and let them cook for about 8-10 minutes. The fish is done when it flakes easily with a fork.
- Carefully remove the cod from the steamer. Tip: Use a spatula to keep the fillets intact.
Great job! The cod should be tender and flaky, with the dill and lemon shining through. Serve it over a bed of quinoa or with steamed veggies for a complete meal.
Pureed Butternut Squash Soup

Kick off your cozy meal prep with this smooth and velvety pureed butternut squash soup. It’s the perfect blend of sweet and savory, ready to warm you up from the inside out.
Ingredients
- 1 medium butternut squash, peeled and cubed
- A couple of tablespoons of olive oil
- 1 small onion, chopped
- 2 cloves of garlic, minced
- A splash of apple cider vinegar
- 4 cups of vegetable broth
- A pinch of salt and pepper
- A dash of cinnamon
- A handful of toasted pumpkin seeds for garnish
Instructions
- Preheat your oven to 400°F. Toss the cubed butternut squash with a tablespoon of olive oil and a pinch of salt on a baking sheet. Roast for 25 minutes, or until the edges start to caramelize.
- While the squash roasts, heat a splash of olive oil in a large pot over medium heat. Add the chopped onion and cook until translucent, about 5 minutes.
- Stir in the minced garlic and cook for another minute, just until fragrant. Tip: Don’t let the garlic brown, or it’ll turn bitter.
- Add the roasted squash to the pot, along with the apple cider vinegar, vegetable broth, and a dash of cinnamon. Bring to a boil, then reduce heat and simmer for 10 minutes.
- Use an immersion blender to puree the soup until smooth. If you don’t have one, a regular blender works—just blend in batches and be careful with the hot liquid. Tip: For extra creaminess, add a splash of coconut milk.
- Season with salt and pepper to taste. Tip: A little maple syrup can enhance the squash’s natural sweetness if you like it sweeter.
- Serve hot, garnished with toasted pumpkin seeds for a crunchy contrast.
Finished with a silky texture that hugs your spoon, this soup’s rich flavor profile makes it a standout. Try swirling in a little Greek yogurt for a tangy twist or pairing it with crusty bread for dipping.
Rice Pudding with Vanilla

Think you’ve tried every comfort food out there? Let me introduce you to a classic that’s both simple and satisfying: rice pudding with vanilla. It’s creamy, it’s sweet, and it’s got that cozy vibe you’re looking for.
Ingredients
- 1 cup of white rice
- 4 cups of whole milk
- A splash of vanilla extract
- 1/2 cup of sugar
- A pinch of salt
- A couple of cinnamon sticks for flavor
Instructions
- Rinse the white rice under cold water until the water runs clear. This removes excess starch and prevents the pudding from getting too sticky.
- In a medium saucepan, combine the rinsed rice, whole milk, vanilla extract, sugar, and a pinch of salt. Stir well to mix everything together.
- Drop in a couple of cinnamon sticks for that warm, spicy flavor. Tip: If you don’t have cinnamon sticks, a teaspoon of ground cinnamon works just fine.
- Bring the mixture to a gentle boil over medium heat, then reduce the heat to low. Simmer for about 25 minutes, stirring occasionally to prevent the rice from sticking to the bottom of the pan.
- After 25 minutes, check the rice. It should be tender and the mixture thick and creamy. If it’s too thick, add a splash more milk to loosen it up.
- Remove the cinnamon sticks (if using) and let the pudding cool for a few minutes before serving. Tip: The pudding will thicken as it cools, so don’t worry if it seems a bit runny at first.
- Serve warm or chilled, depending on your preference. Tip: For an extra touch, sprinkle a little cinnamon on top before serving.
Ultimate comfort in a bowl, this rice pudding is creamy with just the right amount of sweetness. The vanilla and cinnamon add a warm depth that makes it hard to stop at just one serving. Try it with a dollop of whipped cream or fresh berries for a little twist.
Conclusion
Now that you’ve discovered these 18 soothing diverticulitis recipes, your journey to a happier gut begins! Each dish is crafted to comfort and nourish, making meal planning a breeze. We’d love to hear which recipes become your favorites—drop us a comment below. And if you found this roundup helpful, why not share the love? Pin this article on Pinterest to keep these gut-friendly ideas handy for later!