Ever find yourself craving something light yet flavorful, healthy but utterly delicious? Japanese cuisine, with its emphasis on fresh vegetables and simple, clean flavors, offers a treasure trove of dishes that are as nourishing as they are delightful. From crisp tempura to hearty miso soups, our roundup of 18 delicious Japanese vegetable recipes is your passport to a world of healthy eating that doesn’t skimp on taste. Let’s dive in!
Vegetable Tempura
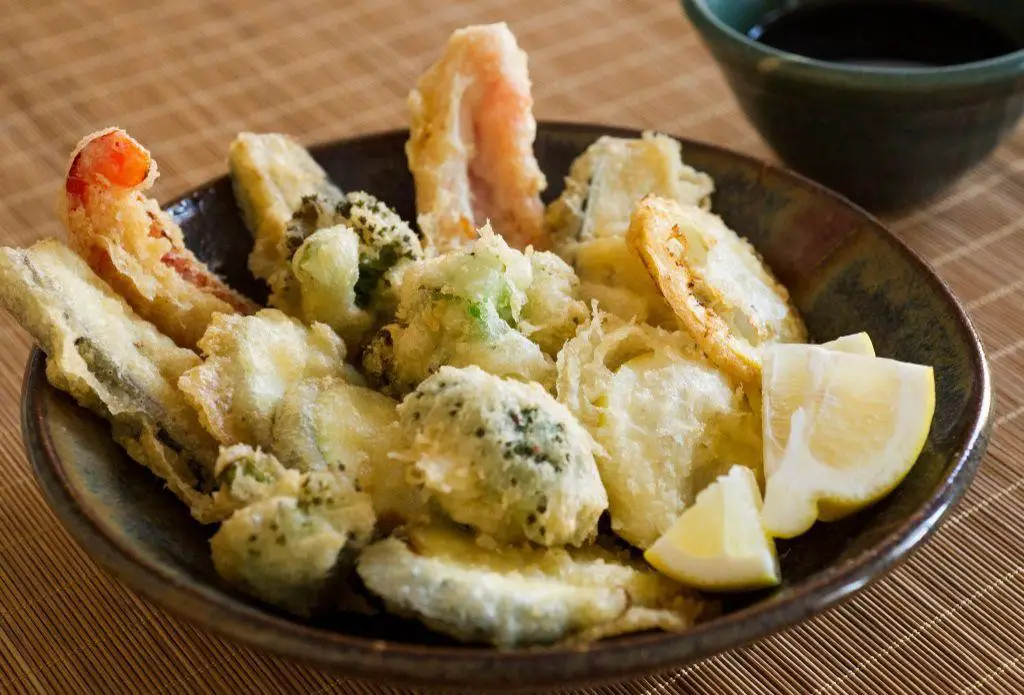
Buckle up, foodies! We’re diving into the crispy, crunchy world of Vegetable Tempura, where every bite is a golden ticket to flavor town. This dish is so light and airy, it’s like the vegetables decided to wear their fanciest fried coats to the party.
Ingredients
- For the batter:
- 1 cup ice-cold water
- 1 large egg, cold
- 1 cup all-purpose flour
- For frying:
- 2 cups vegetable oil
- For the vegetables:
- 1 sweet potato, sliced into 1/4-inch rounds
- 1 zucchini, sliced into 1/4-inch sticks
- 1 bell pepper, sliced into rings
Instructions
- Heat the vegetable oil in a deep fryer or large pot to 375°F. Use a thermometer to ensure accuracy—this is key for that perfect crunch.
- While the oil heats, whisk the egg in a medium bowl, then gently stir in the ice-cold water. Tip: The colder the batter, the crispier the tempura.
- Sift the flour into the egg mixture and stir lightly; lumps are okay. Overmixing leads to a tough batter, and we’re not making armor here.
- Dip each vegetable piece into the batter, letting excess drip off, then carefully add to the hot oil. Don’t overcrowd the pot—give them space to dance.
- Fry for 2-3 minutes until golden and crispy. Listen for the sizzle to slow down, a sign they’re done.
- Remove with a slotted spoon and drain on paper towels. Tip: A wire rack over a baking sheet works even better for keeping them crispy.
Unbelievably crispy on the outside, tender on the inside, this Vegetable Tempura is a textural dream. Serve it with a side of soy sauce mixed with a hint of ginger for dipping, or get wild and sprinkle with some togarashi for a spicy kick. Either way, it’s a guaranteed crowd-pleaser.
Japanese Eggplant with Miso
Just when you thought eggplant couldn’t get any more exciting, along comes this Japanese Eggplant with Miso recipe to prove you wrong. Packed with umami and a hint of sweetness, it’s the kind of dish that makes you forget all about the ‘I don’t like eggplant’ phase of your life.
Ingredients
- For the eggplant:
- 2 medium Japanese eggplants, sliced into 1/2-inch rounds
- 2 tbsp olive oil
- For the miso glaze:
- 2 tbsp white miso paste
- 1 tbsp mirin
- 1 tbsp soy sauce
- 1 tbsp sugar
- 1 tbsp water
- For garnish:
- 1 tbsp toasted sesame seeds
- 2 green onions, thinly sliced
Instructions
- Preheat your oven to 400°F (200°C) and line a baking sheet with parchment paper for easy cleanup.
- Arrange the eggplant rounds on the prepared baking sheet and brush both sides with olive oil. Tip: Don’t skimp on the oil; it helps the eggplant get beautifully caramelized.
- Roast in the preheated oven for 20 minutes, flipping halfway through, until the eggplant is tender and golden.
- While the eggplant roasts, whisk together the miso paste, mirin, soy sauce, sugar, and water in a small bowl until smooth. Tip: If the glaze is too thick, add a teaspoon more water at a time until it’s pourable.
- Brush the miso glaze over the roasted eggplant rounds and return to the oven for 5 minutes, just until the glaze is bubbly and slightly darkened.
- Sprinkle with toasted sesame seeds and green onions before serving. Tip: For an extra crunch, add a sprinkle of crushed peanuts or almonds.
Yum doesn’t even begin to cover it—this dish is a textural dream with creamy eggplant, sticky-sweet glaze, and a pop of freshness from the green onions. Try serving it over steamed rice or alongside grilled fish for a meal that’s anything but ordinary.
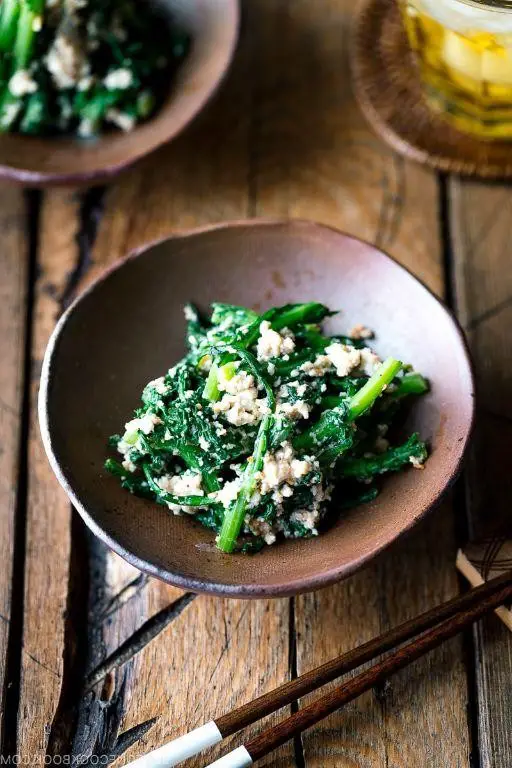
Spinach Gomaae
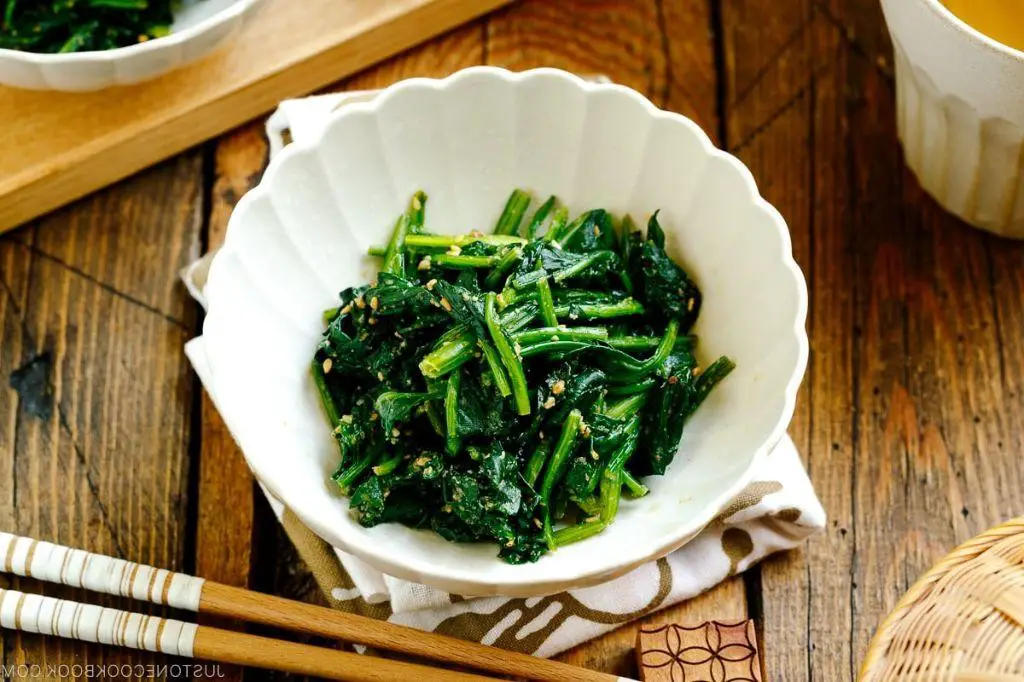
Today’s the day we ditch the boring greens and jazz up our veggie game with Spinach Gomaae, a dish that’s as fun to say as it is to eat. Trust us, your taste buds will throw a party, and your spinach skepticism will vanish faster than leftovers at a potluck.
Ingredients
- For the spinach:
- 1 pound fresh spinach, stems removed
- 1 teaspoon salt
- For the sauce:
- 3 tablespoons toasted sesame seeds
- 2 tablespoons sugar
- 2 tablespoons soy sauce
- 1 tablespoon mirin
Instructions
- Bring a large pot of water to a rolling boil and add the salt.
- Blanch the spinach for exactly 30 seconds, then immediately transfer it to a bowl of ice water to stop the cooking process. Tip: This keeps the spinach bright green and perfectly tender.
- Drain the spinach and squeeze out as much water as possible. Chop it roughly and set aside.
- In a mortar and pestle, grind the toasted sesame seeds until they’re mostly crushed but still a bit chunky. Tip: For a smoother sauce, grind the seeds finer; for more texture, leave them chunkier.
- Mix the ground sesame seeds with sugar, soy sauce, and mirin in a small bowl until well combined.
- Toss the chopped spinach with the sesame sauce until evenly coated. Tip: Let it sit for 10 minutes before serving to allow the flavors to meld beautifully.
Unbelievably easy, right? This Spinach Gomaae brings a nutty, sweet, and savory punch with a texture that’s delightfully tender yet crisp. Serve it as a chic side or pile it atop a bowl of steaming rice for a simple yet stunning meal.
Daikon Radish Salad
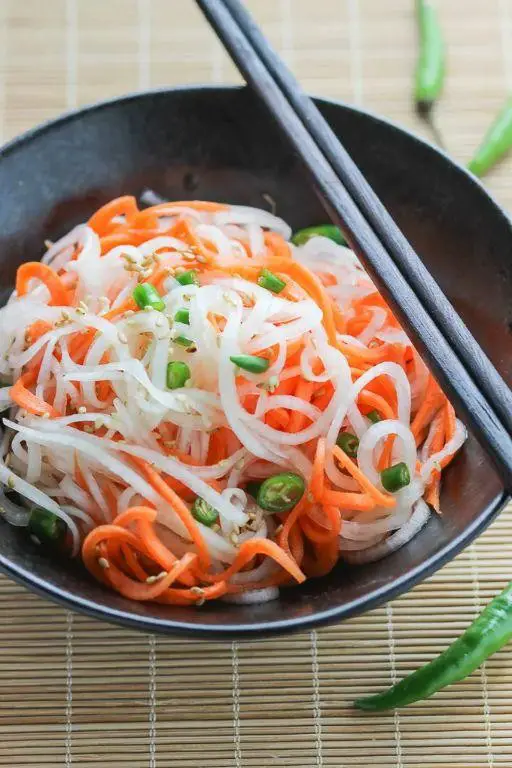
Prepare to have your taste buds tickled by this crunchy, refreshing Daikon Radish Salad that’s as easy to whip up as it is to devour. Perfect for those days when you’re craving something light yet packed with a punch, this salad is your go-to dish that promises to be a crowd-pleaser.
Ingredients
- For the salad:
- 1 large daikon radish, peeled and julienned
- 1 cup carrots, julienned
- 1/4 cup cilantro, chopped
- For the dressing:
- 2 tbsp rice vinegar
- 1 tbsp soy sauce
- 1 tbsp honey
- 1 tsp sesame oil
- 1/2 tsp red pepper flakes
Instructions
- In a large bowl, combine the julienned daikon radish and carrots.
- In a small bowl, whisk together rice vinegar, soy sauce, honey, sesame oil, and red pepper flakes until well blended. Tip: For a smoother dressing, heat the honey for 10 seconds in the microwave before whisking.
- Pour the dressing over the vegetables and toss gently to coat. Tip: Use your hands to toss the salad for an even distribution of dressing.
- Let the salad sit for 10 minutes to allow the flavors to meld. Tip: The longer it sits, the more flavorful it becomes, but don’t let it sit too long or the veggies will lose their crunch.
- Sprinkle chopped cilantro on top before serving.
So there you have it—a salad that’s a symphony of crunch, zest, and a hint of spice. Serve it alongside grilled meats or as a standalone snack for a refreshing bite that’s anything but boring.
Kabocha Squash Soup

Let’s face it, kabocha squash is the underdog of the squash world, but this soup is about to make it the star of your dinner table. Creamy, dreamy, and packed with flavor, it’s the comfort food you didn’t know you needed.
Ingredients
- For the soup:
- 1 medium kabocha squash, peeled and cubed (about 4 cups)
- 2 tbsp olive oil
- 1 medium onion, diced
- 2 cloves garlic, minced
- 4 cups vegetable broth
- 1 cup coconut milk
- 1 tsp salt
- 1/2 tsp black pepper
- For the garnish:
- 1/4 cup pumpkin seeds, toasted
- 2 tbsp fresh cilantro, chopped
Instructions
- Preheat your oven to 400°F. Toss the kabocha squash cubes with 1 tbsp olive oil, salt, and pepper. Spread them on a baking sheet and roast for 25 minutes, or until fork-tender. Tip: Don’t overcrowd the baking sheet to ensure even roasting.
- In a large pot, heat the remaining 1 tbsp olive oil over medium heat. Add the onion and garlic, sautéing until translucent, about 5 minutes. Tip: Stir frequently to prevent burning.
- Add the roasted squash and vegetable broth to the pot. Bring to a boil, then reduce heat and simmer for 10 minutes.
- Using an immersion blender, puree the soup until smooth. Stir in the coconut milk and adjust seasoning if necessary. Tip: For a silkier texture, strain the soup through a fine-mesh sieve.
- Serve hot, garnished with toasted pumpkin seeds and fresh cilantro.
Marvel at how this soup balances the kabocha’s natural sweetness with a savory depth, all wrapped up in a velvety texture. Try serving it in hollowed-out mini pumpkins for a festive twist that’ll have your guests snapping pics before they dig in.
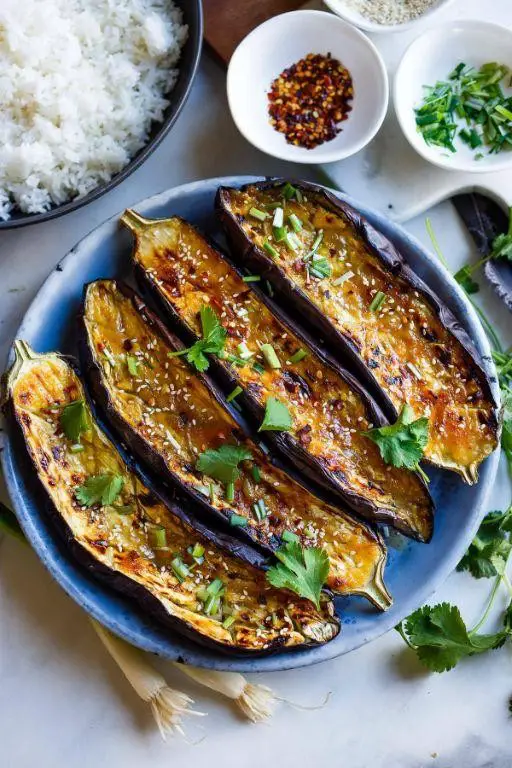
Nasu Dengaku (Miso Glazed Eggplant)
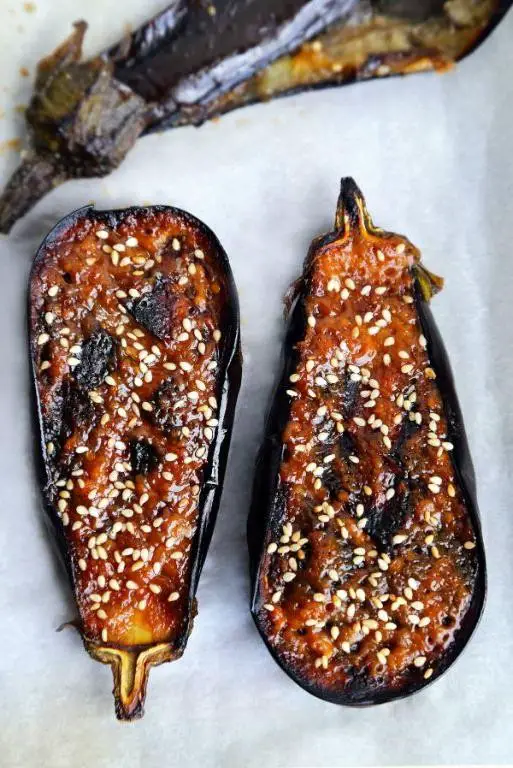
Oh boy, are you in for a treat with this Nasu Dengaku recipe that’s about to make your taste buds do a happy dance. Imagine tender eggplant slathered in a sweet and savory miso glaze, broiled to perfection – it’s like the eggplant dressed up for a fancy party and forgot to tell you.
Ingredients
- For the eggplant:
- 2 medium eggplants
- 2 tbsp vegetable oil
- For the miso glaze:
- 3 tbsp white miso paste
- 2 tbsp mirin
- 1 tbsp sake
- 1 tbsp sugar
- 1 tsp grated ginger
- For garnish:
- 1 tbsp toasted sesame seeds
- 1 green onion, thinly sliced
Instructions
- Preheat your oven to 400°F (200°C) and line a baking sheet with parchment paper.
- Cut the eggplants in half lengthwise and score the flesh in a crisscross pattern to help it absorb the glaze better.
- Brush the eggplant halves with vegetable oil and place them cut-side down on the baking sheet. Bake for 20 minutes until they’re soft and slightly golden.
- While the eggplants bake, whisk together the miso paste, mirin, sake, sugar, and grated ginger in a small bowl until smooth.
- Flip the eggplants cut-side up and spread the miso glaze evenly over each half. Broil on high for 3-5 minutes until the glaze is bubbly and caramelized.
- Sprinkle with toasted sesame seeds and sliced green onion before serving.
Ready to dive into this umami-packed delight? The eggplant turns meltingly soft under its sticky, glossy coat, with a hint of ginger adding a little zing. Serve it as a show-stopping side or pile it on rice for a meal that’s anything but basic.
Kinpira Gobo (Burdock Root)
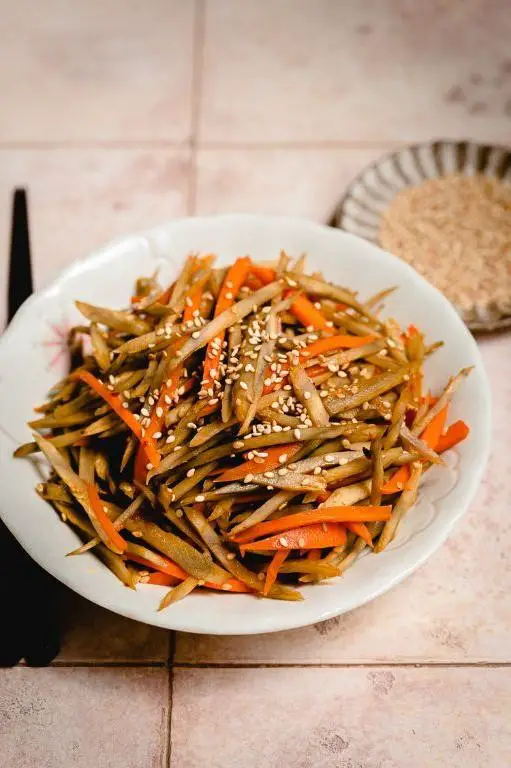
Craving something crunchy, savory, and a tad exotic for your next meal? Kinpira Gobo, a Japanese stir-fry starring burdock root, is here to shake up your veggie game with its earthy charm and a hint of sweetness.
Ingredients
- For the stir-fry:
- 1 large burdock root (about 1 cup, julienned)
- 1 medium carrot (about 1/2 cup, julienned)
- 1 tbsp sesame oil
- For the sauce:
- 1 tbsp soy sauce
- 1 tbsp mirin
- 1 tsp sugar
- 1/2 tsp red pepper flakes (optional)
- For garnish:
- 1 tsp sesame seeds
Instructions
- Peel the burdock root and carrot, then julienne them into thin matchsticks. Tip: Soak the burdock in water for 5 minutes to prevent browning and remove some bitterness.
- Heat sesame oil in a large skillet over medium-high heat (350°F). Add the burdock and carrot, stirring frequently for about 5 minutes until they start to soften.
- While the veggies cook, whisk together soy sauce, mirin, sugar, and red pepper flakes in a small bowl. Tip: Adjust the sugar if you prefer a sweeter or more savory dish.
- Pour the sauce over the veggies, reducing the heat to medium. Stir well to coat and cook for another 3-4 minutes until the liquid is mostly absorbed. Tip: Don’t overcook; the veggies should retain some crunch.
- Sprinkle with sesame seeds before serving. Serve hot or at room temperature.
Lusciously crunchy with a perfect balance of sweet and savory, Kinpira Gobo is a standout side that pairs beautifully with rice or noodles. Try it atop a bowl of steaming ramen for an extra layer of texture and flavor!
Japanese Cucumber Sunomono

Wow, have you ever met a dish that’s as refreshing as a cool breeze on a hot summer day? That’s Japanese Cucumber Sunomono for you—a zesty, vinegary salad that’s like a spa day for your taste buds, minus the awkward small talk.
Ingredients
- For the salad:
- 2 large cucumbers, thinly sliced
- 1 tsp salt
- For the dressing:
- 1/4 cup rice vinegar
- 2 tbsp sugar
- 1/2 tsp salt
- 1 tbsp sesame seeds, toasted
Instructions
- Place the thinly sliced cucumbers in a colander, sprinkle with 1 tsp salt, and let them sit for 10 minutes to draw out excess water. Tip: This step ensures your salad isn’t watery and keeps the crunch intact.
- Rinse the cucumbers under cold water to remove the salt, then pat them dry with a paper towel. Tip: Be gentle to avoid bruising the cucumbers.
- In a small bowl, whisk together the rice vinegar, sugar, and 1/2 tsp salt until the sugar is completely dissolved. Tip: If you’re feeling fancy, a dash of soy sauce can add an umami kick.
- Toss the dried cucumbers with the dressing until evenly coated, then sprinkle with toasted sesame seeds.
- Let the salad marinate in the fridge for at least 30 minutes before serving to allow the flavors to meld.
Kick back and enjoy this crisp, tangy delight that’s perfect as a palate cleanser or a light side. The sesame seeds add a nutty crunch that’ll have you reaching for seconds—maybe even thirds.
Renkon no Nimono (Simmered Lotus Root)
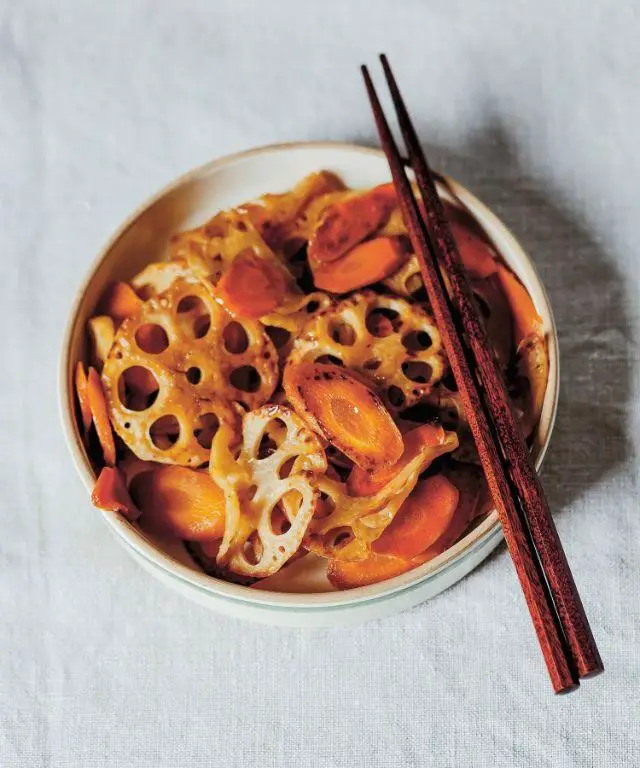
Oh, the joys of discovering a dish that’s as fun to say as it is to eat! ‘Renkon no Nimono’ might sound like a spell from your favorite wizard series, but it’s actually a delightful Japanese simmered lotus root dish that’s about to become your new kitchen obsession.
Ingredients
- For the simmering liquid:
- 1 cup dashi stock
- 2 tbsp soy sauce
- 2 tbsp mirin
- 1 tbsp sugar
- For the lotus root:
- 1 large lotus root, peeled and sliced into 1/4-inch rounds
- 1 tsp vinegar (to prevent discoloration)
Instructions
- Start by soaking the sliced lotus root in a bowl of water mixed with 1 tsp vinegar for 5 minutes to keep it looking fresh and prevent discoloration.
- In a medium saucepan, combine 1 cup dashi stock, 2 tbsp soy sauce, 2 tbsp mirin, and 1 tbsp sugar. Bring to a gentle simmer over medium heat, stirring until the sugar dissolves completely.
- Drain the lotus root and add it to the simmering liquid. Reduce the heat to low, cover, and let it cook for 15 minutes, or until the lotus root is tender but still crisp.
- Remove the lid and increase the heat to medium. Let the liquid reduce for about 5 minutes, or until it thickens slightly and coats the lotus root beautifully.
- Turn off the heat and let the dish cool slightly before serving. This allows the flavors to meld together even more.
With its crunchy texture and a sweet-savory glaze that’s downright addictive, this Renkon no Nimono is a showstopper. Try serving it atop a bowl of steamed rice for a simple yet satisfying meal, or as a unique side dish that’ll have everyone asking for seconds.
Okra with Soy Sauce and Bonito Flakes

Y’all ready to dive into a dish that’s as fun to make as it is to eat? Okra with Soy Sauce and Bonito Flakes is here to shake up your veggie game with its umami-packed punch and a texture that’s anything but boring.
Ingredients
- For the okra:
- 1 lb fresh okra, stems trimmed
- 1 tbsp olive oil
- For the sauce:
- 2 tbsp soy sauce
- 1 tbsp mirin
- 1 tsp sugar
- For garnish:
- 1/4 cup bonito flakes
Instructions
- Preheat your skillet over medium heat (about 350°F) and add the olive oil. Swirl to coat the pan evenly.
- Add the okra to the skillet in a single layer. Let them cook undisturbed for 3 minutes to get a nice sear.
- Flip the okra and cook for another 3 minutes. They should be bright green and slightly tender.
- While the okra cooks, whisk together the soy sauce, mirin, and sugar in a small bowl until the sugar dissolves.
- Pour the sauce over the okra, stirring gently to coat. Cook for 1 minute more, allowing the sauce to thicken slightly.
- Remove from heat and transfer the okra to a serving dish. Immediately sprinkle with bonito flakes, which will dance and curl from the heat.
How about that for a showstopper? The okra’s slight crunch pairs perfectly with the silky sauce, while the bonito flakes add a smoky depth. Serve it over steamed rice or as a bold side to grilled fish for a meal that’s anything but ordinary.
Japanese Sweet Potato Salad
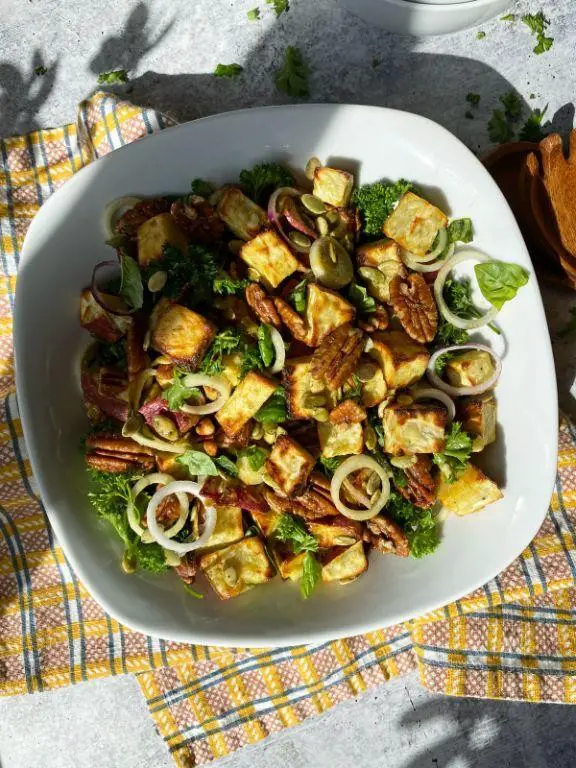
Ready to jazz up your salad game with something that’s as fun to make as it is to eat? Let’s dive into the world of Japanese Sweet Potato Salad, where every bite is a playful mix of sweet, savory, and downright delicious.
Ingredients
- For the salad:
- 2 large Japanese sweet potatoes, peeled and cubed
- 1 tbsp olive oil
- 1/2 tsp salt
- For the dressing:
- 1/4 cup mayonnaise
- 1 tbsp rice vinegar
- 1 tsp honey
- 1/2 tsp garlic powder
- For garnish:
- 2 tbsp chopped green onions
- 1 tbsp toasted sesame seeds
Instructions
- Preheat your oven to 400°F (200°C). This ensures your sweet potatoes get perfectly crispy.
- Toss the cubed sweet potatoes with olive oil and salt in a large bowl until evenly coated. Tip: Uniform pieces mean even cooking!
- Spread the sweet potatoes on a baking sheet in a single layer. Roast for 25 minutes, flipping halfway, until golden and fork-tender.
- While the potatoes roast, whisk together mayonnaise, rice vinegar, honey, and garlic powder in a small bowl for the dressing. Tip: Adjust honey to balance the tanginess to your liking.
- Let the roasted sweet potatoes cool for 5 minutes, then gently fold in the dressing until evenly coated.
- Sprinkle with chopped green onions and toasted sesame seeds before serving. Tip: Toasting sesame seeds enhances their nutty flavor.
Just imagine the creamy dressing clinging to each caramelized sweet potato cube, with a crunch from sesame seeds and a fresh bite from green onions. Serve it as a side, or get creative by piling it onto toasted sourdough for an open-faced sandwich that’s anything but ordinary.
Shungiku (Chrysanthemum Leaves) Salad
Unbelievably fresh and slightly peppery, shungiku leaves are the unsung heroes of the salad world, ready to jazz up your bowl with their unique flavor and vibrant green charm. Let’s dive into making a Shungiku Salad that’s as easy to whip up as it is delightful to devour.
Ingredients
- For the salad:
- 4 cups shungiku (chrysanthemum leaves), washed and dried
- 1 cup cherry tomatoes, halved
- 1/2 cucumber, thinly sliced
- For the dressing:
- 2 tbsp soy sauce
- 1 tbsp sesame oil
- 1 tbsp rice vinegar
- 1 tsp honey
- 1/2 tsp grated ginger
Instructions
- In a large bowl, combine the shungiku leaves, cherry tomatoes, and cucumber slices. Tip: For extra crunch, chill the cucumber before slicing.
- In a small bowl, whisk together the soy sauce, sesame oil, rice vinegar, honey, and grated ginger until well blended. Tip: Adjust the honey to balance the dressing’s sweetness to your liking.
- Drizzle the dressing over the salad and toss gently to coat all the ingredients evenly. Tip: Use your hands to toss the salad for a more even distribution of dressing without bruising the leaves.
- Serve immediately to enjoy the crisp texture and fresh flavors at their best.
Perfectly balanced between peppery and sweet, this Shungiku Salad is a textural dream with every bite. Try topping it with toasted sesame seeds for an extra nutty crunch or serve alongside grilled fish for a light, refreshing meal.
Hijiki Seaweed Salad
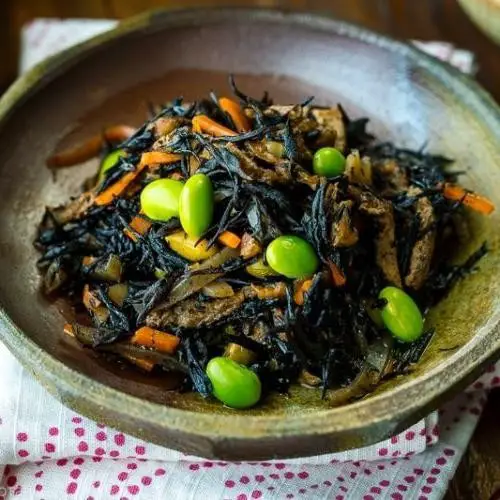
Now, let’s dive into the ocean of flavors with a dish that’s as nutritious as it is delicious—Hijiki Seaweed Salad. This under-the-sea veggie brings a unique texture and a punch of umami that’ll make your taste buds do the backstroke.
Ingredients
- For the salad:
- 1 cup dried hijiki seaweed
- 2 cups water (for soaking)
- 1 medium carrot, julienned
- 1/2 cup edamame, shelled
- For the dressing:
- 2 tbsp soy sauce
- 1 tbsp rice vinegar
- 1 tbsp sesame oil
- 1 tsp sugar
- 1/2 tsp grated ginger
Instructions
- Soak the dried hijiki seaweed in 2 cups of water for 30 minutes until it expands and softens. Tip: The seaweed will triple in size, so use a large bowl.
- Drain the hijiki seaweed thoroughly and set aside. Tip: Squeeze out excess water with your hands to prevent a soggy salad.
- In a medium bowl, combine the soaked hijiki, julienned carrot, and shelled edamame.
- In a small bowl, whisk together soy sauce, rice vinegar, sesame oil, sugar, and grated ginger until the sugar dissolves. Tip: Taste the dressing and adjust the sweetness or acidity to your liking before adding it to the salad.
- Pour the dressing over the salad ingredients and toss gently to combine.
- Let the salad marinate in the refrigerator for at least 1 hour before serving to allow the flavors to meld.
Zesty and refreshing, this Hijiki Seaweed Salad is a crunchy, savory delight with a hint of sweetness from the dressing. Serve it chilled as a side dish or top it with sesame seeds for an extra nutty crunch.
Japanese Mushroom Rice
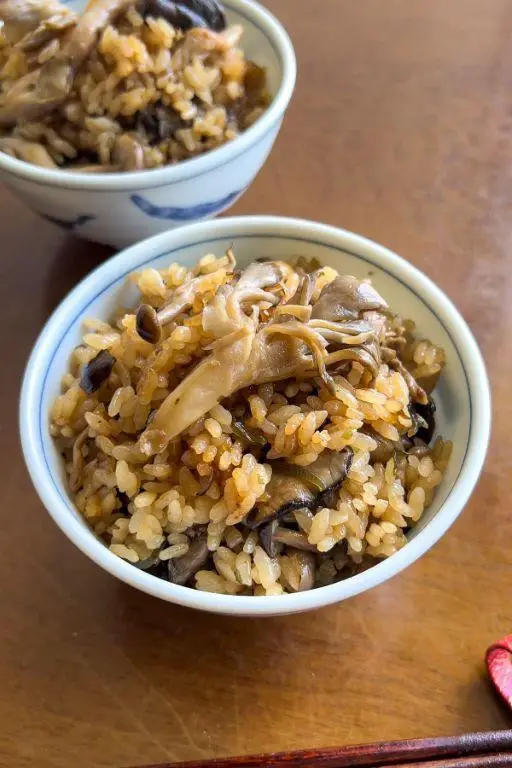
Buckle up, flavor adventurers! Today, we’re diving fork-first into a dish that’s like a cozy hug from your grandma, if your grandma was a Japanese chef who really knew her way around mushrooms. This Japanese Mushroom Rice is the umami-packed, comfort food champion your weeknights have been begging for.
Ingredients
- For the rice:
- 2 cups short-grain Japanese rice
- 2 1/2 cups water
- For the mushrooms:
- 1 tbsp vegetable oil
- 1 lb mixed mushrooms (shiitake, enoki, and maitake), sliced
- 2 tbsp soy sauce
- 1 tbsp mirin
- 1 tsp sugar
- For garnish:
- 2 green onions, thinly sliced
- 1 tbsp toasted sesame seeds
Instructions
- Rinse the rice under cold water until the water runs clear, then drain. This removes excess starch for fluffier rice.
- Combine the rinsed rice and water in a rice cooker. Cook according to the manufacturer’s instructions. Tip: No rice cooker? A heavy-bottomed pot with a tight-fitting lid works too—just simmer on low for 20 minutes after bringing to a boil.
- While the rice cooks, heat the vegetable oil in a large skillet over medium-high heat. Add the mushrooms and sauté until they’re golden and have released their moisture, about 5 minutes.
- Stir in the soy sauce, mirin, and sugar. Cook for another 2 minutes until the mushrooms are glazed and fragrant. Tip: Don’t overcrowd the pan—give those mushrooms room to breathe and brown properly.
- Fluff the cooked rice with a fork, then gently fold in the glazed mushrooms until evenly distributed.
- Garnish with green onions and sesame seeds before serving. Tip: For an extra flavor boost, let the rice sit covered for 5 minutes after mixing to let the flavors meld.
Craving a crunch? Serve this dish with a side of crispy seaweed snacks for a textural contrast that’ll make your taste buds do a happy dance. The rice is perfectly sticky, the mushrooms are savory-sweet, and every bite is a little celebration of simplicity and flavor.
Tofu and Vegetable Miso Soup
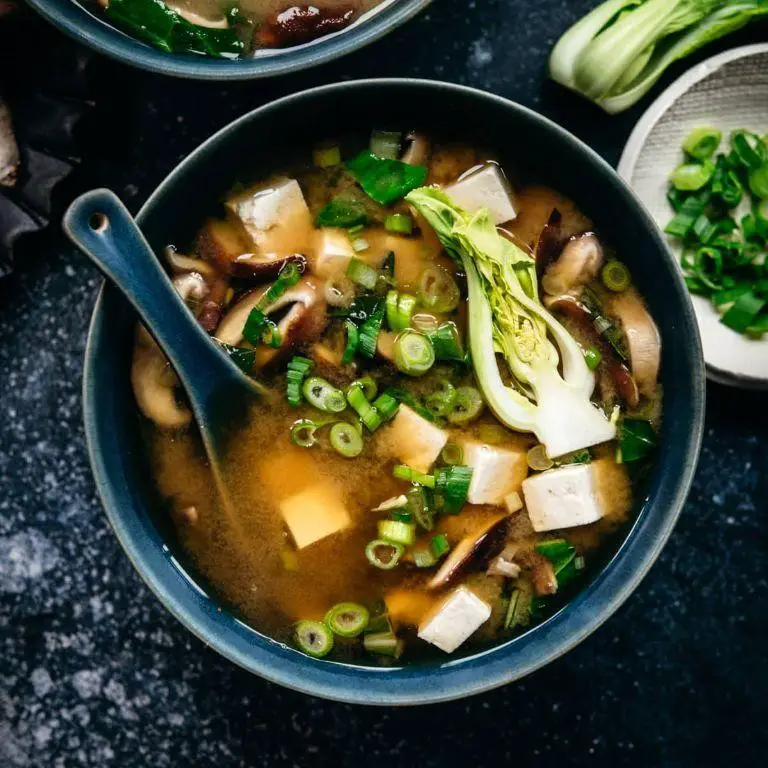
Just when you thought miso soup couldn’t get any more comforting, we’re throwing tofu and a garden’s worth of veggies into the mix to create a bowl of umami-packed bliss that’ll have you saying, ‘More, please!’
Ingredients
- For the broth:
- 4 cups water
- 1/4 cup white miso paste
- For the veggies and tofu:
- 1 cup diced tofu (firm or extra firm)
- 1 cup sliced mushrooms
- 1/2 cup chopped carrots
- 1/2 cup chopped green onions
- 1 cup baby spinach
Instructions
- In a medium pot, bring 4 cups of water to a gentle boil over medium-high heat.
- Reduce the heat to low and whisk in 1/4 cup of white miso paste until fully dissolved. Tip: Avoid boiling the miso to preserve its delicate flavors.
- Add 1 cup of diced tofu, 1 cup of sliced mushrooms, and 1/2 cup of chopped carrots to the broth. Simmer for 5 minutes, or until the carrots are tender. Tip: Cut the tofu into small cubes for quicker cooking.
- Stir in 1/2 cup of chopped green onions and 1 cup of baby spinach. Cook for another 2 minutes, just until the spinach wilts. Tip: Adding the greens last keeps them vibrant and full of nutrients.
- Remove the pot from the heat and let the soup sit for a minute before serving. This allows the flavors to meld beautifully.
Ladle this hearty miso soup into bowls and marvel at the silky tofu, crisp-tender veggies, and that deeply savory broth. For an extra kick, drizzle with a bit of chili oil or sprinkle with sesame seeds before diving in.
Japanese Pickled Vegetables (Tsukemono)
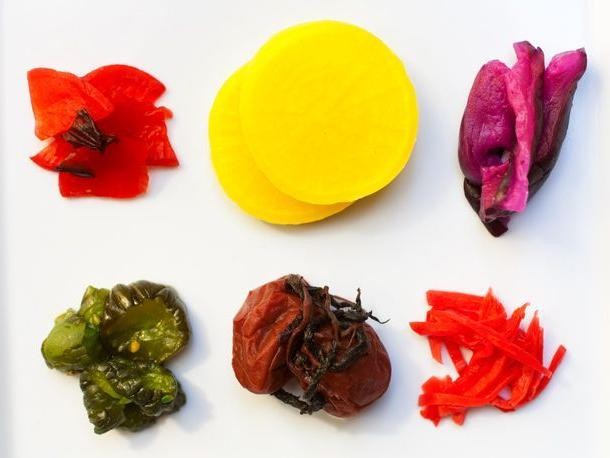
Yowza! If you’re looking to add a crunch to your life that’s more exciting than stepping on a stray LEGO, Japanese Pickled Vegetables (Tsukemono) are here to save the day. These vibrant, tangy treats are like a party in your mouth, and guess what? You’re invited!
Ingredients
- For the brine:
- 1 cup water
- 1/2 cup rice vinegar
- 2 tbsp sugar
- 1 tbsp salt
- For the vegetables:
- 1 cucumber, thinly sliced
- 1 carrot, julienned
- 1 daikon radish, thinly sliced
Instructions
- In a small saucepan, combine water, rice vinegar, sugar, and salt. Bring to a boil over medium heat, stirring until sugar and salt are completely dissolved. Tip: This is your brine’s moment to shine—make sure it’s clear and smooth!
- Place the sliced cucumber, julienned carrot, and sliced daikon radish in a large, clean jar. Tip: Pack them snugly but don’t squish—these veggies need their personal space to pickle properly.
- Pour the hot brine over the vegetables until they are completely submerged. Let it cool to room temperature. Tip: Patience is key here; rushing this step is like skipping the plot in a movie—you’ll miss the good part!
- Once cooled, seal the jar and refrigerate for at least 24 hours before serving. The longer they sit, the more flavorful they become.
Zesty and crisp, these Tsukemono are the perfect sidekick to your sushi night or a bold solo act on a cheese board. Either way, they’re guaranteed to steal the spotlight with their vibrant colors and punchy flavor.
Grilled Shishito Peppers

Yowza! If you’re looking for a snack that’s equal parts easy, exciting, and slightly unpredictable (will it be mild or will it be spicy? The shishito roulette is real!), then these grilled shishito peppers are about to become your new obsession.
Ingredients
- For the peppers:
- 1 lb shishito peppers
- 1 tbsp olive oil
- 1/2 tsp sea salt
- For serving:
- 1 lemon, cut into wedges
Instructions
- Preheat your grill to medium-high heat (about 400°F). Tip: A well-heated grill ensures those beautiful char marks without overcooking the peppers.
- In a large bowl, toss the shishito peppers with olive oil and sea salt until evenly coated. Tip: Don’t skip the oil—it’s the secret to getting that perfect blister on the peppers.
- Place the peppers on the grill in a single layer. Grill for 2-3 minutes per side, or until they’re charred and blistered. Tip: Keep an eye on them; shishitos can go from perfectly charred to overly crispy in a flash.
- Remove the peppers from the grill and transfer them to a serving plate. Squeeze fresh lemon juice over the top before serving.
Crunchy, smoky, with a hint of citrus tang, these grilled shishito peppers are a textural dream. Serve them straight off the grill with a cold drink in hand for the ultimate summer snack experience.
Vegetable Sushi Rolls

Picture this: you’re about to dive into the world of sushi, but with a twist that even your veggie-phobic friend can’t resist. Vegetable Sushi Rolls are here to save your dinner plans with their vibrant colors and crunch that’ll make you forget there’s no fish in sight.
Ingredients
- For the rice:
- 2 cups sushi rice
- 2 cups water
- 1/4 cup rice vinegar
- 2 tbsp sugar
- 1 tsp salt
- For the filling:
- 1 avocado, sliced
- 1 cucumber, julienned
- 1 carrot, julienned
- 1/2 red bell pepper, julienned
- For assembly:
- 4 sheets nori
- 1 tbsp sesame seeds
- 1/2 cup water (for sealing)
Instructions
- Rinse the sushi rice under cold water until the water runs clear, then drain well.
- Combine the rice and 2 cups water in a rice cooker or pot. Cook according to your rice cooker’s instructions or bring to a boil, then simmer covered for 20 minutes.
- While the rice cooks, mix rice vinegar, sugar, and salt in a small bowl until dissolved. Tip: Warming the mixture slightly helps dissolve the sugar faster.
- Spread the cooked rice on a tray, drizzle with the vinegar mixture, and fold gently to combine without mashing the rice. Let it cool to room temperature.
- Place a nori sheet on a bamboo mat. With wet hands, spread a thin layer of rice over the nori, leaving a 1-inch border at the top.
- Sprinkle sesame seeds over the rice, then arrange avocado, cucumber, carrot, and bell pepper strips horizontally near the bottom edge.
- Roll the sushi tightly from the bottom, using the bamboo mat to help. Tip: A little water on the nori’s edge seals the roll perfectly.
- Cut the roll into 8 pieces with a sharp, wet knife. Tip: Wiping the knife between cuts keeps the rolls neat.
Vibrant and fresh, these Vegetable Sushi Rolls pack a crunch in every bite, with the creamy avocado balancing the crisp veggies. Serve them with a side of soy sauce or wasabi for an extra kick, or get creative by drizzling with sriracha mayo for a spicy twist.
Conclusion
Now that you’ve explored these 18 delicious Japanese vegetable recipes, it’s clear how simple ingredients can transform into healthy, flavorful meals. We hope this roundup inspires your next kitchen adventure. Don’t forget to leave a comment with your favorite recipe and share the love by pinning this article on Pinterest. Happy cooking!