Unlock the secrets of your ancestors with these 18 Authentic Old World Recipes Delicious! From hearty stews to delicate pastries, each dish is a treasure trove of flavor, waiting to bring a taste of history to your modern kitchen. Perfect for home cooks looking to explore the rich culinary traditions of the past, this roundup promises to inspire your next meal. Keep reading to discover recipes that stand the test of time!
Classic Beef Bourguignon
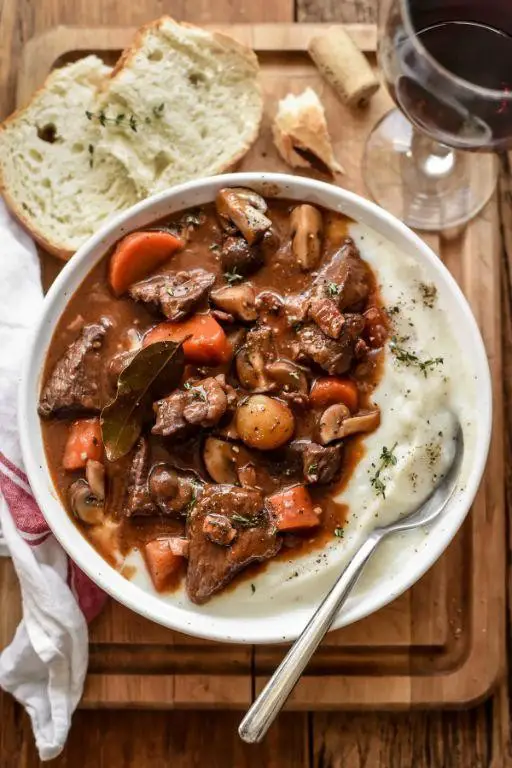
Yesterday, as the rain gently tapped against my kitchen window, I found myself drawn to the comforting embrace of cooking something deeply nourishing. Classic Beef Bourguignon, with its rich layers of flavor and tender chunks of beef, seemed like the perfect companion for such a day.
Ingredients
- 2 lbs beef chuck, cut into 2-inch cubes (I find the marbling in chuck adds incredible flavor)
- 1/4 cup extra virgin olive oil (my go-to for its fruity notes)
- 6 slices bacon, chopped (because everything’s better with bacon)
- 1 large onion, diced (yellow onions are my preference for their sweetness)
- 2 carrots, peeled and sliced into 1-inch pieces
- 3 cloves garlic, minced (freshly minced garlic makes all the difference)
- 1 tbsp tomato paste
- 1 bottle (750 ml) dry red wine (a Burgundy, if you can, to stay true to the dish)
- 2 cups beef stock (homemade stock elevates the dish, but store-bought works in a pinch)
- 1 tbsp fresh thyme leaves (or 1 tsp dried, though fresh is always better)
- 1 lb mushrooms, quartered (cremini mushrooms add a lovely earthiness)
- 20 pearl onions, peeled (a bit of a chore, but worth it for the sweetness they bring)
- Salt and pepper to taste (I like to season in layers, tasting as I go)
Instructions
- Preheat your oven to 325°F. This low and slow cooking temperature is key to tenderizing the beef.
- In a large Dutch oven, heat the olive oil over medium heat. Add the bacon and cook until crispy, about 5 minutes. Remove with a slotted spoon and set aside.
- Season the beef cubes with salt and pepper. In batches, sear the beef in the bacon fat until browned on all sides, about 3 minutes per batch. Tip: Don’t overcrowd the pot to ensure a good sear.
- Remove the beef and set aside. In the same pot, add the diced onion, carrots, and garlic. Cook until softened, about 5 minutes.
- Stir in the tomato paste and cook for another minute to deepen its flavor.
- Return the beef and bacon to the pot. Pour in the red wine and beef stock, ensuring the liquid covers the meat. Add the thyme. Tip: Scrape the bottom of the pot to deglaze and incorporate all those flavorful bits.
- Bring to a simmer, then cover and transfer to the oven. Cook for 2 hours.
- Meanwhile, in a skillet, sauté the mushrooms and pearl onions in a bit of olive oil until golden, about 10 minutes. Tip: This step adds another layer of flavor and texture to the dish.
- After the beef has cooked for 2 hours, stir in the mushrooms and onions. Return to the oven, uncovered, for another 30 minutes to thicken the sauce.
When the beef bourguignon is ready, the meat should be fork-tender, and the sauce rich and velvety. Serve it over a bed of buttery mashed potatoes or with a crusty baguette to soak up every last drop of that glorious sauce.
Traditional Coq au Vin
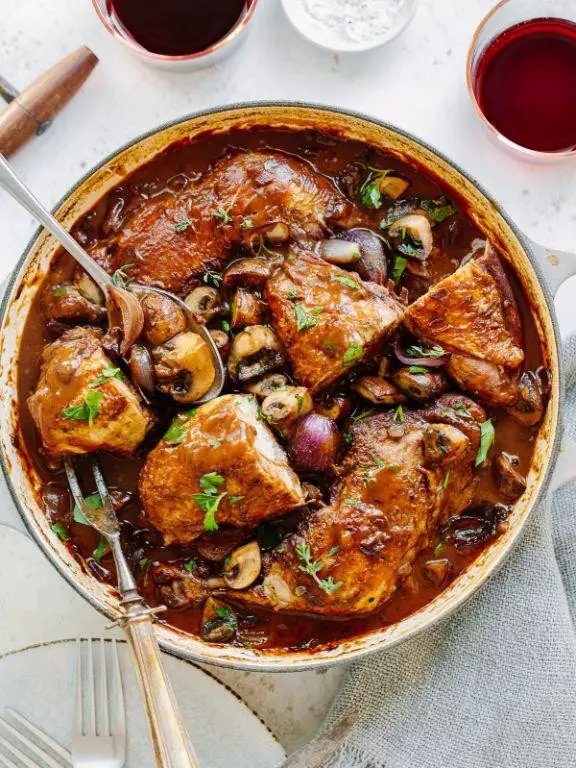
How quietly the evening settles in, the perfect time to gather around the kitchen for a dish that whispers of tradition and comfort. Coq au Vin, with its deep, wine-infused flavors, is a testament to the beauty of slow cooking, a dish that asks for patience but rewards generously.
Ingredients
- 4 chicken thighs (bone-in, skin-on for that irresistible crispiness)
- 1 cup dry red wine (a bold Pinot Noir works wonders here)
- 1 cup chicken stock (homemade if you have it, it makes all the difference)
- 8 oz mushrooms, sliced (I love cremini for their earthy depth)
- 4 slices bacon, chopped (because everything’s better with bacon)
- 2 carrots, diced (for a hint of sweetness)
- 2 cloves garlic, minced (freshly minced, please, for that punch of flavor)
- 1 tbsp tomato paste (it’s my secret for adding richness)
- 1 tbsp all-purpose flour (to thicken the sauce just right)
- 2 tbsp unsalted butter (because butter makes it better)
- 1 tsp thyme (dried is fine, but fresh thyme sprigs are magical)
- Salt and pepper (to season every layer of flavor)
Instructions
- In a large Dutch oven, cook the chopped bacon over medium heat until crispy, about 5 minutes. Remove with a slotted spoon and set aside, leaving the fat in the pot.
- Season the chicken thighs with salt and pepper. Brown them in the bacon fat, skin side down first, for about 5 minutes per side until golden. Remove and set aside.
- In the same pot, add the carrots and mushrooms, sautéing until the mushrooms release their moisture and the carrots soften, about 5 minutes. Tip: Don’t rush this step; letting the vegetables caramelize slightly builds flavor.
- Stir in the garlic and tomato paste, cooking for 1 minute until fragrant. Sprinkle the flour over the vegetables, stirring to coat evenly.
- Pour in the red wine and chicken stock, scraping up any browned bits from the bottom of the pot. Add the thyme, then return the chicken and bacon to the pot.
- Bring to a simmer, then reduce the heat to low. Cover and cook for 45 minutes, until the chicken is tender and the sauce has thickened. Tip: Resist the urge to peek; keeping the lid on ensures the chicken cooks evenly.
- Finish by stirring in the butter until melted, which will give the sauce a silky texture. Tip: This is the step where the sauce goes from good to unforgettable.
Silky and rich, the sauce clings to the tender chicken, each bite a melody of wine-kissed depth and earthy mushrooms. Serve it over a bed of buttery mashed potatoes or alongside a crusty baguette to soak up every last drop of that glorious sauce.
Homemade Sauerbraten
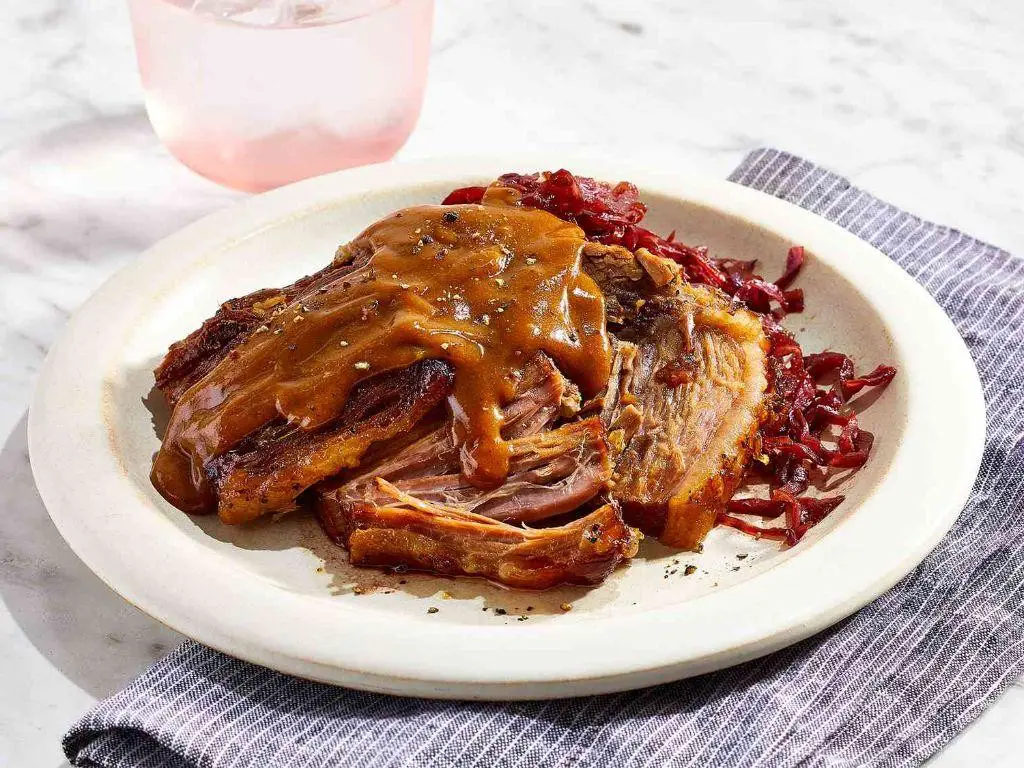
Lingering in the kitchen on a quiet afternoon, the thought of preparing a traditional Sauerbraten feels like weaving a tapestry of flavors, each thread a memory of family gatherings and the warmth of shared meals.
Ingredients
- 3 lbs beef rump roast (I find the marbling in rump roast adds just the right tenderness)
- 1 cup red wine vinegar (a bold, tangy base that’s essential for the marinade)
- 1 cup water (to balance the acidity)
- 1 large onion, thinly sliced (for a subtle sweetness)
- 2 cloves garlic, minced (because garlic is the soul of flavor)
- 10 whole cloves (they’re tiny but mighty in flavor)
- 2 bay leaves (I always crush them slightly to release their aroma)
- 1 tbsp brown sugar (a hint of sweetness to round out the tang)
- 1 tsp salt (to enhance all the flavors)
- 1/2 tsp black pepper (freshly ground, for that little kick)
- 2 tbsp vegetable oil (my go-to for searing)
- 1/2 cup crushed gingersnaps (an unconventional thickener that adds depth)
Instructions
- In a large bowl, combine red wine vinegar, water, onion, garlic, cloves, bay leaves, brown sugar, salt, and black pepper to create the marinade.
- Place the beef rump roast in a resealable plastic bag and pour the marinade over it. Seal the bag, ensuring the meat is fully submerged. Refrigerate for 3 days, turning the bag twice daily to evenly marinate.
- After marinating, remove the beef from the bag, reserving the marinade. Pat the beef dry with paper towels to ensure a good sear.
- Heat vegetable oil in a large Dutch oven over medium-high heat. Sear the beef on all sides until deeply browned, about 4 minutes per side.
- Pour the reserved marinade over the beef, bring to a simmer, then cover and reduce heat to low. Cook for 3 to 3.5 hours, or until the beef is fork-tender.
- Remove the beef to a platter and tent with foil to keep warm. Strain the cooking liquid into a saucepan, discarding the solids.
- Whisk in crushed gingersnaps over medium heat until the sauce thickens, about 5 minutes.
- Slice the beef against the grain and serve with the gingersnap sauce poured over the top.
Kindly, the Sauerbraten emerges tender and richly flavored, its tangy sauce a perfect counterpoint to the savory beef. Serve it over a bed of buttery spaetzle or alongside roasted root vegetables for a meal that feels like a hug from the inside.
Authentic Hungarian Goulash
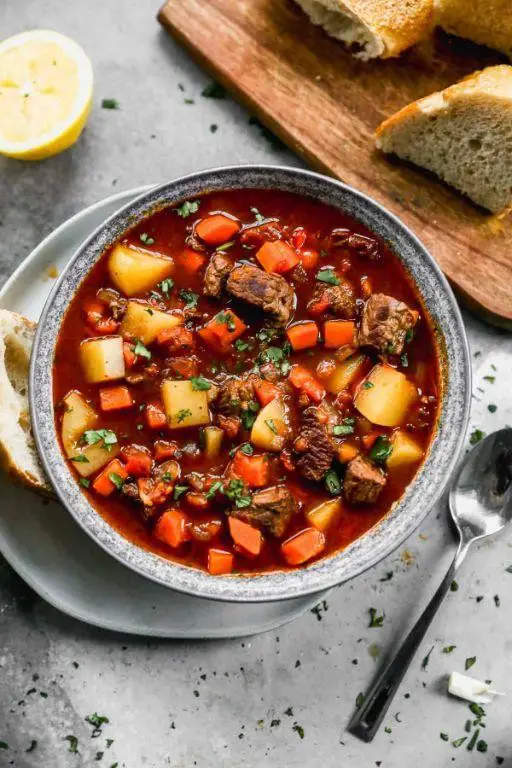
Perhaps it’s the way the paprika melds with the tender beef, or how the caraway seeds whisper secrets of old Budapest kitchens, but this Authentic Hungarian Goulash feels like a warm embrace on a chilly evening.
Ingredients
- 2 lbs beef chuck, cut into 1-inch cubes (I find the marbling in chuck adds incredible richness)
- 2 tbsp extra virgin olive oil (my go-to for its fruity notes)
- 2 large onions, diced (they should almost melt into the sauce)
- 3 cloves garlic, minced (freshly minced garlic makes all the difference)
- 2 tbsp sweet paprika (Hungarian, if you can find it, for authenticity)
- 1 tsp caraway seeds (toast them lightly for a deeper flavor)
- 1 red bell pepper, diced (adds a sweet contrast)
- 4 cups beef broth (homemade is best, but a good store-bought works)
- 2 medium potatoes, peeled and cubed (they thicken the goulash beautifully)
- Salt, to taste (I start with 1 tsp and adjust)
Instructions
- Heat the olive oil in a large pot over medium heat until shimmering, about 2 minutes.
- Add the beef cubes in batches, browning on all sides, about 5 minutes per batch. Don’t overcrowd the pot.
- Remove the beef and set aside. In the same pot, add the onions and cook until translucent, about 5 minutes.
- Stir in the garlic, paprika, and caraway seeds, cooking until fragrant, about 1 minute. Tip: Blooming the spices in oil unlocks their flavors.
- Return the beef to the pot. Add the red bell pepper and beef broth, bringing to a simmer.
- Cover and simmer on low heat for 1.5 hours, stirring occasionally. The beef should become fork-tender.
- Add the potatoes and continue to simmer, uncovered, for another 30 minutes. Tip: The potatoes will thicken the goulash as they cook.
- Season with salt, starting with 1 tsp and adjusting as needed. Tip: Taste as you go to perfect the seasoning.
Zesty and hearty, this goulash boasts a velvety texture with layers of smoky paprika and sweet pepper. Serve it over buttered egg noodles or with a dollop of sour cream for a touch of coolness.
Old Fashioned Ratatouille

Many evenings, I find myself drawn to the kitchen, where the simple act of chopping vegetables becomes a meditation. Today, it’s the vibrant colors of summer that inspire me to make an Old Fashioned Ratatouille, a dish that feels like a warm embrace from the garden.
Ingredients
- 2 tbsp extra virgin olive oil (my go-to for its fruity notes)
- 1 large eggplant, diced into 1-inch pieces (I love the way it soaks up flavors)
- 2 medium zucchinis, sliced into half-moons (for a bit of crunch)
- 1 large bell pepper, any color, chopped (I’m partial to red for its sweetness)
- 4 ripe tomatoes, roughly chopped (the juicier, the better)
- 1 medium onion, thinly sliced (a humble start to any great dish)
- 3 cloves garlic, minced (because what’s cooking without garlic?)
- 1 tsp dried thyme (it whispers of Provence)
- Salt to taste (I prefer sea salt for its mineral quality)
Instructions
- Preheat your oven to 375°F (190°C), letting it warm up like a sunny day.
- In a large oven-safe skillet, heat the olive oil over medium heat until it shimmers, about 2 minutes.
- Add the onion and garlic, sautéing until they’re just golden and fragrant, about 3 minutes. Tip: Stir frequently to prevent burning.
- Toss in the eggplant, zucchini, and bell pepper, cooking until they start to soften, about 5 minutes. Tip: A pinch of salt here helps them release their juices.
- Stir in the tomatoes and thyme, mixing gently to combine all the flavors.
- Transfer the skillet to the oven and bake uncovered for 25 minutes, until the vegetables are tender and the edges are slightly caramelized. Tip: Check halfway through to stir and ensure even cooking.
Coming out of the oven, the ratatouille is a tapestry of textures, from the silky eggplant to the firm zucchini, all bathed in a rich, herb-infused tomato sauce. Serve it over a slice of crusty bread or alongside a simple grilled fish for a meal that sings of summer.
Heritage Cassoulet
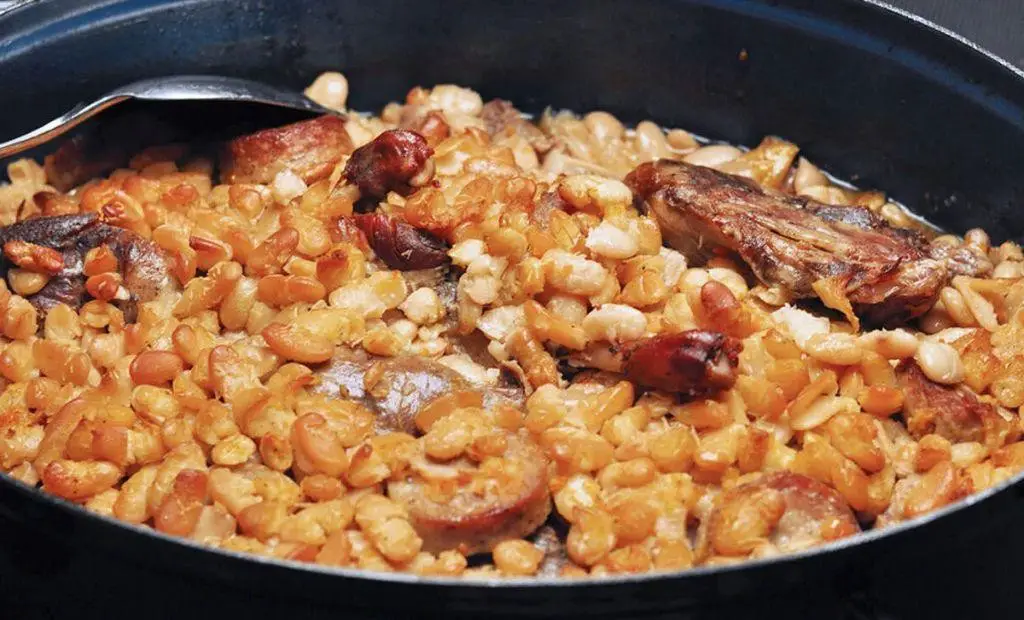
Perhaps there’s no dish quite as comforting as a heritage cassoulet, a slow-cooked melody of beans and meats that whispers stories of generations past. It’s a dish that demands patience, rewarding you with depths of flavor that only time can unveil.
Ingredients
- 2 cups dried white beans (I love the creaminess of cannellini beans here)
- 4 duck confit legs (the richness of duck is irreplaceable)
- 1 lb pork shoulder, cubed (a little fat adds wonderful flavor)
- 1 large onion, diced (yellow onions are my go-to for their sweetness)
- 4 cloves garlic, minced (freshly minced makes all the difference)
- 2 carrots, diced (for a subtle sweetness and color)
- 4 cups chicken stock (homemade stock elevates the dish)
- 1 tbsp tomato paste (adds a lovely depth and color)
- 2 sprigs thyme (fresh thyme is magical in slow-cooked dishes)
- 1 bay leaf (don’t skip this; it’s the soul of the dish)
- Salt and pepper (to season layers as you build the dish)
Instructions
- Soak the dried white beans in water overnight, or for at least 8 hours, to soften them.
- Preheat your oven to 300°F, a gentle heat that coaxes out flavors slowly.
- In a large Dutch oven, brown the pork shoulder cubes over medium heat until golden, about 5 minutes per side. Remove and set aside.
- In the same pot, sauté the diced onion and carrots until soft, about 5 minutes, then add the garlic for another minute until fragrant.
- Stir in the tomato paste, cooking for 2 minutes to deepen its flavor.
- Return the pork to the pot, add the soaked beans, duck confit legs, chicken stock, thyme, and bay leaf. Season with salt and pepper.
- Bring to a simmer, then cover and transfer to the oven. Cook for 4 hours, checking occasionally to ensure the liquid is at a gentle simmer.
- After 4 hours, remove the lid and cook for an additional 30 minutes to thicken the sauce slightly.
- Discard the thyme sprigs and bay leaf before serving.
Just as the cassoulet emerges from the oven, the beans are tender, the meats fall apart at a touch, and the broth is rich and velvety. Serve it with a crusty baguette to soak up every last drop, or alongside a simple green salad to cut through the richness.
Time-Honored Bouillabaisse
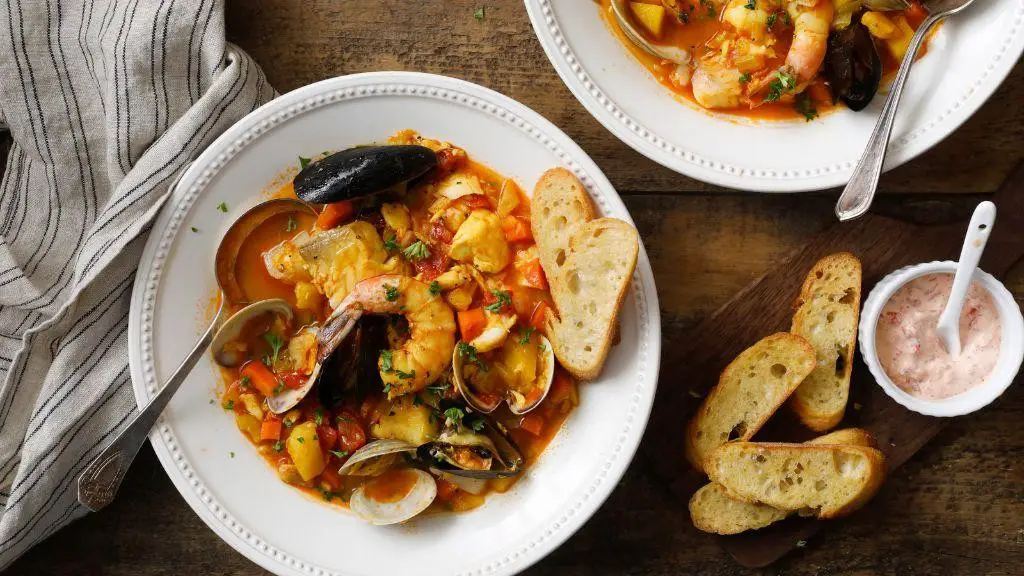
Evening light filters through the kitchen window as I begin to prepare a dish that feels like a warm embrace from the sea. This bouillabaisse, with its rich history and deeper flavors, is more than just a meal; it’s a journey to the shores of Provence, right from my humble kitchen.
Ingredients
- 2 tablespoons extra virgin olive oil (my go-to for its fruity notes)
- 1 large onion, finely chopped (I find the sweetness balances the seafood)
- 2 cloves garlic, minced (freshly minced releases more aroma)
- 1 fennel bulb, thinly sliced (for a subtle licorice hint)
- 1 pinch saffron threads (a luxury that’s worth every penny)
- 1 pound mixed seafood (I like a combo of mussels, shrimp, and firm white fish)
- 4 cups fish stock (homemade if possible, for the clearest flavors)
- 1 cup ripe tomatoes, diced (their acidity brightens the dish)
- Salt to taste (I prefer sea salt for its mineral quality)
- Fresh parsley, chopped (for a burst of color and freshness)
Instructions
- Heat the olive oil in a large pot over medium heat until shimmering but not smoking.
- Add the onion, garlic, and fennel, sautéing until translucent, about 5 minutes, stirring occasionally to prevent burning.
- Stir in the saffron threads, letting their color and aroma bloom for about 30 seconds.
- Gently add the mixed seafood, searing each side for 2 minutes to lock in flavors.
- Pour in the fish stock and bring to a gentle simmer, not a boil, to keep the seafood tender.
- Add the diced tomatoes and simmer for 15 minutes, allowing the flavors to meld beautifully.
- Season with salt carefully, tasting as you go to avoid overpowering the delicate seafood.
- Garnish with fresh parsley just before serving to add a fresh contrast to the rich broth.
Ladling this bouillabaisse into bowls, the aroma alone transports you. The broth, a golden elixir, carries the essence of the sea, while the seafood remains succulent, a testament to gentle cooking. Serve it with a slice of crusty bread, perfect for sopping up every last drop of this maritime treasure.
Classic French Onion Soup

Now, as the evening light fades, there’s something deeply comforting about stirring a pot of slowly caramelizing onions, their sweet aroma filling the kitchen. This Classic French Onion Soup, with its rich broth and melty cheese topping, is a hug in a bowl, perfect for those quiet nights when you need a little warmth.
Ingredients
- 4 large yellow onions, thinly sliced (I find the sweetness of yellow onions perfect for this soup)
- 3 tbsp unsalted butter (I always reach for unsalted to control the seasoning)
- 1 tbsp all-purpose flour (a little goes a long way to thicken the soup)
- 6 cups beef broth (homemade is ideal, but a good quality store-bought works too)
- 1/2 cup dry white wine (I love the depth it adds, but you can skip it if you prefer)
- 1 tsp sugar (just a pinch to help the onions caramelize)
- 1 bay leaf (for that subtle herbal note)
- Salt and freshly ground black pepper (to season)
- 4 slices of baguette, toasted (the crunch is essential)
- 1 1/2 cups grated Gruyère cheese (the nuttiness is unmatched)
Instructions
- In a large pot, melt the butter over medium heat. Add the sliced onions and sugar, stirring to coat. Cook for about 40 minutes, stirring occasionally, until the onions are deeply caramelized and golden brown.
- Sprinkle the flour over the onions, stirring well to combine. Cook for 1 minute to remove the raw flour taste.
- Slowly pour in the white wine, scraping up any browned bits from the bottom of the pot. Let it simmer for 2 minutes until slightly reduced.
- Add the beef broth and bay leaf. Bring to a simmer, then reduce the heat to low. Cover and let it cook for 30 minutes to meld the flavors. Season with salt and pepper to taste.
- While the soup simmers, preheat your oven’s broiler. Place the toasted baguette slices on a baking sheet and top generously with Gruyère cheese.
- Broil for 2-3 minutes, until the cheese is bubbly and golden. Keep a close eye to prevent burning.
- Remove the bay leaf from the soup. Ladle the soup into bowls, then top each with a cheesy baguette slice.
The soup should be rich and velvety, with the onions melting into the broth, offering a sweet and savory balance. The cheese-topped crouton adds a delightful crunch and creaminess, making each spoonful a perfect bite. Try serving it with a simple green salad for a light contrast to the soup’s richness.
Traditional German Pretzels

Kneading the dough for these Traditional German Pretzels feels like connecting with centuries of bakers before us, each fold and twist a quiet homage to simplicity and flavor.
Ingredients
- 4 cups all-purpose flour (I find King Arthur flour gives the best texture)
- 1 tbsp sugar (a touch of sweetness to balance the salt)
- 2 tsp salt (I like using fine sea salt for its clean taste)
- 1 packet active dry yeast (about 2 1/4 tsp, make sure it’s fresh for the best rise)
- 1 1/2 cups warm water (110°F, just warm to the touch)
- 4 tbsp unsalted butter, melted (I prefer European-style butter for its richness)
- 1/2 cup baking soda (for the pretzel bath, it’s what gives them that signature crust)
- 1 egg yolk beaten with 1 tbsp water (for that golden shine)
- Coarse salt for sprinkling (I use Maldon for its flaky texture)
Instructions
- In a large bowl, whisk together the flour, sugar, salt, and yeast.
- Add the warm water and melted butter to the dry ingredients, stirring until a dough forms.
- Turn the dough onto a floured surface and knead for about 5 minutes, until smooth and elastic. Tip: If the dough sticks, add a little more flour, but not too much to keep the pretzels tender.
- Place the dough in a greased bowl, cover with a damp towel, and let rise in a warm place for 1 hour, or until doubled in size.
- Preheat your oven to 450°F and line a baking sheet with parchment paper.
- Bring 9 cups of water and the baking soda to a boil in a large pot. Tip: Be careful with the baking soda—it can bubble up violently.
- Divide the dough into 8 equal pieces, rolling each into a 24-inch rope and forming into a pretzel shape.
- Boil each pretzel in the baking soda water for 30 seconds, then transfer to the prepared baking sheet. Tip: This step is crucial for the chewy crust, don’t skip it!
- Brush the pretzels with the egg wash and sprinkle with coarse salt.
- Bake for 12-14 minutes, until deep golden brown.
Yielding to the oven’s heat, these pretzels emerge with a crackly crust giving way to a soft, pillowy interior. Serve them warm with a dollop of spicy mustard or, for a sweet twist, a side of honey butter.
Authentic Italian Risotto
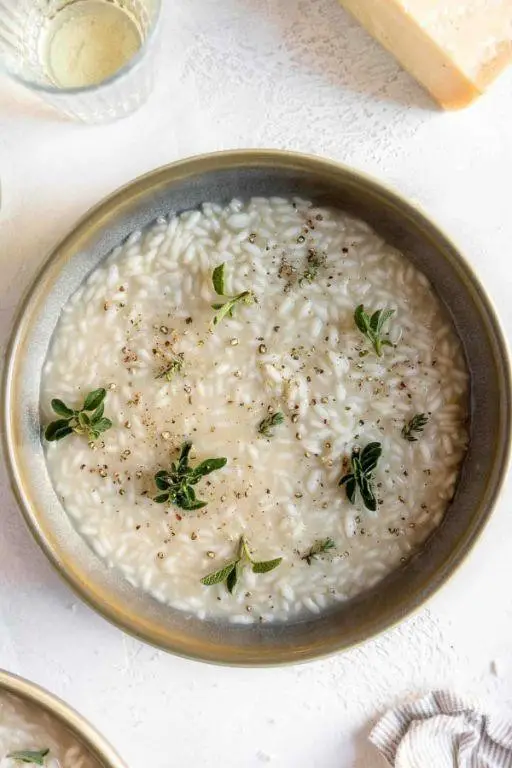
Yesterday, as the golden hour light spilled into my kitchen, I found myself drawn to the comforting ritual of making risotto, a dish that feels like a warm embrace from Italy itself.
Ingredients
- 1 1/2 cups Arborio rice – the star of the show, its high starch content is key for that creamy texture.
- 4 cups chicken broth, kept warm on the stove – I find that warm broth helps the rice cook evenly.
- 1/2 cup dry white wine – a splash adds depth, and I always use a wine I’d enjoy drinking.
- 1 small onion, finely diced – the foundation of flavor, I take my time here to ensure it’s perfectly softened.
- 3 tbsp unsalted butter – divided, because everything’s better with butter.
- 1/2 cup freshly grated Parmesan cheese – the sharper, the better, in my opinion.
- 2 tbsp extra virgin olive oil – my go-to for its fruity notes.
- Salt to taste – though I’m careful, as the broth and Parmesan add saltiness.
Instructions
- In a large pan, heat the olive oil and 1 tbsp butter over medium heat until the butter melts.
- Add the diced onion, cooking slowly until translucent, about 5 minutes – this is where patience pays off.
- Stir in the Arborio rice, toasting it lightly for 2 minutes until the edges become slightly translucent.
- Pour in the white wine, stirring constantly until it’s fully absorbed – the aroma at this step is heavenly.
- Begin adding the warm chicken broth, one ladle at a time, stirring frequently and waiting until each addition is nearly absorbed before adding the next – this process should take about 18-20 minutes.
- Once the rice is al dente and the mixture is creamy, remove from heat and stir in the remaining butter and Parmesan cheese – this is where the magic happens.
- Let the risotto rest for 2 minutes before serving – it thickens slightly, achieving the perfect consistency.
Just as the risotto rests, so does the cook, admiring the creamy, velvety texture and the rich, comforting flavors that meld together beautifully. Serve it in shallow bowls, perhaps with a drizzle of olive oil or a sprinkle of fresh herbs, to elevate this humble dish into something truly special.
Old World Spanakopita
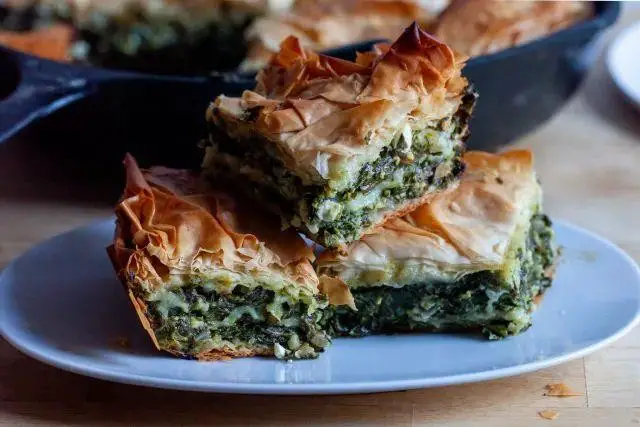
Under the soft glow of the kitchen light, there’s something deeply comforting about unfolding the layers of history and flavor in a dish like Spanakopita. It’s a recipe that carries the whispers of generations, blending simple ingredients into something truly magical.
Ingredients
- 1 lb fresh spinach, roughly chopped (I love the vibrant green it brings to the dish)
- 1 cup feta cheese, crumbled (the saltiness balances the spinach perfectly)
- 1/2 cup ricotta cheese (for a creamy texture)
- 1/4 cup extra virgin olive oil (my go-to for its fruity notes)
- 2 large eggs, room temperature (they blend more smoothly)
- 1/2 tsp salt (just enough to enhance the flavors)
- 1/4 tsp black pepper (a subtle kick)
- 1 package phyllo dough, thawed (handle with care, it’s delicate)
- 1/2 cup unsalted butter, melted (for that golden, crispy layers)
Instructions
- Preheat your oven to 350°F (175°C), ensuring it’s perfectly heated for even baking.
- In a large bowl, combine the spinach, feta, ricotta, olive oil, eggs, salt, and pepper. Mix gently to keep the spinach leaves somewhat intact.
- Layer 8 sheets of phyllo dough in a baking dish, brushing each with melted butter to achieve those signature crispy layers.
- Spread the spinach mixture evenly over the phyllo, then top with another 8 sheets, buttering each as before.
- Trim any excess phyllo hanging over the edges, then score the top layers into squares or triangles for easy serving after baking.
- Bake for 45 minutes, or until the top is golden and crisp. Let it rest for 10 minutes before serving to allow the layers to set.
Vibrant and flaky, this Spanakopita offers a delightful contrast between the crispy phyllo and the creamy, savory filling. Serve it warm, perhaps with a drizzle of honey for a sweet contrast, or alongside a crisp salad for a light, satisfying meal.
Heritage Moussaka
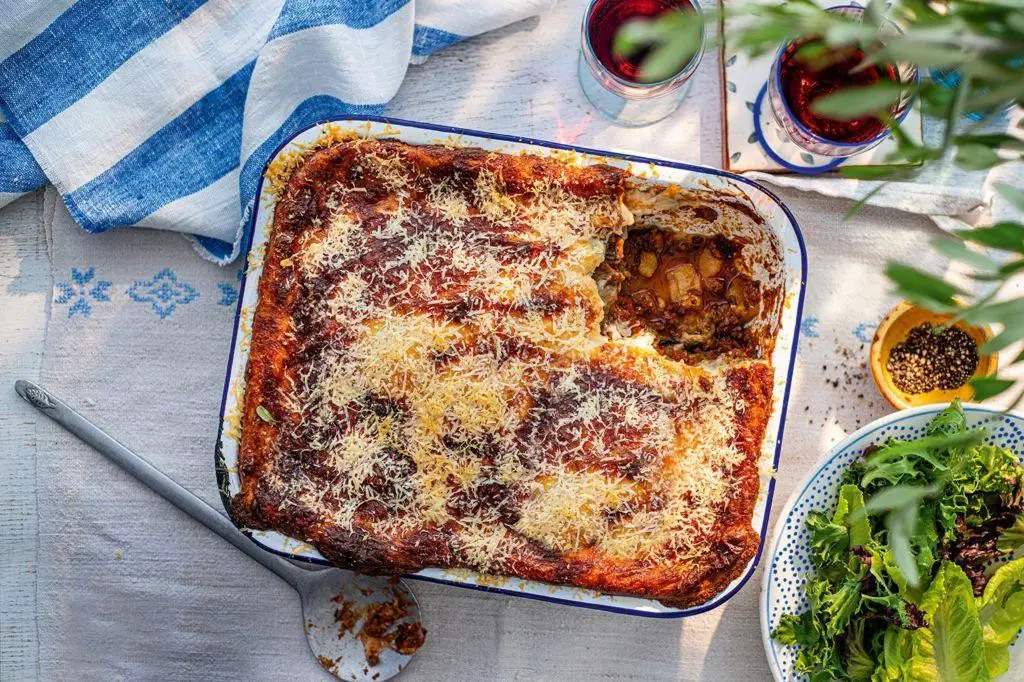
Musing over the layers of history and flavor, Heritage Moussaka stands as a testament to the comfort found in tradition. This dish, with its rich layers of eggplant, spiced meat, and creamy béchamel, invites a moment of pause to savor the stories it carries.
Ingredients
- 2 large eggplants, sliced into 1/2-inch rounds (I find salting them draws out bitterness)
- 1 lb ground lamb (beef works too, but lamb’s richness is unmatched)
- 1/4 cup extra virgin olive oil (my go-to for its fruity notes)
- 1 large onion, finely diced (yellow onions add a sweet depth)
- 3 cloves garlic, minced (freshly minced garlic makes all the difference)
- 1 tsp ground cinnamon (a whisper of warmth)
- 1/2 tsp ground allspice (for a hint of complexity)
- 1 can (14.5 oz) crushed tomatoes (I prefer San Marzano for their sweetness)
- 1/2 cup grated Parmesan cheese (for a salty, nutty finish)
- 2 cups whole milk (room temperature blends smoother into the béchamel)
- 4 tbsp unsalted butter (I always use unsalted to control the seasoning)
- 1/4 cup all-purpose flour (for thickening the béchamel)
- 2 eggs, beaten (room temperature eggs incorporate better)
Instructions
- Preheat your oven to 375°F (190°C) to ensure it’s ready for baking.
- Sprinkle the eggplant slices with salt and let them sit for 30 minutes to draw out bitterness, then pat dry.
- Heat 2 tbsp olive oil in a large skillet over medium heat and brown the eggplant slices in batches, about 3 minutes per side, adding more oil as needed.
- In the same skillet, sauté the onion until translucent, about 5 minutes, then add garlic, cinnamon, and allspice, cooking for another minute until fragrant.
- Add the ground lamb, breaking it apart with a spoon, and cook until no longer pink, about 8 minutes.
- Stir in the crushed tomatoes and simmer for 10 minutes, allowing the flavors to meld.
- For the béchamel, melt butter in a saucepan over medium heat, whisk in flour, and cook for 2 minutes to remove the raw taste.
- Gradually add milk, whisking constantly to prevent lumps, and cook until thickened, about 5 minutes.
- Remove from heat, stir in Parmesan, then slowly mix in the beaten eggs to temper them.
- In a 9×13 inch baking dish, layer half the eggplant, all the meat sauce, the remaining eggplant, and top with béchamel.
- Bake for 45 minutes, until the top is golden and bubbly, then let it rest for 10 minutes before serving.
Comforting in its complexity, this moussaka offers a creamy, spiced, and deeply satisfying experience. Serve it with a crisp green salad to cut through the richness, or enjoy it as is, letting each layer speak for itself.
Time-Honored Paella
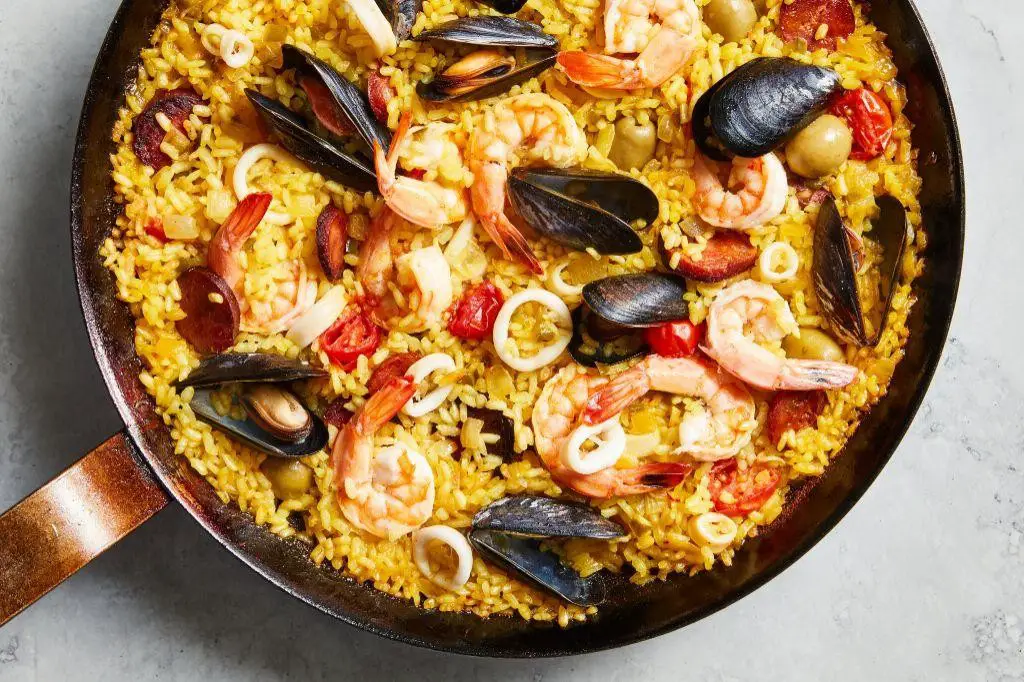
Clouds drift lazily across the sky as I find myself drawn to the kitchen, the allure of crafting something as timeless as paella pulling me in. It’s a dish that carries the whispers of generations, a symphony of flavors and textures that tell a story with every bite.
Ingredients
- 2 cups of Arborio rice – its starchy goodness is key for that perfect paella texture.
- 4 cups of chicken broth – I like to warm it slightly before adding, it just feels right.
- 1 large pinch of saffron threads – the soul of paella, their golden hue is unmatched.
- 1 lb of chicken thighs, bone-in and skin-on – for depth of flavor that breasts just can’t match.
- 1/2 cup of extra virgin olive oil – my go-to for its fruity notes.
- 1 red bell pepper, thinly sliced – for a sweet crunch.
- 1 cup of frozen peas – a pop of color and sweetness.
- 1 tsp of smoked paprika – it adds a whisper of the outdoors.
- 4 cloves of garlic, minced – because what’s cooking without garlic?
- 1 lemon, cut into wedges – for that final bright touch.
Instructions
- Heat the olive oil in a large paella pan over medium heat until shimmering, about 2 minutes.
- Add the chicken thighs, skin side down, and cook until golden brown, about 5 minutes per side. Tip: Don’t rush this step; the browning adds incredible flavor.
- Remove the chicken and set aside. In the same oil, sauté the garlic and red bell pepper until soft, about 3 minutes.
- Stir in the rice, coating it well with the oil and vegetables, then add the smoked paprika and saffron, stirring to combine.
- Pour in the warm chicken broth, bring to a simmer, and arrange the chicken thighs on top. Tip: Resist the urge to stir the rice from now on; you want that coveted socarrat at the bottom.
- Cook uncovered for 20 minutes, then scatter the peas over the top and cook for another 5 minutes. Tip: If the rice is drying out too quickly, cover with foil for the last few minutes.
- Remove from heat and let rest for 5 minutes before serving with lemon wedges.
Layers of flavor unfold with each forkful, the rice perfectly al dente, the chicken falling off the bone. Serve it straight from the pan, the socarrat crackling beneath, for a truly communal experience.
Classic British Fish and Chips
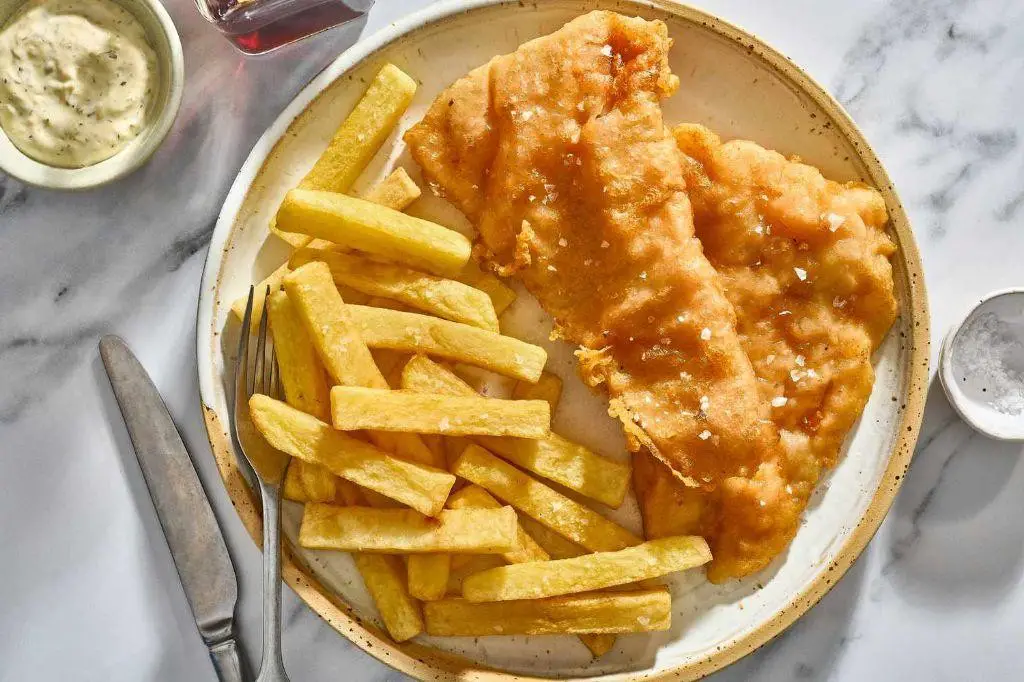
Under the golden hue of the evening light, there’s something profoundly comforting about the crisp exterior and tender interior of Classic British Fish and Chips, a dish that transports me straight to the bustling streets of London with every bite.
Ingredients
- 4 large russet potatoes, peeled and cut into thick fries (I find the starchiness gives the perfect fluffy inside)
- 1 cup all-purpose flour (for that light, airy batter)
- 1 teaspoon baking powder (a little secret for extra crispiness)
- 1 cup cold beer (the carbonation makes the batter irresistibly light)
- 4 cod fillets, about 6 ounces each (freshness is key here)
- Vegetable oil, for frying (I always keep a thermometer handy)
- Salt, to taste (because seasoning is everything)
Instructions
- Heat vegetable oil in a deep fryer or large pot to 325°F, using a thermometer to ensure accuracy.
- Blanch the potato fries in the hot oil for about 5 minutes until soft but not colored, then drain on paper towels.
- Increase the oil temperature to 375°F for the final fry.
- In a large bowl, whisk together flour and baking powder, then gradually add beer until the batter is smooth.
- Dip each cod fillet into the batter, letting excess drip off, then fry for 6-8 minutes until golden and crispy.
- Return the fries to the oil and fry for another 2-3 minutes until golden and crisp.
- Drain both fish and chips on paper towels, seasoning immediately with salt.
Zesty and satisfying, the contrast between the crunchy batter and the flaky fish is nothing short of magical. Serve with a side of mushy peas or a simple tartar sauce for an authentic touch.
Traditional Irish Stew
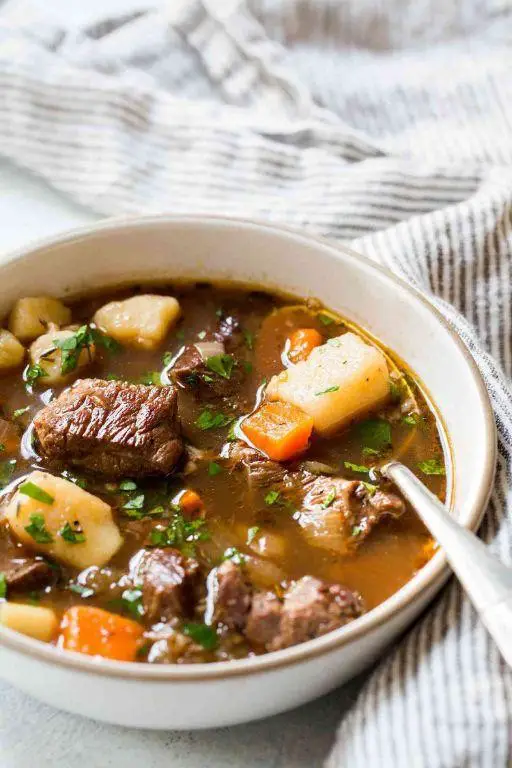
Kindly imagine a quiet evening, the kind where the air carries a hint of chill, and the thought of something warm and hearty stirs the soul. Traditional Irish Stew, with its humble beginnings and rich flavors, feels like a hug in a bowl, perfect for such moments.
Ingredients
- 2 lbs lamb shoulder, cut into 1-inch pieces (I find the shoulder offers the perfect balance of meat and fat)
- 4 large potatoes, peeled and quartered (Yukon Golds are my favorite for their buttery texture)
- 3 large carrots, sliced into thick rounds (for a sweet, earthy note)
- 1 large onion, roughly chopped (yellow onions work beautifully here)
- 4 cups beef stock (homemade if you have it, but a good quality store-bought works in a pinch)
- 2 tbsp extra virgin olive oil (my go-to for its fruity undertones)
- 1 tsp salt (to start, you can adjust later)
- 1/2 tsp black pepper (freshly ground, if possible)
- 2 tbsp all-purpose flour (for thickening the stew just right)
- 2 sprigs fresh thyme (because fresh herbs make all the difference)
Instructions
- Heat the olive oil in a large pot over medium heat until shimmering, about 2 minutes.
- Add the lamb pieces in batches, browning each side for about 3 minutes per batch to develop flavor. Tip: Don’t overcrowd the pot to ensure even browning.
- Remove the lamb and set aside. In the same pot, add the onions, cooking until translucent, about 5 minutes, stirring occasionally.
- Sprinkle the flour over the onions, stirring constantly for 1 minute to cook off the raw flour taste.
- Gradually add the beef stock, stirring continuously to avoid lumps. Tip: Adding the stock slowly helps achieve a smooth base.
- Return the lamb to the pot, along with any accumulated juices. Add the thyme, salt, and pepper.
- Bring the mixture to a simmer, then reduce the heat to low. Cover and cook for 1 hour, stirring occasionally.
- Add the potatoes and carrots, submerging them in the liquid. Cover and cook for another 45 minutes, or until the vegetables are tender. Tip: The stew is ready when the meat falls apart easily with a fork.
- Adjust seasoning with salt and pepper if needed before serving.
Hearty and comforting, this stew boasts tender lamb and vegetables in a rich, flavorful broth. Serve it with a slice of rustic bread to soak up every last drop, or enjoy it as is for a truly satisfying meal.
Authentic Spanish Gazpacho

Lazy summer afternoons call for dishes that are as refreshing as they are simple to prepare, and nothing quite captures the essence of a sun-drenched day like a bowl of authentic Spanish gazpacho. This chilled soup, with its vibrant colors and fresh flavors, is a testament to the beauty of minimalism in cooking.
Ingredients
- 6 ripe tomatoes, cored and roughly chopped (I find that vine-ripened ones bring a deeper flavor)
- 1 cucumber, peeled and chopped (save a few slices for garnish if you like a bit of crunch)
- 1 green bell pepper, seeded and chopped (for a subtle bitterness that balances the sweetness)
- 2 cloves of garlic, minced (because what’s a gazpacho without that punchy kick?)
- 1/4 cup extra virgin olive oil (my go-to for its fruity notes)
- 2 tbsp sherry vinegar (it adds a unique depth you won’t get from other vinegars)
- 1 tsp salt (to taste, but this is a good starting point)
- 1/2 tsp ground cumin (a little secret for warmth)
- 2 cups cold water (to achieve that perfect, light consistency)
Instructions
- In a blender, combine the tomatoes, cucumber, green bell pepper, and garlic. Blend on high until smooth, about 2 minutes.
- With the blender running, slowly drizzle in the olive oil to emulsify the mixture, creating a creamy texture.
- Add the sherry vinegar, salt, and cumin, then blend for another 30 seconds to ensure everything is well incorporated.
- Pour the mixture into a large bowl and stir in the cold water. This step is crucial for achieving the right consistency, so don’t skip it.
- Cover the bowl with plastic wrap and refrigerate for at least 2 hours, though overnight is better. The flavors meld beautifully over time.
- Before serving, give the gazpacho a good stir. Taste and adjust the seasoning if necessary, but remember, the flavors should be bright and balanced.
- Serve chilled, garnished with cucumber slices, a drizzle of olive oil, and a sprinkle of cumin if desired.
On a hot day, this gazpacho is like a cool breeze in a bowl, with each spoonful bursting with the freshness of summer. The texture is silky yet light, making it perfect as a starter or a light meal on its own. For a creative twist, serve it in glasses as a drinkable appetizer at your next gathering.
Old Fashioned Apple Strudel

Perhaps there’s no better way to welcome the gentle embrace of autumn than with the warm, cinnamon-spiced layers of an old-fashioned apple strudel. This recipe, passed down through generations, carries the essence of home and the simplicity of ingredients coming together to create something truly magical.
Ingredients
- 2 cups all-purpose flour (I find that sifting it makes the dough lighter)
- 1/4 cup granulated sugar (a little extra for sprinkling never hurts)
- 1/2 tsp salt (the fine sea variety blends in more evenly)
- 1/2 cup unsalted butter, chilled and cubed (European-style butter is my secret for flakier layers)
- 1/4 cup cold water (ice-cold works best to keep the butter from melting)
- 4 medium apples, peeled and thinly sliced (I adore Honeycrisp for their perfect balance of sweet and tart)
- 1 tsp ground cinnamon (the aroma alone is worth it)
- 1/2 cup raisins (soaked in warm water for 10 minutes to plump up)
- 1 egg, beaten (for that golden, glossy finish)
Instructions
- In a large bowl, whisk together the flour, sugar, and salt until well combined.
- Add the chilled butter cubes to the flour mixture. Using your fingertips, rub the butter into the flour until the mixture resembles coarse crumbs.
- Gradually add the cold water, stirring with a fork until the dough begins to come together. Tip: Avoid overworking the dough to keep it tender.
- Turn the dough onto a lightly floured surface and knead gently into a ball. Wrap in plastic and refrigerate for 30 minutes.
- Preheat your oven to 375°F (190°C) and line a baking sheet with parchment paper.
- In another bowl, toss the apple slices with cinnamon and raisins until evenly coated.
- Roll out the chilled dough on a floured surface into a thin rectangle, about 16×12 inches.
- Spread the apple mixture evenly over the dough, leaving a 1-inch border around the edges.
- Carefully roll the dough into a log, starting from the long side, and seal the edges by pinching them together.
- Transfer the strudel to the prepared baking sheet, seam side down, and brush the top with the beaten egg.
- Bake for 35-40 minutes, or until the strudel is golden brown and the apples are tender. Tip: Rotate the baking sheet halfway through for even browning.
- Let the strudel cool for at least 10 minutes before slicing. Tip: A serrated knife works best for clean cuts.
Just out of the oven, the strudel’s flaky crust gives way to the soft, spiced apple filling, creating a contrast that’s simply irresistible. Serve it warm with a dollop of whipped cream or a scoop of vanilla ice cream for an extra touch of indulgence.
Heritage Tiramisu

Remembering the first time I tasted Heritage Tiramisu, it felt like uncovering a cherished family secret, one that whispers of comfort and tradition with every layered bite.
Ingredients
- 6 large egg yolks (room temperature, they blend more smoothly)
- 3/4 cup granulated sugar (I find this amount perfectly balances the coffee’s bitterness)
- 1 cup mascarpone cheese (full-fat for that irreplaceable creamy texture)
- 1 1/2 cups heavy cream (chilled, it whips up lighter and fluffier)
- 2 cups strong brewed coffee, cooled (I use a dark roast for depth)
- 24 ladyfingers (crisp, not the soft ones, they hold up better)
- 1/4 cup cocoa powder (for dusting, a bittersweet variety adds complexity)
- 1 tbsp vanilla extract (pure, it makes all the difference)
Instructions
- In a large bowl, whisk together the egg yolks and sugar until pale and thickened, about 5 minutes. Tip: A stand mixer saves time here.
- Gently fold in the mascarpone until just combined. Overmixing can deflate the mixture.
- In another bowl, whip the heavy cream to stiff peaks. Tip: Chill your bowl and whisk beforehand for best results.
- Fold the whipped cream into the mascarpone mixture in two additions, maintaining as much air as possible.
- Quickly dip each ladyfinger into the coffee, ensuring they’re moist but not soggy, and layer them in a 9×13-inch dish.
- Spread half the mascarpone mixture over the ladyfingers, then repeat with another layer of dipped ladyfingers and the remaining mascarpone.
- Cover and refrigerate for at least 4 hours, though overnight is ideal. Tip: This patience pays off in texture.
- Just before serving, dust the top generously with cocoa powder.
Cool and creamy, with the subtle bitterness of coffee and cocoa, this Heritage Tiramisu is a testament to the beauty of simple ingredients coming together. Serve it in delicate glasses for an elegant touch, or enjoy it straight from the dish for a more homely feel.
Conclusion
These 18 Authentic Old World Recipes offer a treasure trove of delicious, time-honored dishes that bring the rich flavors of the past into your modern kitchen. Whether you’re craving comfort food or eager to explore new culinary traditions, there’s something here for every home cook. We’d love to hear which recipes become your favorites—don’t forget to leave a comment and share this roundup on Pinterest for fellow food lovers to enjoy!