Pears are the unsung heroes of the fruit world, offering a sweet, juicy versatility that can transform any meal from ordinary to extraordinary. Whether you’re craving a cozy dessert, a refreshing salad, or a hearty breakfast, our roundup of 18 Delicious Pear Recipes Healthy and Nutritious has something to delight your taste buds. Dive in and discover how pears can add a touch of magic to your cooking!
Baked Pears with Cinnamon and Honey
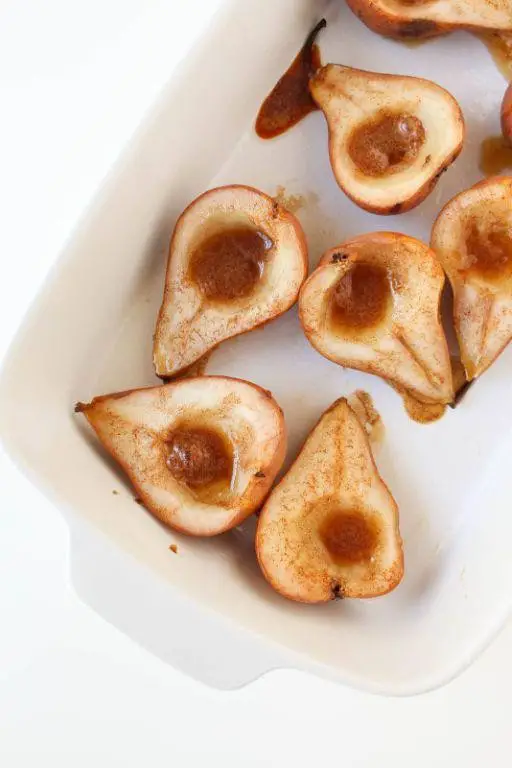
Zesty and oh-so-easy, these baked pears are like a hug in dessert form—warm, sweet, and spiced to perfection. Perfect for when you’re pretending to be a gourmet chef but really just want something delicious with minimal effort.
Ingredients
- 4 ripe pears, halved and cored (Bartlett or Anjou work wonders)
- 2 tbsp honey (for that golden drizzle of joy)
- 1 tsp cinnamon (because life’s too short for bland food)
- 1 tbsp unsalted butter, melted (or coconut oil for a vegan twist)
- 1/4 cup walnuts, chopped (optional, for a crunchy surprise)
Instructions
- Preheat your oven to 375°F (190°C)—no peeking until it’s fully heated!
- Arrange the pear halves cut side up in a baking dish. Think of it as setting up little boats for a flavor voyage.
- Drizzle the melted butter over the pears, followed by the honey. Pro tip: Warm the honey slightly if it’s too thick to drizzle.
- Sprinkle the cinnamon evenly over the pears. If you’re feeling adventurous, a pinch of nutmeg can join the party.
- Scatter the chopped walnuts on top if using, because texture is everything.
- Bake for 25-30 minutes, or until the pears are tender and the edges are just starting to caramelize. The smell will tell you when it’s close.
- Let them cool for a few minutes—patience is a virtue, especially with molten honey involved.
Buttery soft with a hint of spice, these pears are a dream on their own or paired with vanilla ice cream for that hot-cold contrast. Serve them in a fancy dish to impress, or straight from the baking dish for maximum comfort.
Healthy Pear and Spinach Smoothie

Brace yourselves, smoothie skeptics, because this ‘Healthy Pear and Spinach Smoothie’ is about to turn your blender into a magic wand that transforms ‘meh’ mornings into ‘heck yes’ ones. Packed with greens that don’t taste like punishment and pears that bring the sweet, it’s a sip of sunshine that even your pickiest eater might not side-eye.
Ingredients
- 1 cup fresh spinach, tightly packed (baby spinach works best for a milder taste)
- 1 ripe pear, cored and chopped (no need to peel, but go for it if you’re anti-skin)
- 1/2 cup plain Greek yogurt (for creaminess and a protein punch)
- 1/2 cup almond milk (or any milk that makes your heart sing)
- 1 tbsp honey (adjust to sweeten the deal to your liking)
- 1/2 tsp vanilla extract (because vanilla makes everything fancy)
- A handful of ice cubes (unless you like your smoothies room temp, you rebel)
Instructions
- Wash the spinach thoroughly to avoid any gritty surprises in your sip.
- Chop the pear into chunks small enough to not challenge your blender’s will to live.
- Add all ingredients to your blender in the order listed, because layering matters more than your Instagram feed.
- Blend on high for 45 seconds, or until the mixture is as smooth as your post-smoothie skin.
- Pause to scrape down the sides if your blender’s acting shy, then blend for another 15 seconds to ensure no spinach leaf is left behind.
- Pour into your favorite glass, and if you’re feeling extra, garnish with a thin pear slice or a spinach leaf for that ‘I definitely have my life together’ vibe.
Creamy with a hint of sweetness and a texture that’s neither too thick nor too thin, this smoothie is like the Goldilocks of breakfast drinks. Serve it with a side of smug satisfaction for choosing health, or dunk a cookie in it because balance, right?
Pear and Quinoa Salad with Walnuts

Brace yourselves, salad skeptics, because this Pear and Quinoa Salad with Walnuts is about to rock your world. It’s the perfect blend of sweet, crunchy, and downright delicious, proving that salads can indeed be the life of the party.
Ingredients
- 1 cup quinoa, rinsed (for that perfect fluffiness)
- 2 cups water (or broth for extra flavor)
- 2 ripe pears, diced (any variety, but go for crisp ones)
- 1/2 cup walnuts, toasted (because everything’s better toasted)
- 2 tbsp olive oil (or any neutral oil you love)
- 1 tbsp lemon juice (freshly squeezed, please)
- 1/4 tsp salt (adjust to taste, you salty dog)
- 1/4 tsp black pepper (freshly ground, if you’re fancy)
Instructions
- In a medium saucepan, combine quinoa and water. Bring to a boil over high heat, then reduce heat to low, cover, and simmer for 15 minutes, or until water is absorbed and quinoa is fluffy. Tip: Let it sit covered for 5 minutes off the heat for extra fluffiness.
- While quinoa cooks, toast walnuts in a dry skillet over medium heat for 3-5 minutes, stirring frequently, until fragrant and lightly browned. Tip: Keep an eye on them; nuts go from toasted to burnt in a flash.
- In a large bowl, whisk together olive oil, lemon juice, salt, and pepper. Tip: Taste as you go; dressing should be zesty but not face-puckering.
- Add cooked quinoa, diced pears, and toasted walnuts to the bowl with dressing. Toss gently to combine.
Kick back and marvel at your creation: a salad that’s a textural dream with creamy quinoa, juicy pears, and crunchy walnuts. Serve it up in a hollowed-out pear half for a presentation that’ll have your Instagram followers swooning.
Roasted Pear and Butternut Squash Soup

Howdy, soup lovers! If you’re ready to cozy up with a bowl that’s like autumn in a spoon, you’ve hit the jackpot. This roasted pear and butternut squash soup is the culinary equivalent of a warm hug—sweet, savory, and utterly irresistible.
Ingredients
- 2 cups butternut squash, peeled and cubed (save time with pre-cut!)
- 1 large pear, cored and quartered (Bartlett or Anjou work wonders)
- 2 tbsp olive oil (or any neutral oil)
- 1 small onion, diced (yellow or white for sweetness)
- 2 cups vegetable broth (chicken broth for non-vegans)
- 1/2 tsp cinnamon (because why not?)
- Salt to taste (start with 1/4 tsp)
Instructions
- Preheat your oven to 400°F (because we’re roasting our way to flavor town).
- Toss the butternut squash and pear with 1 tbsp olive oil on a baking sheet. Roast for 25 minutes or until they’re golden and fork-tender.
- While the goodies roast, heat the remaining 1 tbsp olive oil in a pot over medium heat. Add the onion and sauté until translucent, about 5 minutes.
- Add the roasted squash, pear, vegetable broth, and cinnamon to the pot. Bring to a boil, then simmer for 10 minutes to let the flavors marry.
- Blend the soup until smooth using an immersion blender (or carefully in batches with a regular blender).
- Season with salt to taste. Tip: A pinch of cayenne can add a nice kick!
Zesty, velvety, and just the right amount of sweet, this soup is a showstopper. Serve it with a dollop of Greek yogurt and a sprinkle of pepitas for crunch, or go wild with a drizzle of maple syrup. Either way, your taste buds will thank you.
Pear and Almond Butter Toast
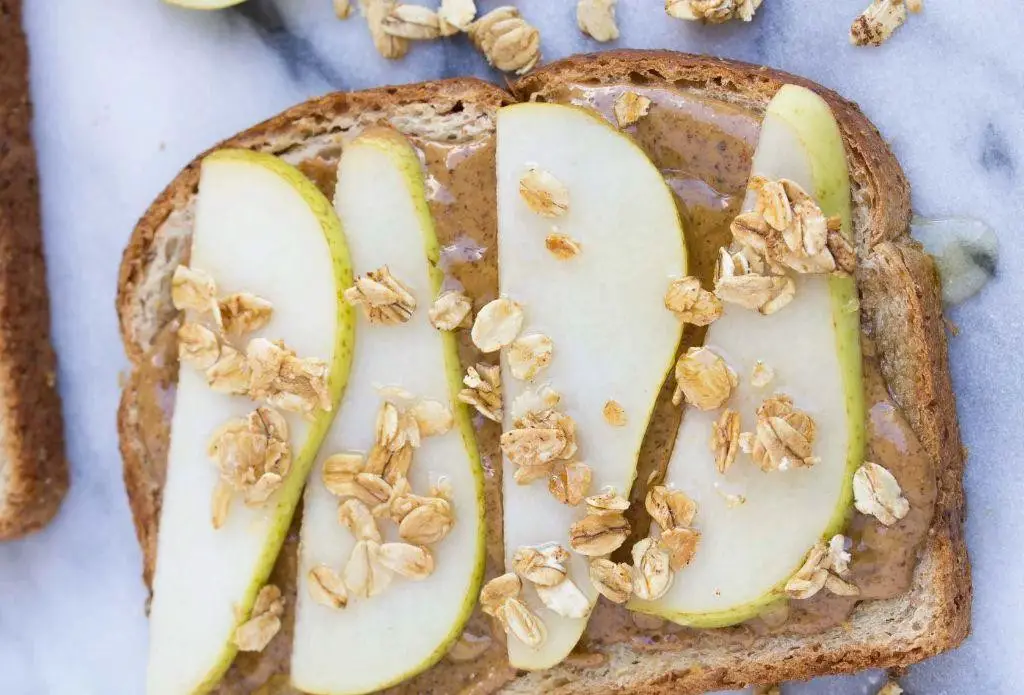
Picture this: a slice of toast so divine, it’ll make your taste buds throw a party. Pear and Almond Butter Toast is here to turn your mundane breakfast into a gourmet experience—no fancy chef skills required!
Ingredients
- 2 slices of whole grain bread (or your favorite bread, for a personal twist)
- 1 ripe pear, thinly sliced (because nobody likes a chunky pear situation)
- 2 tbsp almond butter (smooth or crunchy, depending on your texture preference)
- 1 tsp honey (for that sweet, sweet drizzle action)
- A pinch of cinnamon (because why not spice things up?)
Instructions
- Toast the whole grain bread in a toaster or on a skillet over medium heat until golden brown and crispy, about 2-3 minutes. Tip: Keep an eye on it to avoid a charcoal situation.
- Spread 1 tbsp of almond butter evenly on each slice of toast. Tip: Warming the almond butter slightly can make spreading easier.
- Arrange the thinly sliced pear on top of the almond butter. Tip: Overlapping the slices slightly gives a fancy, restaurant-worthy presentation.
- Drizzle honey over the pears, aiming for that Instagram-worthy zigzag. Tip: If your honey is too thick, warm it up for a smoother drizzle.
- Sprinkle a pinch of cinnamon over the top for that extra flavor kick. Tip: A little goes a long way, so don’t go overboard.
Yum! This Pear and Almond Butter Toast is a symphony of textures—crunchy, creamy, and juicy all in one bite. Serve it with a side of sass or a cup of coffee for the ultimate breakfast flex.
Spiced Pear Oatmeal
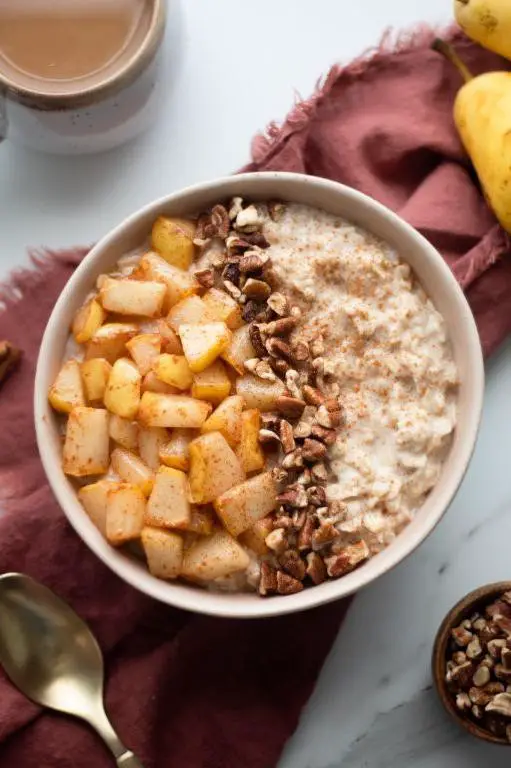
Alright, let’s dive into a breakfast that’s as cozy as your favorite sweater but with a spicy twist that’ll wake you up faster than your alarm clock. Spiced Pear Oatmeal is here to turn your mundane morning routine into a flavor-packed adventure.
Ingredients
- 1 cup old-fashioned oats (not the instant kind, unless you enjoy mush)
- 2 cups water (or milk for extra creaminess)
- 1 ripe pear, diced (leave the skin on for texture and fiber)
- 1 tbsp honey (or maple syrup for a vegan twist)
- 1/2 tsp cinnamon (because life’s too short for bland food)
- 1/4 tsp nutmeg (freshly grated if you’re feeling fancy)
- A pinch of salt (to make all the flavors pop)
Instructions
- In a medium saucepan, bring the water (or milk) to a boil over high heat. Watch it like a hawk to prevent a boil-over disaster.
- Stir in the oats and reduce the heat to medium-low. Let it simmer for 5 minutes, stirring occasionally to avoid sticking. Tip: A wooden spoon is your best friend here.
- Add the diced pear, honey, cinnamon, nutmeg, and salt to the saucepan. Stir well to combine. Tip: If the mixture seems too thick, add a splash of water or milk to loosen it up.
- Continue to cook for another 3-5 minutes, or until the pears are tender but still hold their shape. Tip: Taste test here—adjust sweetness or spice if needed.
- Remove from heat and let it sit for 2 minutes to thicken up. This is the perfect time to debate whether you’re a morning person or not.
Yield: This Spiced Pear Oatmeal is luxuriously creamy with little bursts of sweet, spicy pear. Serve it topped with a dollop of yogurt or a sprinkle of granola for crunch, and watch as it becomes the highlight of your morning.
Grilled Pear and Chicken Salad
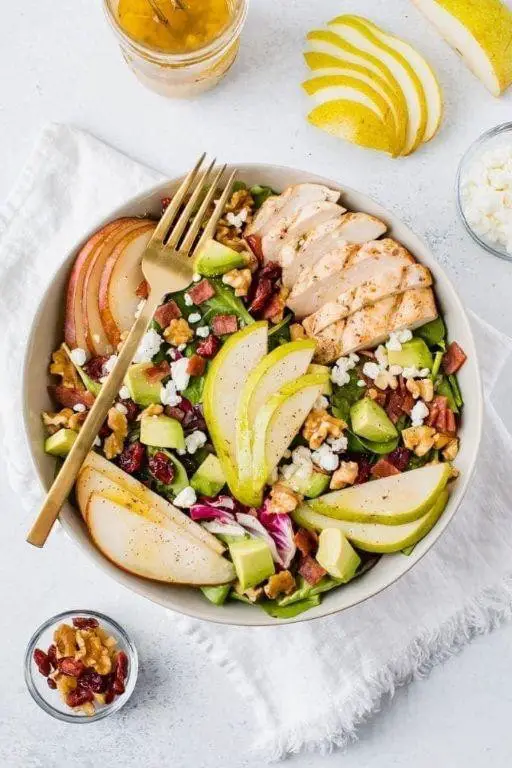
Unbelievably, this Grilled Pear and Chicken Salad is the culinary equivalent of a summer fling—light, refreshing, and leaves you wanting more. Perfect for those days when you crave something gourmet but can’t be bothered to spend hours in the kitchen.
Ingredients
- 2 boneless, skinless chicken breasts (about 1 lb total, for even cooking)
- 2 ripe pears, halved and cored (Bosc or Anjou work wonders)
- 1/4 cup olive oil (or any neutral oil, for that matter)
- 2 tbsp balsamic vinegar (the good stuff makes a difference)
- 1 tbsp honey (adjust to taste, sweet tooths)
- 4 cups mixed greens (because we’re fancy like that)
- 1/4 cup crumbled goat cheese (or feta, for the rebels)
- 1/4 cup chopped walnuts (toasted, because why not?)
- Salt and pepper (to taste, but don’t be shy)
Instructions
- Preheat your grill to medium-high heat (about 375°F to 400°F). No grill? A grill pan over medium heat works too.
- Brush chicken breasts and pear halves lightly with olive oil, then season both sides with salt and pepper. This is your flavor foundation—build it well.
- Grill chicken for 6-7 minutes per side, or until internal temperature reaches 165°F. Pears grill for 3-4 minutes per side, just until you see those sexy grill marks.
- While the grill does its magic, whisk together remaining olive oil, balsamic vinegar, and honey in a small bowl. Taste and adjust sweetness or acidity as needed.
- Slice grilled chicken and pears. Tip: Let the chicken rest for 5 minutes before slicing to keep it juicy.
- In a large bowl, toss mixed greens with half the dressing. Add chicken, pears, goat cheese, and walnuts. Drizzle with remaining dressing.
- Serve immediately. Tip: For an extra crunch, add the walnuts just before serving to keep them from getting soggy.
What you’ve got here is a salad that’s a symphony of textures—juicy chicken, creamy goat cheese, crunchy walnuts, and those slightly charred, sweet pears. Serve it on a platter for a family-style meal or plate it up fancy to impress your in-laws. Either way, it’s a win.
Pear and Ginger Detox Juice
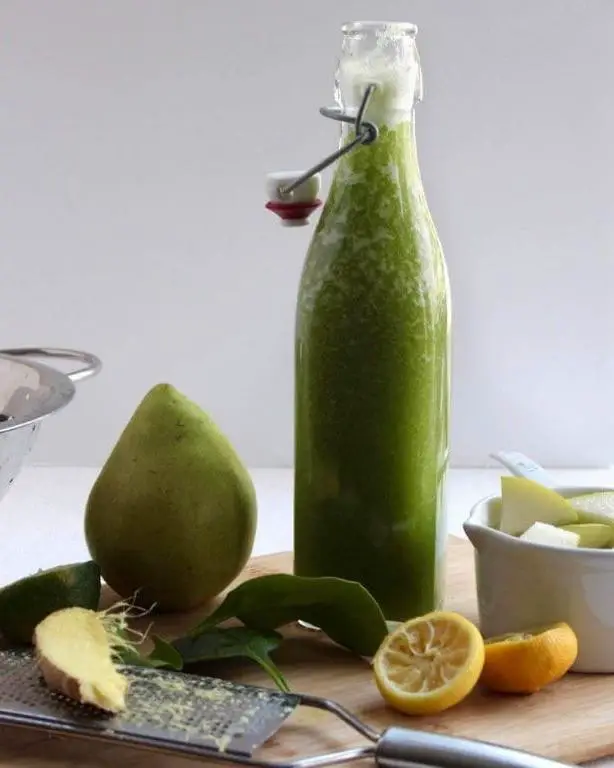
Picture this: you’ve had one too many slices of pizza last night, and now your body’s screaming for a detox hero. Enter our Pear and Ginger Detox Juice—a zesty, refreshing elixir that’ll have you bouncing back faster than a cat on a hot tin roof.
Ingredients
- 2 ripe pears, cored and chopped (no need to peel, unless you’re extra)
- 1-inch piece of fresh ginger, peeled (unless you’re brave, then leave it on)
- 1 cup cold water (ice-cold if you’re feeling fancy)
- 1 tbsp lemon juice (freshly squeezed, because we’re not savages)
- A pinch of cayenne pepper (for that cheeky little kick)
Instructions
- Toss the pears, ginger, water, and lemon juice into your blender. Blend on high for 45 seconds, or until smoother than a jazz saxophonist.
- Strain the mixture through a fine mesh sieve into a pitcher, pressing down to extract every last drop of that liquid gold.
- Stir in the cayenne pepper with the finesse of a bartender crafting a signature cocktail.
- Chill in the fridge for 30 minutes, because patience is a virtue, especially when it comes to detox juices.
- Pour into a glass over ice, garnish with a thin slice of pear if you’re feeling artsy, and serve immediately.
Here’s the scoop: this juice is as invigorating as a morning jog, with a sweet pear base, a fiery ginger punch, and a lemony zing that’ll wake up your taste buds. Serve it in a fancy glass with a striped straw, and suddenly, you’re not just detoxing—you’re living your best life.
Healthy Pear and Yogurt Parfait
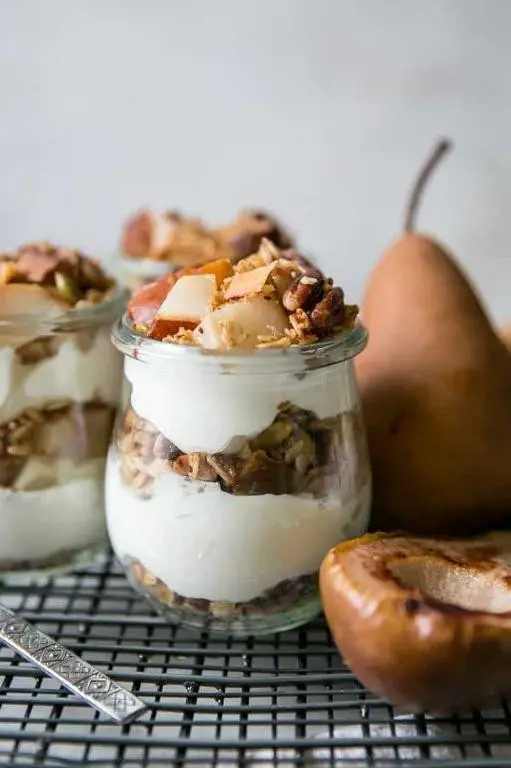
Buckle up, buttercups, because we’re about to dive into a breakfast that’s as nutritious as it is delicious. This Healthy Pear and Yogurt Parfait is the perfect way to start your day with a bang, or hey, even to trick yourself into thinking you’re eating dessert for breakfast.
Ingredients
- 1 cup Greek yogurt (go for full-fat to keep it creamy)
- 1 ripe pear, diced (any variety, but Bartlett adds a nice sweetness)
- 1/4 cup granola (homemade or store-bought, we won’t judge)
- 1 tbsp honey (adjust to sweetness preference)
- 1/2 tsp cinnamon (because everything’s better with a little spice)
Instructions
- In a clear glass or bowl, start by layering half of the Greek yogurt at the bottom. Pro tip: Using a clear vessel makes it Instagram-worthy.
- Sprinkle half of the diced pear over the yogurt. The juicier the pear, the better the texture contrast.
- Drizzle half of the honey over the pears. A little goes a long way, so don’t drown it.
- Repeat the layers with the remaining yogurt, pear, and honey.
- Top with granola for that essential crunch and a dusting of cinnamon for warmth.
Mmm, the contrast between the creamy yogurt, juicy pear, and crunchy granola is nothing short of magical. Serve it in a mason jar for a picnic, or hey, eat it straight from the bowl while pretending you’re a gourmet chef.
Pear and Blue Cheese Salad with Balsamic Glaze
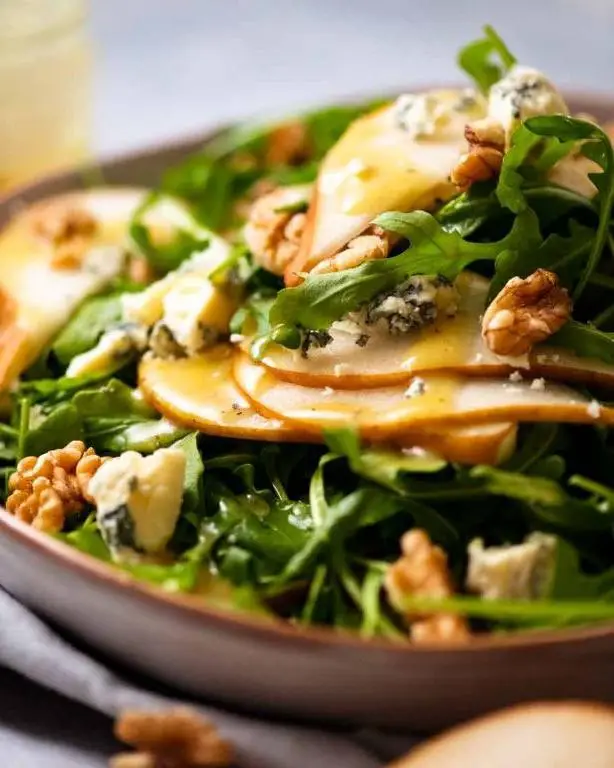
Vividly imagine a salad that dances on the palate with the sweet crunch of pears, the bold tang of blue cheese, and the rich drizzle of balsamic glaze. This isn’t just a salad; it’s a symphony of flavors that’ll make your taste buds sing (or at least hum a happy tune).
Ingredients
- 2 ripe pears, thinly sliced (Bartlett or Anjou work beautifully)
- 1/2 cup crumbled blue cheese (or more, because why not?)
- 1/4 cup walnuts, toasted (for that irresistible crunch)
- 4 cups mixed greens (the fresher, the better)
- 2 tbsp extra virgin olive oil (or any neutral oil)
- 1 tbsp balsamic vinegar (adjust to taste)
- 1 tbsp honey (for a touch of sweetness)
- Salt and pepper to taste (because seasoning is key)
Instructions
- In a large bowl, toss the mixed greens with olive oil until lightly coated. This is the foundation of your flavor masterpiece.
- Arrange the thinly sliced pears on top of the greens. Their sweetness is the perfect counterpoint to the blue cheese.
- Sprinkle the crumbled blue cheese and toasted walnuts over the pears. This is where the magic happens.
- In a small bowl, whisk together balsamic vinegar and honey until smooth. Drizzle this glaze over the salad for a glossy finish.
- Season with salt and pepper to taste. Remember, a little goes a long way.
Yield to the temptation of this pear and blue cheese salad, where every bite offers a contrast of textures and flavors. Serve it as a sophisticated starter or pair it with a crisp white wine for an effortless dinner party showstopper.
Pear and Chia Seed Pudding
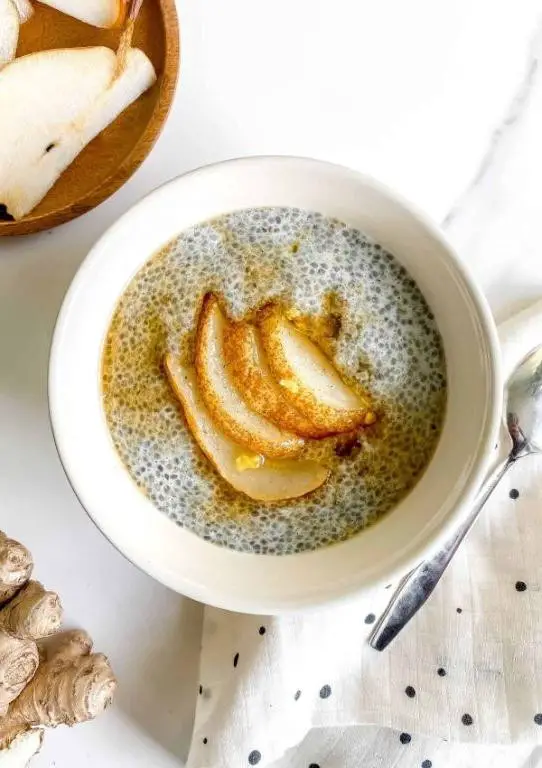
Hold onto your spoons, folks, because we’re about to dive into a bowl of creamy, dreamy Pear and Chia Seed Pudding that’s as easy to whip up as it is delicious. Perfect for those mornings when you’re half-awake but still want to eat like a gourmet.
Ingredients
- 2 ripe pears, peeled and diced (the sweeter, the better)
- 1/4 cup chia seeds (they’re the magic thickeners)
- 1 cup almond milk (or any milk that tickles your fancy)
- 1 tbsp honey (adjust to sweetness level of your pears)
- 1/2 tsp vanilla extract (because vanilla makes everything better)
- A pinch of cinnamon (for that cozy spice kick)
Instructions
- In a medium bowl, combine the diced pears, chia seeds, almond milk, honey, vanilla extract, and cinnamon. Stir well to ensure the chia seeds are fully submerged to avoid clumping.
- Cover the bowl and refrigerate for at least 4 hours, or overnight if you’re planning ahead. The chia seeds need time to work their thickening magic.
- Give the mixture a good stir before serving to break up any chia seed clumps that might have formed. This ensures a smooth, pudding-like texture.
- Serve chilled, topped with extra diced pears or a drizzle of honey for an extra touch of sweetness.
Who knew something so simple could taste so indulgent? The pudding sets into a luxuriously thick texture with little pops of pear sweetness in every bite. Try layering it with granola for a breakfast parfait that’ll make you feel fancy without the fuss.
Stuffed Pears with Ricotta and Pistachios

Today is ‘2025-06-15 03:04:53.925276’, You’re a professional food blogger writing a relatable US-based roundup-style recipe article. Introduce the dish: ‘Stuffed Pears with Ricotta and Pistachios’ using the structure below.
Tone: Use a playful, witty voice. Add light humor, bold phrasing, and fun energy throughout.
Write a short 2-3 sentence intro, The first word of your introduction must begin with the letter ‘T’. Do not display the title. Start directly with the introduction.
Ingredients
- 2 ripe but firm pears (Bartlett or Anjou work beautifully)
- 1/2 cup ricotta cheese (whole milk for extra creaminess)
- 1/4 cup shelled pistachios, roughly chopped (for a delightful crunch)
- 2 tbsp honey (local is lovely, but any will do)
- 1/2 tsp vanilla extract (the good stuff makes a difference)
- A pinch of salt (to balance the sweetness)
Instructions
- Preheat your oven to 375°F (190°C) and line a baking sheet with parchment paper for easy cleanup.
- Cut the pears in half lengthwise and use a melon baller or spoon to scoop out the cores, creating a small well in each half.
- In a small bowl, mix the ricotta, chopped pistachios, honey, vanilla extract, and a pinch of salt until well combined. Taste and adjust sweetness if needed.
- Spoon the ricotta mixture into the wells of the pear halves, dividing it evenly among them.
- Place the stuffed pears on the prepared baking sheet and bake for 20-25 minutes, or until the pears are tender when pierced with a fork but still hold their shape.
- Let the pears cool for a few minutes before serving to allow the flavors to meld beautifully.
Dive into these stuffed pears where the creamy ricotta and crunchy pistachios play a delightful game of texture tag in your mouth. Serve them warm with a drizzle of extra honey for a touch of sweetness that’ll make your taste buds sing.
Pear and Kale Detox Salad
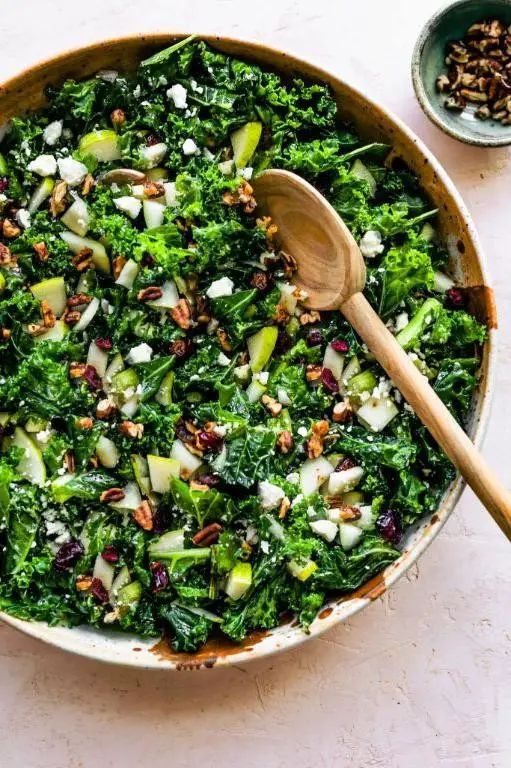
Now, who said detoxing had to be a dull affair? Dive fork-first into this vibrant Pear and Kale Detox Salad that’s as delightful to your taste buds as it is to your Instagram feed. Packed with crisp, sweet, and earthy flavors, it’s the salad that eats like a meal and makes you feel like a wellness guru.
Ingredients
- 4 cups kale, chopped (stems removed for tenderness)
- 1 ripe pear, thinly sliced (Bartlett or Anjou work wonders)
- 1/4 cup walnuts, toasted (because everything’s better with a crunch)
- 2 tbsp olive oil (or any neutral oil you fancy)
- 1 tbsp apple cider vinegar (adjust to taste for that perfect zing)
- 1/2 tsp salt (because even salads need a little love)
- 1/4 tsp black pepper (freshly ground, if you’re feeling fancy)
Instructions
- In a large bowl, massage the kale with olive oil and salt for 2-3 minutes until it softens and turns a brighter green. (Yes, massage. Your kale will thank you.)
- Add the thinly sliced pear and toasted walnuts to the bowl. Toss gently to combine. (This is where the magic starts.)
- In a small bowl, whisk together apple cider vinegar and black pepper. Drizzle over the salad and toss to coat evenly. (Tip: Taste as you go—more vinegar? More pepper? You do you.)
- Let the salad sit for 5 minutes before serving to allow the flavors to meld. (Patience is a virtue, especially in salad-making.)
Ready to serve? This salad is a textural dream—crispy, juicy, and crunchy all at once. Pair it with a slice of crusty bread for a light lunch, or top it with grilled chicken to turn it into a hearty dinner. Either way, it’s a dish that’s as versatile as it is vibrant.
Healthy Pear and Banana Bread
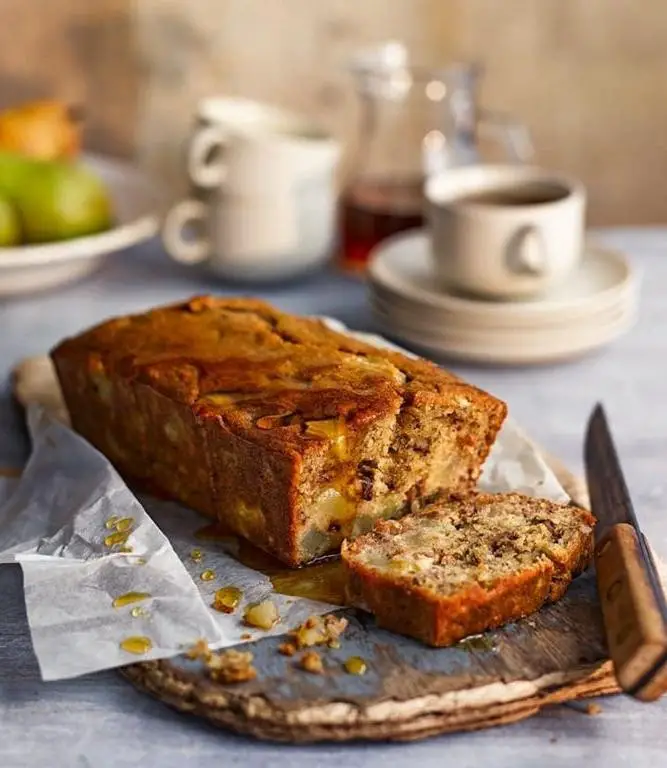
Mmm, who knew health could taste this good? Our Healthy Pear and Banana Bread is here to prove that you can have your cake and eat it too—minus the guilt, plus all the flavor. Perfect for those mornings when you’re racing out the door or those afternoons when your sweet tooth is staging a coup.
Ingredients
- 1 1/2 cups whole wheat flour (or all-purpose for a lighter texture)
- 1 tsp baking soda (the secret to that perfect rise)
- 1/2 tsp salt (because even sweet bread needs balance)
- 1/2 cup honey (or maple syrup for a vegan twist)
- 1/4 cup coconut oil, melted (or any neutral oil you have on hand)
- 2 eggs (flax eggs work too for our plant-based pals)
- 1 cup mashed ripe bananas (about 2 medium, the spottier, the better)
- 1 cup diced pears (peeled or unpeeled, your call)
- 1/2 cup chopped walnuts (optional, but highly recommended for crunch)
Instructions
- Preheat your oven to 350°F (175°C) and grease a 9×5 inch loaf pan. Tip: A light spray of oil does the trick without the fuss.
- In a large bowl, whisk together the whole wheat flour, baking soda, and salt. This ensures no sneaky clumps ruin your bread.
- In another bowl, mix the honey, melted coconut oil, and eggs until smooth. Tip: If your coconut oil solidifies upon contact with cold ingredients, a quick microwave zap will bring it back to liquid gold.
- Fold the mashed bananas and diced pears into the wet ingredients. The pears add a juicy surprise in every bite.
- Gradually combine the wet and dry ingredients, stirring just until mixed. Overmixing is the enemy of fluffy bread.
- Gently fold in the chopped walnuts, if using. They’re not just for texture; they’re little nuggets of joy.
- Pour the batter into the prepared loaf pan and smooth the top. A little unevenness adds character.
- Bake for 50-60 minutes, or until a toothpick inserted into the center comes out clean. Tip: Ovens can be drama queens, so start checking at 50 minutes.
- Let the bread cool in the pan for 10 minutes, then transfer to a wire rack. Patience is key here—unless you enjoy crumbly disasters.
Now, not only does this bread boast a moist, tender crumb with bursts of sweet pear and banana, but it also makes your kitchen smell like a bakery. Serve it warm with a smear of almond butter for breakfast, or toast a slice and top with yogurt for an epic snack. No matter how you slice it, it’s a win.
Pear and Coconut Energy Balls
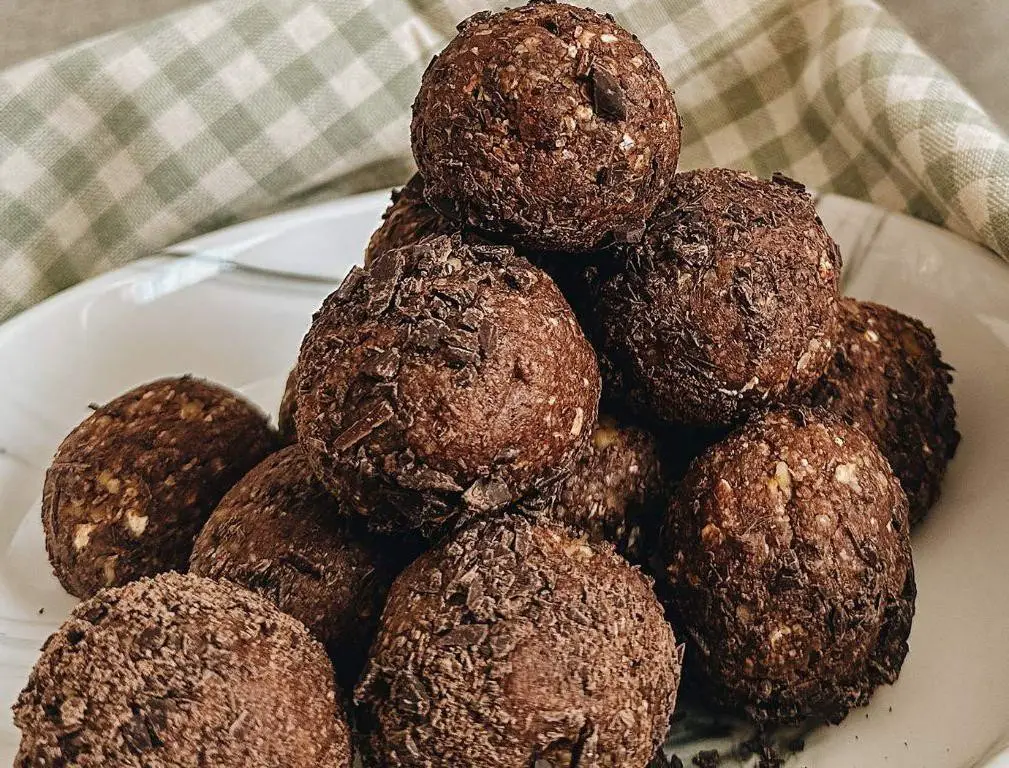
Yummy doesn’t even begin to cover these Pear and Coconut Energy Balls—your new go-to snack that’s as fun to make as it is to eat. Packed with natural sweetness and a tropical twist, they’re the perfect pick-me-up for when you’re running on empty but still want to keep it healthy.
Ingredients
- 1 cup dried pears, chopped (soak in warm water for 10 minutes if too hard)
- 1 cup shredded coconut, unsweetened (toast lightly for extra flavor)
- 1/2 cup almond butter (creamy or crunchy, your call)
- 1/4 cup honey (or maple syrup for a vegan twist)
- 1 tsp vanilla extract (the real deal, please)
- 1/2 tsp cinnamon (because everything’s better with a little spice)
- Pinch of salt (to balance the sweetness)
Instructions
- In a food processor, blend the dried pears until they form a sticky paste. Tip: Scrape down the sides as needed to ensure everything blends evenly.
- Add the shredded coconut, almond butter, honey, vanilla extract, cinnamon, and salt to the food processor. Pulse until the mixture comes together into a dough-like consistency. Tip: If the mixture is too dry, add a teaspoon of water at a time until it binds.
- Roll the mixture into 1-inch balls, placing them on a parchment-lined tray as you go. Tip: Wet your hands slightly to prevent sticking.
- Chill the energy balls in the refrigerator for at least 30 minutes to firm up. This step is crucial for the perfect texture.
Unbelievably soft yet satisfyingly chewy, these energy balls are a delightful mix of sweet pear and nutty coconut. Serve them as a post-workout snack or roll them in extra coconut for a fancy touch at your next brunch spread.
Slow Cooker Pear Applesauce
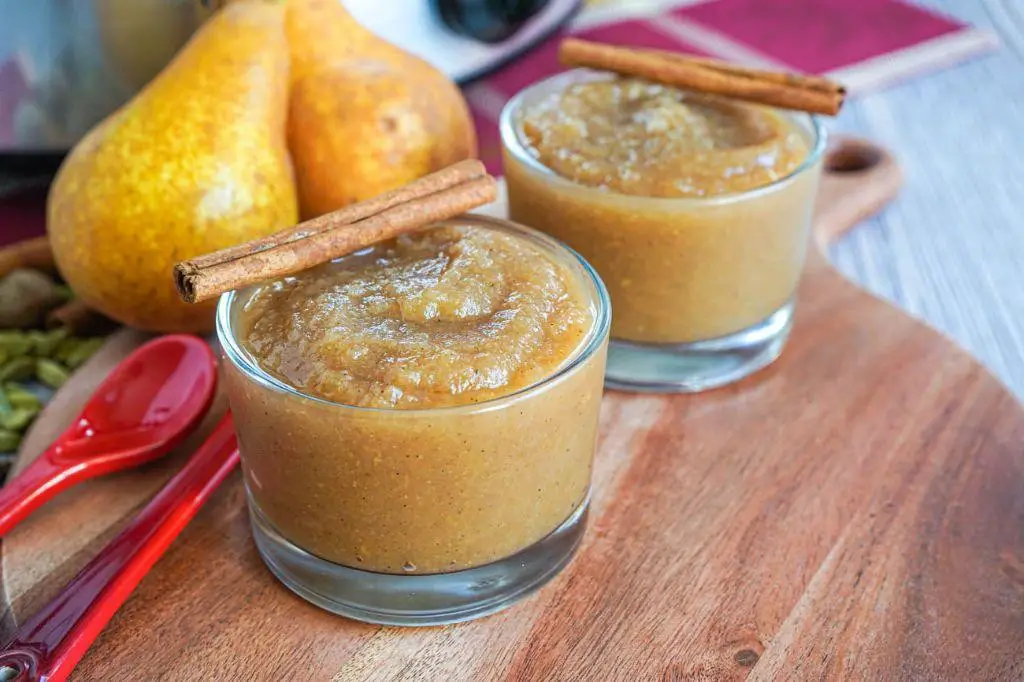
Craving a twist on the classic applesauce that’ll make your taste buds dance? Our Slow Cooker Pear Applesauce is here to save the day, blending the sweet, juicy goodness of pears with the timeless charm of apples. It’s like autumn in a bowl, but let’s be real—you’ll want to eat it year-round.
Ingredients
- 4 large pears, peeled and diced (Bartlett or Anjou work wonders)
- 4 large apples, peeled and diced (go for Honeycrisp for sweetness or Granny Smith for a tart kick)
- 1/2 cup water (just enough to keep things moving)
- 1/4 cup brown sugar (because a little sweetness never hurt nobody)
- 1 tsp cinnamon (or more if you’re feeling spicy)
- 1/2 tsp vanilla extract (the secret weapon)
Instructions
- Toss the diced pears and apples into your slow cooker. Pro tip: Uniform pieces cook evenly, so keep your dice game strong.
- Pour in the water, then sprinkle the brown sugar and cinnamon over the fruit. Drizzle with vanilla extract like you’re the boss of flavor town.
- Cover and cook on LOW for 4 hours. No peeking—let the slow cooker work its magic.
- After 4 hours, give the mixture a good stir. If you like chunky applesauce, you’re done. For smoother sauce, mash with a potato masher or blend briefly with an immersion blender.
- Let it cool slightly before serving, unless you’re into eating lava (we don’t judge).
Mmm, the result? A velvety, spiced sauce with layers of flavor that’ll make store-bought taste like sad cardboard. Serve it warm over vanilla ice cream for a dessert that’ll have everyone asking for seconds, or keep it classic with a side of pork chops. Either way, you win.
Pear and Avocado Green Smoothie
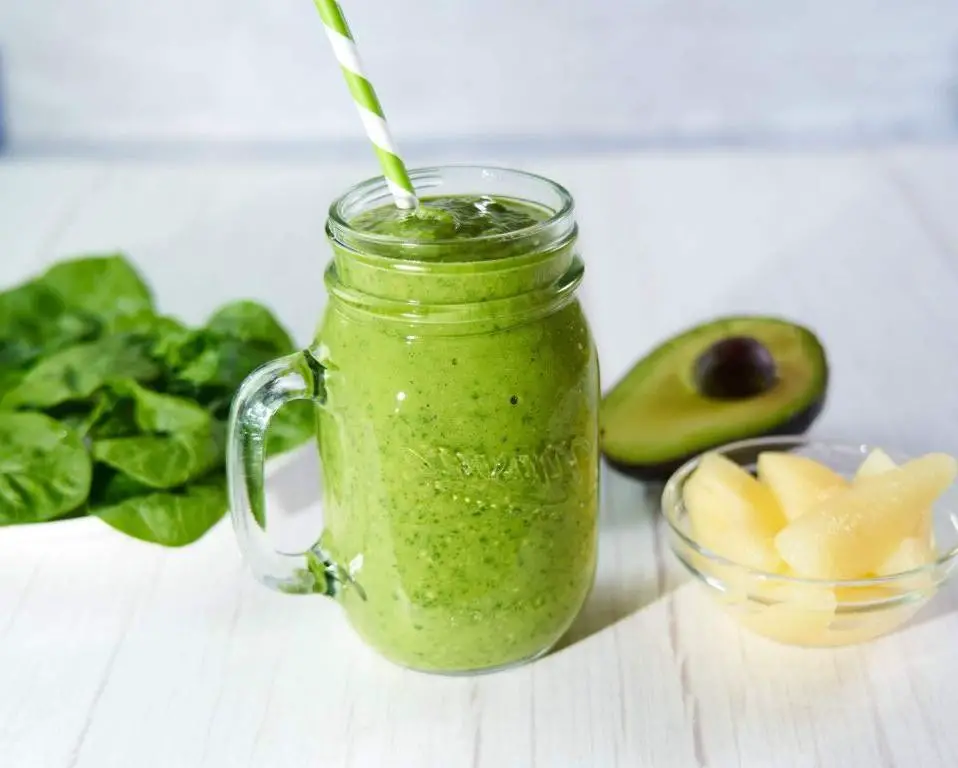
Feeling like your breakfast routine could use a little pizzazz? Let’s blend our way out of boredom with a smoothie that’s as nutritious as it is Instagram-worthy. This pear and avocado green smoothie is the superhero of your morning, packing a punch of flavor and energy to kickstart your day.
Ingredients
- 1 ripe pear, cored and chopped (any variety will do, but Bartlett adds a nice sweetness)
- 1/2 ripe avocado, pitted and scooped (because who has time for slicing?)
- 1 cup spinach, tightly packed (or kale for an extra nutrient boost)
- 1/2 cup almond milk (adjust for desired thickness)
- 1 tbsp honey (or maple syrup for a vegan twist)
- 1/2 cup ice cubes (unless you’re into room temperature smoothies, which, no judgment)
Instructions
- Grab your blender – yes, the one buried under last week’s grocery receipts.
- Toss in the pear, avocado, spinach, almond milk, and honey. Blend on high for 30 seconds or until the mixture is smoother than your morning playlist.
- Add the ice cubes and blend again for another 30 seconds. Pro tip: If your blender sounds like it’s protesting, pause and stir with a spoon to help it along.
- Pour into your favorite glass. Extra pro tip: A mason jar not only looks cute but also makes you feel like you’ve got your life together.
- Take a moment to admire the vibrant green hue before diving in. Final pro tip: A sprinkle of chia seeds on top adds texture and makes you feel extra fancy.
Bold in flavor yet silky in texture, this smoothie is like a hug in a glass. Serve it with a side of avocado toast for the ultimate breakfast duo, or sip it solo while pretending you’re in a health food commercial.
Pear and Walnut Stuffed French Toast
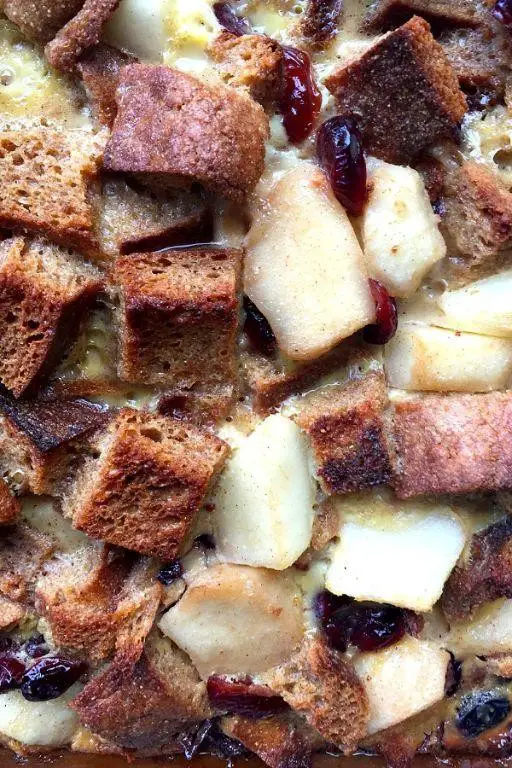
Oh, what a glorious morning to dive into a dish that’s as decadent as it is deceptively simple! Pear and Walnut Stuffed French Toast is the weekend warrior’s dream, combining the elegance of brunch with the comfort of your favorite PJs.
Ingredients
- 4 thick slices of brioche bread (or challah for extra fluffiness)
- 1 ripe pear, thinly sliced (Bartlett or Anjou work wonders)
- 1/2 cup chopped walnuts (toast them for a deeper flavor)
- 4 oz cream cheese, softened (because everything’s better with cream cheese)
- 2 large eggs (farm-fresh if you can swing it)
- 1/2 cup whole milk (or half-and-half for indulgence)
- 1 tsp vanilla extract (the real deal, please)
- 1/2 tsp ground cinnamon (plus extra for dusting)
- 2 tbsp unsalted butter (for that golden crisp)
- Maple syrup, for serving (the more, the merrier)
Instructions
- In a small bowl, mix the cream cheese with half of the chopped walnuts until well combined. This will be your luscious filling.
- Spread the cream cheese mixture evenly on two slices of brioche. Top with pear slices and the remaining walnuts, then sandwich with the remaining bread slices.
- In a shallow dish, whisk together the eggs, milk, vanilla extract, and cinnamon until fully blended. This is your custard bath for the toast.
- Heat a large skillet over medium heat and melt 1 tbsp of butter. Dip each sandwich into the egg mixture, allowing each side to soak for about 30 seconds for maximum absorption.
- Place the soaked sandwiches in the skillet and cook for 3-4 minutes per side, or until golden brown and crispy. Add the remaining butter as needed to prevent sticking.
- Serve immediately, dusted with a little extra cinnamon and drowned in maple syrup. For an extra touch, add a dollop of whipped cream or a sprinkle of powdered sugar.
Golden, crispy on the outside, with a creamy, nutty, and slightly sweet interior, this French toast is a textural masterpiece. Try serving it with a side of crispy bacon or a fresh fruit salad to balance the richness. And remember, the best bites are the ones where the syrup pools just right!
Conclusion
Brimming with variety, our roundup of 18 delicious pear recipes offers something for every taste and occasion, proving that healthy eating can be both nutritious and delightful. We invite you to explore these recipes, find your favorites, and share your culinary adventures with us in the comments below. Don’t forget to spread the love by pinning this article on Pinterest for fellow home cooks to enjoy!