Ready to transform your kitchen into a playground of flavors? Our roundup of 18 Amazing Pretty Good Tools Recipes Delicious is here to inspire home cooks across North America with a mix of quick dinners, seasonal favorites, and ultimate comfort foods. Whether you’re looking to spice up your weeknight meals or impress at your next gathering, these recipes promise delicious results. Let’s dive in and discover your next kitchen adventure!
Avocado Toast with Poached Eggs
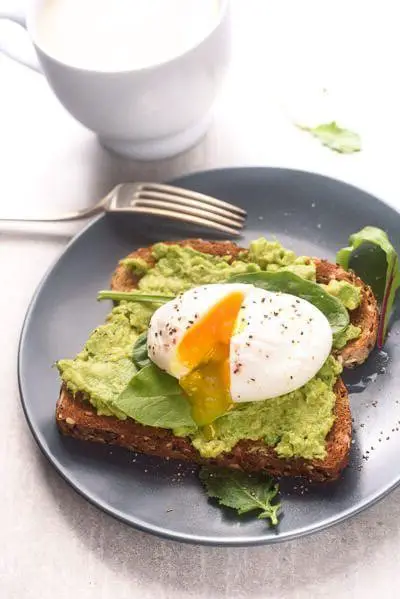
Morning light filters through the kitchen window, casting a soft glow on the counter where today’s simplicity meets indulgence. Avocado toast with poached eggs, a dish that whispers of lazy weekends and nourishing starts, feels just right for this moment.
Ingredients
- 2 slices of artisan sourdough bread
- 1 ripe Hass avocado
- 2 pasture-raised eggs
- 1 tablespoon of white vinegar
- 1 tablespoon of extra virgin olive oil
- 1/2 teaspoon of flaky sea salt
- 1/4 teaspoon of freshly ground black pepper
- 1/4 teaspoon of red pepper flakes
Instructions
- Fill a medium saucepan with 3 inches of water, add white vinegar, and bring to a gentle simmer over medium heat, maintaining a temperature of 190°F.
- While the water heats, toast the sourdough bread slices until golden and crisp, about 3 minutes per side in a toaster or under a broiler.
- Halve the avocado, remove the pit, and scoop the flesh into a bowl. Mash lightly with a fork, leaving some chunks for texture.
- Crack each egg into a small cup or ramekin. Gently slide the eggs into the simmering water, one at a time, and poach for 4 minutes for runny yolks.
- Spread the mashed avocado evenly over the toasted sourdough slices. Drizzle with extra virgin olive oil and sprinkle with flaky sea salt, black pepper, and red pepper flakes.
- Using a slotted spoon, carefully lift the poached eggs from the water, allowing excess water to drain. Place one egg on top of each avocado toast.
- Serve immediately, garnishing with additional red pepper flakes if desired.
Under the delicate yolk, the creamy avocado and crunchy toast create a harmony of textures. For an extra touch, a sprinkle of microgreens adds color and a peppery bite, transforming this simple dish into a canvas of flavors.
Homemade Pasta with Fresh Tomato Sauce
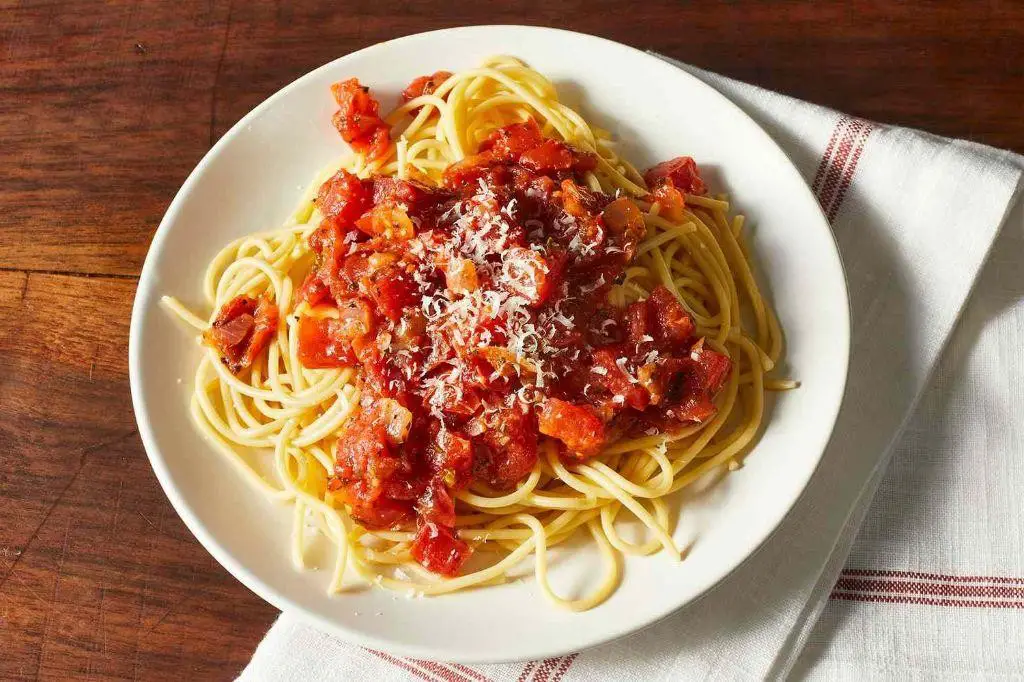
Under the soft glow of the kitchen light, there’s something deeply comforting about rolling out fresh pasta dough, the rhythmic motion a quiet meditation before the vibrant burst of tomato sauce brings it all to life.
Ingredients
- 2 cups all-purpose flour, plus extra for dusting
- 3 pasture-raised eggs, lightly beaten
- 1 tbsp extra-virgin olive oil
- 1/2 tsp fine sea salt
- 2 lbs ripe heirloom tomatoes, blanched, peeled, and crushed
- 2 cloves garlic, minced
- 1/4 cup fresh basil leaves, torn
- 1/4 cup grated Parmigiano-Reggiano cheese
- 1/4 tsp crushed red pepper flakes
- Salt to season
Instructions
- On a clean, flat surface, mound the flour and create a well in the center. Pour the beaten eggs, olive oil, and salt into the well.
- Using a fork, gently whisk the eggs, gradually incorporating the flour from the sides until a dough begins to form.
- Knead the dough by hand for 10 minutes until smooth and elastic. Wrap in plastic and let rest at room temperature for 30 minutes.
- Divide the dough into 4 equal parts. Roll each piece through a pasta machine starting at the widest setting, gradually reducing to the second-thinnest setting.
- Cut the sheets into fettuccine strands and dust lightly with flour to prevent sticking.
- In a large skillet over medium heat, warm the olive oil. Add the garlic and red pepper flakes, sautéing until fragrant, about 30 seconds.
- Add the crushed tomatoes and simmer uncovered for 20 minutes, stirring occasionally, until the sauce thickens slightly.
- Meanwhile, bring a large pot of salted water to a rolling boil. Cook the pasta for 2-3 minutes until al dente.
- Drain the pasta, reserving 1/4 cup of the cooking water. Toss the pasta with the tomato sauce, adding reserved water as needed to loosen the sauce.
- Stir in the torn basil leaves and serve immediately, garnished with grated Parmigiano-Reggiano.
Now, the pasta should be tender yet firm, with the sauce clinging to each strand, its brightness balanced by the richness of the cheese. For a twist, top with a drizzle of basil-infused olive oil or a sprinkle of toasted breadcrumbs for added texture.
Garlic Butter Shrimp with Quinoa
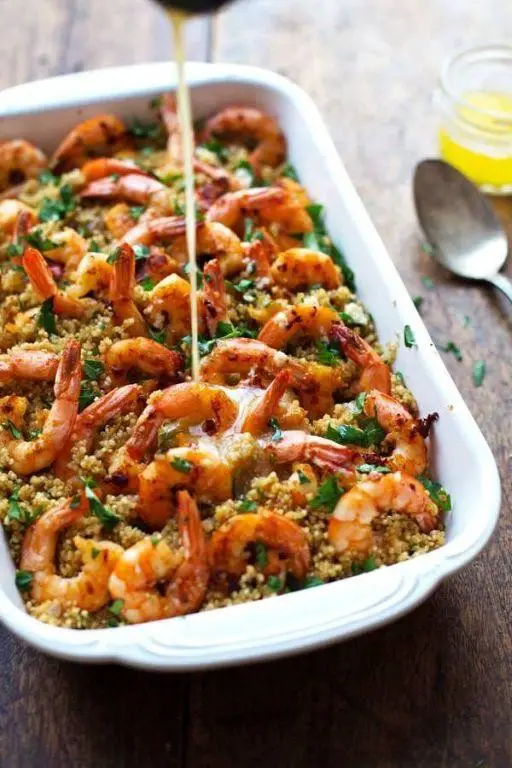
Gently, the aroma of garlic and butter fills the kitchen, a comforting prelude to the simple yet elegant dish we’re about to create. This Garlic Butter Shrimp with Quinoa is a harmonious blend of flavors and textures, perfect for a reflective evening meal.
Ingredients
- 1 cup quinoa, rinsed
- 1 3/4 cups water
- 1/2 tsp sea salt
- 1 lb large shrimp, peeled and deveined
- 3 tbsp clarified butter
- 4 garlic cloves, minced
- 1/4 tsp crushed red pepper flakes
- 2 tbsp fresh lemon juice
- 1/4 cup fresh parsley, finely chopped
Instructions
- In a medium saucepan, combine the quinoa, water, and sea salt. Bring to a boil over high heat, then reduce the heat to low, cover, and simmer for 15 minutes, or until the water is fully absorbed. Remove from heat and let stand, covered, for 5 minutes.
- While the quinoa cooks, pat the shrimp dry with paper towels to ensure a good sear.
- In a large skillet, heat the clarified butter over medium heat until shimmering. Add the minced garlic and crushed red pepper flakes, sautéing for 1 minute until fragrant but not browned.
- Increase the heat to medium-high and add the shrimp in a single layer. Cook for 2 minutes per side, or until the shrimp are pink and opaque.
- Remove the skillet from heat and stir in the fresh lemon juice and chopped parsley, tossing to coat the shrimp evenly.
- Fluff the quinoa with a fork and divide it among plates. Top with the garlic butter shrimp and drizzle any remaining sauce from the skillet over the top.
Fluffy quinoa serves as the perfect canvas for the succulent shrimp, each bite infused with the rich, garlicky butter and a hint of lemon. For an extra touch of elegance, garnish with thin lemon slices and a sprinkle of parsley.
Chocolate Chip Cookies with Sea Salt

Gently, the aroma of warm chocolate and caramelized sugar fills the kitchen, a reminder of the simple joys that baking brings. This recipe for chocolate chip cookies, adorned with a sprinkle of sea salt, is a testament to the beauty of balancing sweet and savory, creating a treat that’s both comforting and sophisticated.
Ingredients
- 1 cup unsalted butter, clarified and cooled to room temperature
- 3/4 cup granulated sugar
- 3/4 cup packed dark brown sugar
- 2 pasture-raised eggs, lightly beaten
- 2 tsp pure vanilla extract
- 2 1/4 cups all-purpose flour, sifted
- 1 tsp baking soda
- 1/2 tsp fine sea salt, plus extra for sprinkling
- 2 cups semisweet chocolate chips
Instructions
- Preheat the oven to 375°F (190°C) and line two baking sheets with parchment paper.
- In a large mixing bowl, cream together the clarified butter, granulated sugar, and dark brown sugar until light and fluffy, about 3 minutes.
- Gradually add the lightly beaten eggs and vanilla extract to the butter mixture, ensuring each addition is fully incorporated before adding the next.
- In a separate bowl, whisk together the sifted flour, baking soda, and fine sea salt.
- Slowly fold the dry ingredients into the wet mixture until just combined, being careful not to overmix.
- Gently stir in the semisweet chocolate chips until evenly distributed throughout the dough.
- Using a cookie scoop or tablespoon, drop dough onto the prepared baking sheets, spacing them 2 inches apart.
- Sprinkle each cookie with a pinch of fine sea salt for that perfect sweet and savory contrast.
- Bake for 10-12 minutes, or until the edges are golden but the centers are still soft.
- Allow the cookies to cool on the baking sheets for 5 minutes before transferring to a wire rack to cool completely.
Finally, these cookies emerge with a crisp edge giving way to a chewy center, the chocolate chips still slightly molten. The hint of sea salt elevates the sweetness, making each bite a complex dance of flavors. Serve them warm with a glass of cold milk or crumble over vanilla ice cream for an indulgent dessert.
Grilled Cheese with Tomato Soup

Basking in the quiet of the morning, there’s something profoundly comforting about the simplicity of a grilled cheese sandwich paired with a bowl of tomato soup. It’s a dish that whispers of childhood and home, yet with the right ingredients and techniques, it can sing with sophistication.
Ingredients
- 4 slices of artisan sourdough bread, 1/2 inch thick
- 2 tablespoons of clarified butter
- 4 ounces of aged sharp cheddar cheese, thinly sliced
- 2 cups of heirloom tomato soup, homemade or high-quality store-bought
- 1 tablespoon of extra virgin olive oil
- 1 small garlic clove, minced
- 1/4 teaspoon of smoked paprika
- Sea salt, to finish
Instructions
- Preheat a cast-iron skillet over medium-low heat for 5 minutes to ensure even heating.
- Spread clarified butter on one side of each sourdough slice, ensuring coverage to the edges for uniform browning.
- Place two slices of bread, buttered side down, in the skillet. Layer the cheddar cheese evenly over the bread.
- Top with the remaining bread slices, buttered side up, pressing gently to adhere.
- Cook for 3-4 minutes until the bottom is golden brown and the cheese begins to melt. Tip: Resist the urge to press down on the sandwich; this expels air and can make the bread soggy.
- Carefully flip the sandwiches using a spatula. Cook for another 3-4 minutes until the second side is golden and the cheese is fully melted.
- While the sandwiches cook, heat the olive oil in a small saucepan over medium heat. Add the minced garlic and sauté for 30 seconds until fragrant.
- Pour in the tomato soup and smoked paprika, stirring to combine. Heat until the soup is just simmering, about 3-4 minutes.
- Season the soup with a pinch of sea salt, adjusting to your preference.
- Remove the grilled cheese sandwiches from the skillet and let them rest for a minute before cutting diagonally. Tip: Letting the sandwich rest allows the cheese to set slightly, preventing oozing when cut.
- Serve the sandwiches alongside the warm tomato soup, garnished with a drizzle of olive oil and a sprinkle of smoked paprika for an extra layer of flavor.
Somehow, the crisp exterior of the sandwich gives way to a molten center, while the soup offers a velvety contrast with its smoky undertones. For an unexpected twist, try dipping the sandwich into a spoonful of soup infused with a drop of balsamic glaze.
Beef Bourguignon with Mashed Potatoes
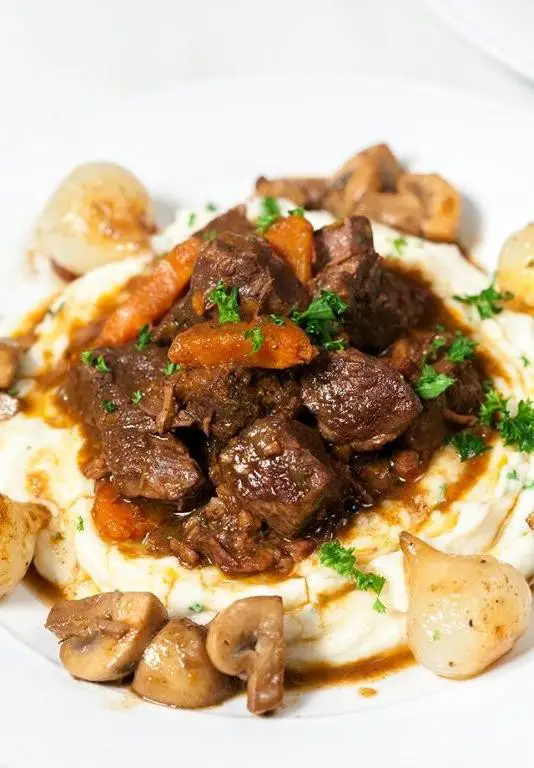
Musing over the comfort that a hearty meal brings, there’s something undeniably soothing about the slow simmer of Beef Bourguignon, its rich aromas weaving through the kitchen, promising warmth and satisfaction. Paired with creamy mashed potatoes, this dish is a tender embrace on a plate, a testament to the beauty of slow cooking.
Ingredients
- 2 lbs beef chuck, cut into 2-inch cubes
- 1/4 cup clarified butter
- 1 large yellow onion, finely diced
- 2 cloves garlic, minced
- 2 cups dry red wine
- 2 cups beef stock
- 1 tbsp tomato paste
- 1 bouquet garni (thyme, bay leaf, parsley)
- 1 lb small pearl onions, peeled
- 8 oz cremini mushrooms, quartered
- 2 lbs Yukon Gold potatoes, peeled and quartered
- 1/2 cup heavy cream
- 4 tbsp unsalted butter
- Salt and freshly ground black pepper
Instructions
- Preheat oven to 325°F. Season beef cubes generously with salt and pepper.
- In a large Dutch oven, heat clarified butter over medium-high heat until shimmering. Sear beef in batches until deeply browned on all sides, about 3 minutes per side. Transfer to a plate.
- Reduce heat to medium. Add diced onion and garlic to the pot, sautéing until translucent, about 5 minutes.
- Deglaze with red wine, scraping up any browned bits. Simmer until reduced by half, about 10 minutes.
- Stir in beef stock, tomato paste, and bouquet garni. Return beef to the pot, cover, and transfer to the oven. Braise for 2.5 hours, until beef is fork-tender.
- Meanwhile, in a skillet, sauté pearl onions and mushrooms in 2 tbsp unsalted butter until golden, about 10 minutes. Set aside.
- For the mashed potatoes, boil Yukon Gold potatoes in salted water until tender, about 15 minutes. Drain and return to the pot.
- Mash potatoes with heavy cream and remaining 2 tbsp unsalted butter until smooth. Season with salt and pepper to taste.
- Remove beef from oven. Stir in pearl onions and mushrooms. Simmer on stove top for 5 minutes to combine flavors.
- Serve Beef Bourguignon over a bed of mashed potatoes.
Zesty with the depth of red wine and the earthiness of mushrooms, this Beef Bourguignon melts into the velvety mashed potatoes, creating a harmony of textures and flavors. For an elegant touch, garnish with a sprig of fresh thyme or a drizzle of truffle oil.
Vegetable Stir Fry with Tofu

Just as the first light of dawn gently illuminates the kitchen, there’s something profoundly comforting about preparing a dish that’s both nourishing and vibrant. This vegetable stir fry with tofu is a canvas of colors and textures, inviting you to slow down and savor the process.
Ingredients
- 1 block extra-firm tofu, pressed and cubed
- 2 tbsp cold-pressed sesame oil
- 1 cup broccoli florets, blanched
- 1 red bell pepper, julienned
- 1 carrot, thinly sliced on a bias
- 2 cloves garlic, minced
- 1 tbsp fresh ginger, grated
- 2 tbsp tamari sauce
- 1 tsp pure maple syrup
- 1/2 tsp crushed red pepper flakes
- 1/4 cup scallions, thinly sliced
Instructions
- Heat sesame oil in a large wok or skillet over medium-high heat until shimmering, about 1 minute.
- Add cubed tofu in a single layer, cooking undisturbed for 3 minutes to achieve a golden crust. Flip and repeat on all sides, about 9 minutes total.
- Introduce minced garlic and grated ginger, stirring constantly for 30 seconds until fragrant to prevent burning.
- Toss in blanched broccoli, julienned bell pepper, and sliced carrot, stir-frying for 4 minutes until vegetables are crisp-tender.
- Whisk together tamari sauce, maple syrup, and crushed red pepper flakes in a small bowl, then pour over the stir fry, coating evenly.
- Continue cooking for 2 minutes, allowing the sauce to reduce slightly and adhere to the ingredients.
- Remove from heat and garnish with sliced scallions.
Silky tofu contrasts with the crunch of fresh vegetables, while the sauce offers a balance of umami and subtle heat. Serve atop a mound of jasmine rice or alongside a crisp, chilled cucumber salad for a complete meal.
Banana Bread with Walnuts
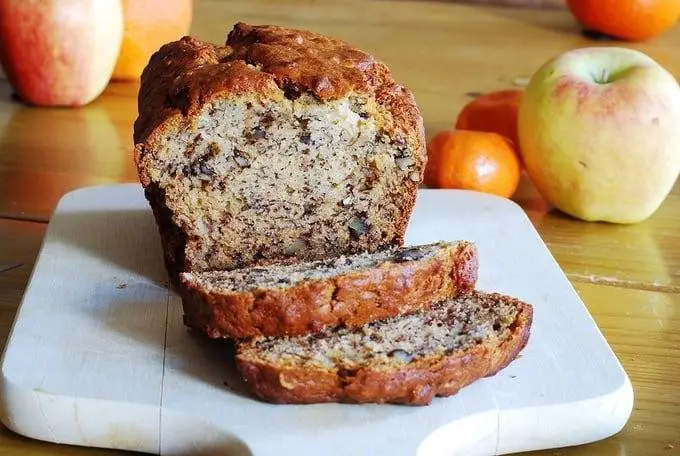
Gently, the aroma of ripe bananas and toasted walnuts fills the kitchen, a comforting reminder of the simple pleasures in life. This banana bread, with its moist crumb and crunchy walnut pieces, is a testament to the beauty of baking with intention and care.
Ingredients
- 1 3/4 cups all-purpose flour, sifted
- 1 teaspoon baking soda
- 1/2 teaspoon sea salt
- 3/4 cup granulated sugar
- 2 pasture-raised eggs, lightly beaten
- 1/2 cup unsalted butter, melted and cooled
- 3 overripe bananas, mashed
- 1/2 cup walnuts, toasted and roughly chopped
- 1 teaspoon pure vanilla extract
Instructions
- Preheat the oven to 350°F (175°C). Grease a 9×5-inch loaf pan with butter and line with parchment paper, leaving an overhang on the sides for easy removal.
- In a medium bowl, whisk together the sifted flour, baking soda, and sea salt until well combined.
- In a large bowl, mix the granulated sugar and lightly beaten eggs until pale and slightly thickened, about 2 minutes.
- Gradually add the melted and cooled butter to the sugar-egg mixture, stirring constantly to incorporate.
- Fold in the mashed bananas and pure vanilla extract until the mixture is uniformly combined.
- Gently fold the dry ingredients into the wet ingredients with a spatula, being careful not to overmix. The batter should be thick and slightly lumpy.
- Fold in the toasted and roughly chopped walnuts until evenly distributed throughout the batter.
- Pour the batter into the prepared loaf pan, smoothing the top with the spatula.
- Bake for 55-60 minutes, or until a toothpick inserted into the center comes out clean. The top should be golden brown and slightly cracked.
- Allow the banana bread to cool in the pan for 10 minutes, then transfer to a wire rack to cool completely.
How the banana bread emerges from the oven, its crust crackling softly as it cools, is a moment of pure anticipation. The interior is tender, with pockets of walnuts adding a delightful crunch. Serve it warm, with a dollop of crème fraîche or a drizzle of honey, to elevate its humble charm.
Pumpkin Spice Latte Cupcakes

Yearning for the cozy embrace of autumn flavors, even as summer begins to wane? These Pumpkin Spice Latte Cupcakes blend the warmth of pumpkin spice with the rich, comforting notes of a latte, creating a dessert that feels like a hug in every bite.
Ingredients
- 1 1/2 cups all-purpose flour, sifted
- 1 tsp baking powder
- 1/2 tsp baking soda
- 1/4 tsp salt
- 2 tsp pumpkin pie spice
- 1/2 cup unsalted butter, room temperature
- 1 cup granulated sugar
- 2 pasture-raised eggs, lightly beaten
- 1 tsp pure vanilla extract
- 3/4 cup pumpkin puree
- 1/2 cup strong brewed coffee, cooled
- 1/4 cup whole milk
Instructions
- Preheat your oven to 350°F (175°C) and line a 12-cup muffin tin with cupcake liners.
- In a medium bowl, whisk together the sifted flour, baking powder, baking soda, salt, and pumpkin pie spice until well combined.
- In a large bowl, cream the butter and sugar together on medium speed until light and fluffy, about 3 minutes. Tip: Ensure your butter is at room temperature for optimal creaming.
- Gradually add the lightly beaten eggs to the butter mixture, one at a time, beating well after each addition. Stir in the vanilla extract.
- Alternately add the dry ingredients and the pumpkin puree to the butter mixture, beginning and ending with the dry ingredients. Mix until just combined. Tip: Overmixing can lead to dense cupcakes, so fold gently.
- Combine the cooled coffee and milk in a small bowl. Slowly add to the batter, mixing until smooth.
- Divide the batter evenly among the prepared muffin cups, filling each about 2/3 full. Tip: Use an ice cream scoop for uniform cupcakes.
- Bake for 18-20 minutes, or until a toothpick inserted into the center comes out clean.
- Allow the cupcakes to cool in the pan for 5 minutes before transferring to a wire rack to cool completely.
The cupcakes emerge with a tender crumb, infused with the deep, aromatic flavors of pumpkin and coffee. For an extra touch, serve them with a dollop of whipped cream and a sprinkle of cinnamon, echoing the latte experience.
Roasted Chicken with Herbs
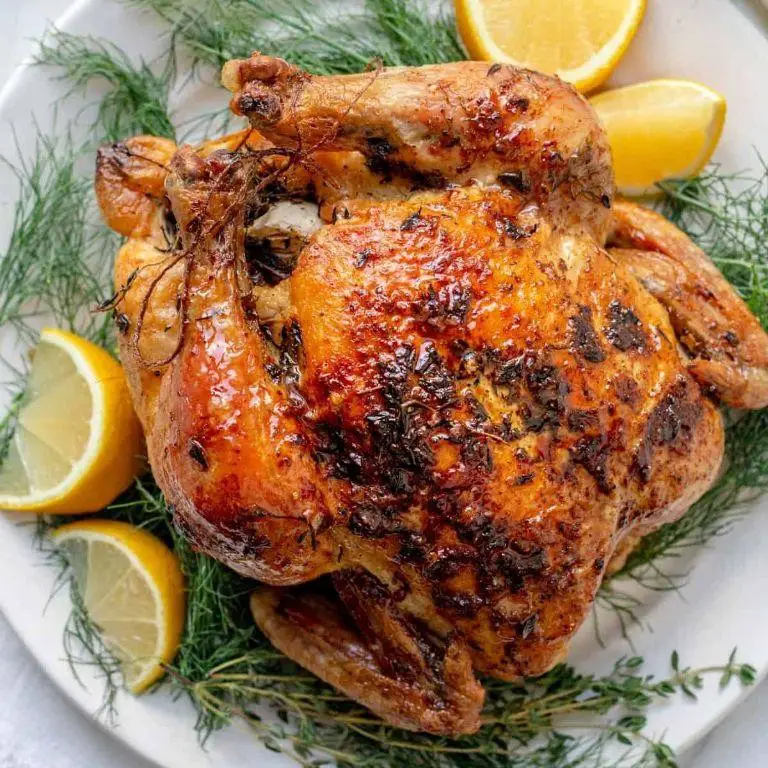
Perhaps there’s no dish more comforting than the golden, herb-scented allure of roasted chicken, its skin crisped to perfection, the meat beneath tender and juicy. It’s a reminder of home, of simplicity, and of the profound beauty in cooking with intention.
Ingredients
- 1 whole pasture-raised chicken (about 4 lbs)
- 3 tbsp clarified butter, melted
- 2 tbsp fresh thyme leaves, finely chopped
- 2 tbsp fresh rosemary leaves, finely chopped
- 1 tbsp fresh sage leaves, finely chopped
- 1 tsp fine sea salt
- 1/2 tsp freshly ground black pepper
- 1 lemon, halved
- 4 garlic cloves, lightly crushed
Instructions
- Preheat your oven to 375°F (190°C) to ensure a consistent cooking environment.
- Pat the chicken dry with paper towels, removing any moisture for optimal skin crispiness.
- In a small bowl, combine the melted clarified butter, thyme, rosemary, sage, sea salt, and black pepper to create a herb-infused butter.
- Gently loosen the skin over the chicken breasts and thighs with your fingers, then evenly spread half of the herb butter underneath the skin.
- Rub the remaining herb butter over the exterior of the chicken, ensuring even coverage for a flavorful crust.
- Place the halved lemon and crushed garlic cloves inside the chicken cavity to infuse the meat with aromatic flavors as it roasts.
- Transfer the chicken to a roasting pan, breast side up, and roast in the preheated oven for 1 hour and 15 minutes, or until the internal temperature reaches 165°F (74°C) at the thickest part of the thigh.
- Let the chicken rest for 10 minutes before carving to allow the juices to redistribute, ensuring moist and tender meat.
Yielded from the oven, the chicken boasts a crackling skin, its herbs lending a fragrant earthiness that complements the succulent, perfectly seasoned meat. Consider serving it atop a bed of roasted root vegetables or alongside a crisp, green salad for a meal that sings of simplicity and grace.
Caesar Salad with Homemade Dressing
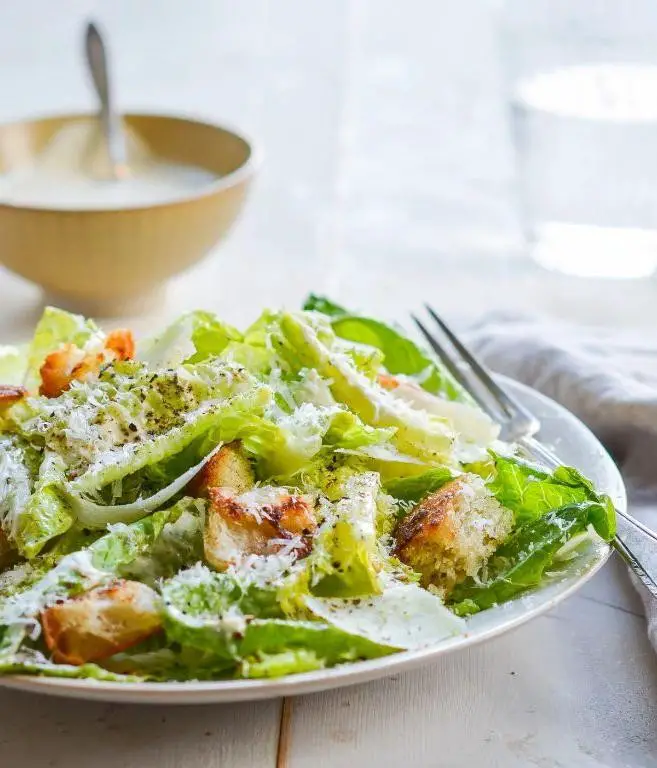
Beneath the quiet hum of the kitchen, the Caesar salad emerges as a timeless classic, its crisp romaine and creamy dressing a dance of textures and flavors that speak to the soul.
Ingredients
- 1 large head of romaine lettuce, washed and dried
- 1/2 cup of extra-virgin olive oil
- 2 pasture-raised eggs, lightly beaten
- 2 cloves of garlic, minced
- 1 tbsp of Dijon mustard
- 2 anchovy fillets, finely chopped
- 1/2 cup of freshly grated Parmesan cheese
- 1 tbsp of fresh lemon juice
- 1/2 tsp of Worcestershire sauce
- 1/4 tsp of sea salt
- 1/4 tsp of freshly ground black pepper
- 1 cup of homemade croutons
Instructions
- In a large mixing bowl, whisk together the olive oil, beaten eggs, minced garlic, Dijon mustard, chopped anchovy fillets, Parmesan cheese, lemon juice, Worcestershire sauce, sea salt, and black pepper until the dressing is smooth and emulsified.
- Tear the romaine lettuce into bite-sized pieces and add them to the bowl with the dressing.
- Using salad tongs, gently toss the lettuce until each leaf is evenly coated with the dressing.
- Add the homemade croutons to the salad and toss once more to distribute them throughout.
- Let the salad sit for 5 minutes to allow the flavors to meld together before serving.
Freshly tossed, the salad offers a crisp bite with a rich, umami-laden dressing that clings lovingly to each leaf. Serve it alongside a grilled protein or enjoy it as a standalone meal for a light yet satisfying dinner.
Berry Smoothie Bowl with Granola

Gently, the morning light filters through the kitchen window, casting a soft glow on the counter where a vibrant Berry Smoothie Bowl with Granola awaits. It’s a dish that whispers of summer mornings and the simple joy of nourishing oneself with colors and textures that delight the senses.
Ingredients
- 1 cup frozen mixed berries (strawberries, blueberries, raspberries)
- 1/2 cup unsweetened almond milk
- 1 tbsp pure maple syrup
- 1/2 tsp vanilla extract
- 1/4 cup granola
- 1 tbsp chia seeds
- Fresh berries and mint leaves for garnish
Instructions
- In a high-speed blender, combine the frozen mixed berries, almond milk, maple syrup, and vanilla extract.
- Blend on high for 45 seconds, or until the mixture is smooth and creamy. Tip: For a thicker consistency, add a few ice cubes and blend again.
- Pour the smoothie into a bowl, using the back of a spoon to create a slight well in the center.
- Sprinkle the granola evenly over the smoothie, focusing on the edges to create a textured contrast.
- Scatter chia seeds over the granola for an added crunch and nutritional boost. Tip: Soak chia seeds in water for 10 minutes beforehand for a gel-like texture.
- Garnish with fresh berries and mint leaves for a pop of color and freshness. Tip: Use seasonal berries for the best flavor and vibrancy.
Overtly, the smoothie bowl presents a symphony of textures—from the creamy base to the crunchy granola and the burst of fresh berries. Serve it with a long-handled spoon to dive deep into the layers, or enjoy it as a refreshing post-workout meal that feels like a treat.
Eggplant Parmesan with Spaghetti
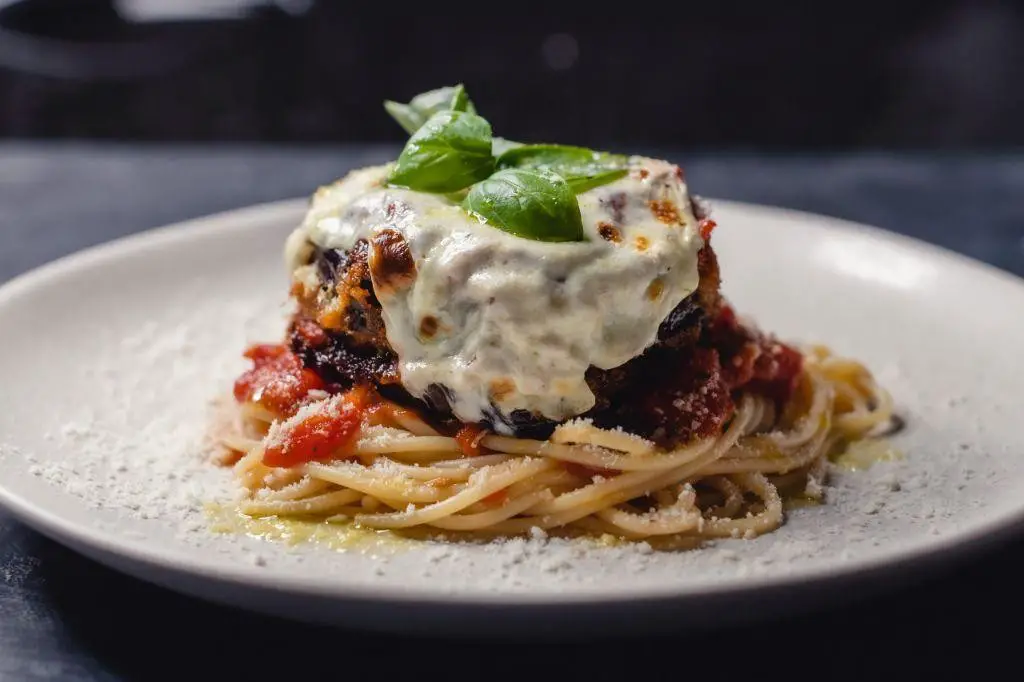
Evenings like these call for a dish that comforts the soul, a meal that wraps you in its warmth like a well-loved blanket. Eggplant Parmesan with Spaghetti is just that—a harmonious blend of crispy, golden eggplant layered with rich marinara and melted cheeses, served atop a bed of al dente spaghetti.
Ingredients
- 1 large eggplant, sliced into 1/2-inch rounds
- 1 cup all-purpose flour
- 2 pasture-raised eggs, lightly beaten
- 1 cup panko breadcrumbs
- 1/2 cup grated Parmesan cheese
- 2 cups marinara sauce
- 1 cup shredded mozzarella cheese
- 1/4 cup olive oil
- 8 oz spaghetti
- Salt, to season
Instructions
- Preheat the oven to 375°F and line a baking sheet with parchment paper.
- Season the eggplant slices with salt and let them sit for 10 minutes to draw out moisture, then pat dry with paper towels.
- Dredge each eggplant slice in flour, dip into the beaten eggs, then coat with a mixture of panko breadcrumbs and Parmesan cheese.
- Heat olive oil in a large skillet over medium heat and fry the eggplant slices until golden brown, about 3 minutes per side. Transfer to the prepared baking sheet.
- Spread a thin layer of marinara sauce over each eggplant slice, sprinkle with mozzarella cheese, and bake for 15 minutes, or until the cheese is bubbly and golden.
- While the eggplant bakes, cook the spaghetti in boiling salted water until al dente, according to package instructions, then drain.
- Serve the baked eggplant Parmesan over a bed of spaghetti, topped with additional marinara sauce if desired.
Kindly savor the contrast of textures—the crispiness of the eggplant against the tender spaghetti, all brought together by the velvety marinara and gooey cheese. For an extra touch of elegance, garnish with fresh basil leaves before serving.
Blueberry Pancakes with Maple Syrup

On a quiet morning like this, there’s something deeply comforting about the ritual of making blueberry pancakes. The way the batter sizzles gently on the griddle, the burst of berries, and the drizzle of maple syrup create a symphony of simple pleasures.
Ingredients
- 1 cup all-purpose flour, sifted
- 2 tbsp granulated sugar
- 1 tsp baking powder
- 1/2 tsp baking soda
- 1/4 tsp fine sea salt
- 3/4 cup buttermilk, room temperature
- 1 large pasture-raised egg, lightly beaten
- 2 tbsp clarified butter, melted
- 1/2 cup fresh blueberries, rinsed and dried
- Maple syrup, for serving
Instructions
- In a large mixing bowl, whisk together the sifted flour, granulated sugar, baking powder, baking soda, and fine sea salt until well combined.
- In a separate bowl, mix the buttermilk, lightly beaten egg, and melted clarified butter until smooth.
- Gently fold the wet ingredients into the dry ingredients until just combined; avoid overmixing to ensure fluffy pancakes.
- Heat a non-stick griddle or skillet over medium heat (350°F) and lightly grease with clarified butter.
- Pour 1/4 cup of batter onto the griddle for each pancake, then sprinkle 5-6 blueberries onto each.
- Cook until bubbles form on the surface and the edges look set, about 2-3 minutes, then flip carefully.
- Cook for another 1-2 minutes until golden brown and cooked through.
- Serve immediately with warm maple syrup.
Kneading the batter as little as possible keeps these pancakes light and airy, with pockets of juicy blueberries. The clarified butter adds a nutty depth, making each bite a delightful contrast of textures and flavors. For an extra touch, garnish with a few fresh blueberries and a dusting of powdered sugar before serving.
Chicken Tikka Masala with Basmati Rice

Wandering through the flavors of the world from the comfort of my kitchen, I find myself drawn to the aromatic allure of Chicken Tikka Masala, a dish that marries the warmth of spices with the creamy embrace of tomato-based sauce, served alongside the delicate grains of basmati rice.
Ingredients
- 1.5 lbs boneless, skinless chicken thighs, cut into 1-inch pieces
- 1 cup plain whole-milk yogurt
- 2 tbsp clarified butter
- 1 tbsp garam masala
- 1 tsp ground turmeric
- 1 tbsp grated fresh ginger
- 3 garlic cloves, minced
- 1 cup heavy cream
- 1.5 cups tomato puree
- 1 cup basmati rice, rinsed until water runs clear
- 2 cups water
- 1 tbsp fresh cilantro, chopped
Instructions
- In a large bowl, combine chicken pieces with yogurt, garam masala, turmeric, ginger, and garlic. Cover and marinate in the refrigerator for at least 4 hours, preferably overnight, for deeper flavor penetration.
- Preheat oven to 375°F. Arrange marinated chicken on a baking sheet lined with parchment paper. Bake for 25 minutes, until edges begin to char slightly.
- In a large skillet over medium heat, melt clarified butter. Add tomato puree and cook for 5 minutes, stirring occasionally, until it darkens slightly.
- Add baked chicken to the skillet, stirring to coat with tomato puree. Pour in heavy cream, reduce heat to low, and simmer for 15 minutes, allowing flavors to meld.
- Meanwhile, in a medium saucepan, combine rinsed basmati rice and water. Bring to a boil, then reduce heat to low, cover, and simmer for 15 minutes, until water is absorbed and rice is tender.
- Fluff rice with a fork and divide among plates. Top with chicken tikka masala, garnish with fresh cilantro, and serve immediately.
Creamy and rich, the chicken tikka masala offers a harmonious blend of spices that are both bold and comforting, while the basmati rice provides a light, fragrant counterbalance. For an extra touch of elegance, serve with a side of naan bread to scoop up the sauce.
French Onion Soup with Gruyere Cheese

How comforting it is to stir a pot of slowly caramelizing onions, their sweet aroma filling the kitchen, as you prepare to create a classic French onion soup. This version, crowned with a generous layer of melted Gruyere cheese, transforms simple ingredients into a deeply flavorful and satisfying dish.
Ingredients
- 4 large yellow onions, thinly sliced
- 3 tbsp clarified butter
- 1 tsp granulated sugar
- 1/2 cup dry white wine
- 6 cups beef stock, homemade preferred
- 1 tbsp all-purpose flour
- 1 bay leaf
- 1/2 tsp freshly ground black pepper
- 4 slices of baguette, toasted
- 1 1/2 cups Gruyere cheese, grated
- 1/4 cup Parmesan cheese, grated
Instructions
- In a large Dutch oven, melt the clarified butter over medium-low heat.
- Add the thinly sliced onions and sugar, stirring to coat. Cook slowly, stirring occasionally, until the onions are deeply caramelized, about 45 minutes. Tip: Resist the urge to turn up the heat; patience yields the best flavor.
- Pour in the white wine, scraping any browned bits from the bottom of the pot. Simmer until the wine has nearly evaporated, about 5 minutes.
- Sprinkle the flour over the onions, stirring to combine. Cook for 1 minute to remove the raw flour taste.
- Gradually add the beef stock, stirring constantly. Add the bay leaf and black pepper. Bring to a simmer and cook for 30 minutes. Tip: Skim off any foam that rises to the surface for a clearer broth.
- Preheat your oven’s broiler to 450°F. Ladle the soup into oven-safe bowls, top each with a slice of toasted baguette, and sprinkle generously with Gruyere and Parmesan cheeses.
- Place the bowls on a baking sheet and broil until the cheese is bubbly and golden, about 3-5 minutes. Tip: Watch closely to prevent burning.
Once broiled, the soup presents a harmonious blend of sweet, savory, and umami flavors, with the cheese forming a delightful crust. For an extra touch, serve with a small glass of the remaining white wine to complement the soup’s richness.
Lemon Garlic Roasted Brussels Sprouts
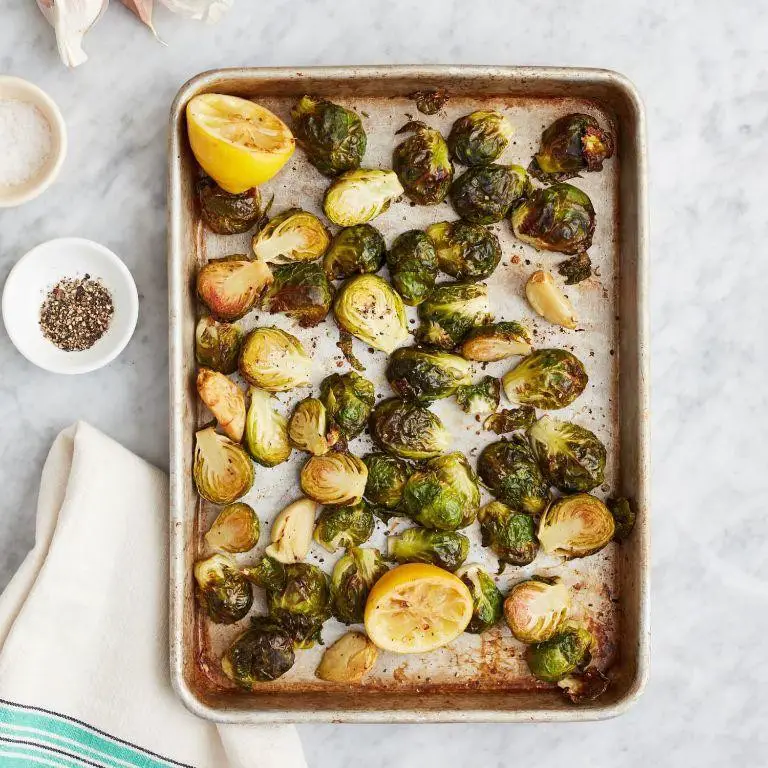
Crisp mornings and the quiet hum of the kitchen at dawn bring to mind the simple pleasures of cooking, like the transformation of humble Brussels sprouts into a dish that sings with brightness and depth. This recipe, with its balance of tangy lemon and pungent garlic, turns the often-overlooked sprout into a side that can stand proudly at any table.
Ingredients
– 1 pound Brussels sprouts, trimmed and halved
– 3 tablespoons extra-virgin olive oil
– 3 cloves garlic, minced
– 1 tablespoon lemon zest, finely grated
– 2 tablespoons fresh lemon juice
– 1/2 teaspoon sea salt
– 1/4 teaspoon freshly ground black pepper
Instructions
1. Preheat your oven to 400°F (204°C) to ensure a hot environment for roasting, which helps achieve a caramelized exterior.
2. In a large mixing bowl, combine the halved Brussels sprouts with extra-virgin olive oil, ensuring each piece is lightly coated for even cooking.
3. Add the minced garlic, lemon zest, lemon juice, sea salt, and black pepper to the bowl, tossing gently to distribute the flavors uniformly.
4. Spread the Brussels sprouts in a single layer on a parchment-lined baking sheet, allowing space between each piece to promote roasting over steaming.
5. Roast in the preheated oven for 20-25 minutes, or until the sprouts are tender inside and their edges are golden and crisp, stirring halfway through for even browning.
6. Remove from the oven and let rest for 2 minutes before serving to allow the flavors to meld slightly.
Dishing out these Lemon Garlic Roasted Brussels sprouts reveals a delightful contrast: the outer leaves are shatteringly crisp, while the interiors remain tender, all enveloped in a bright, garlicky aroma. Consider serving them atop a creamy polenta or alongside a robust roast chicken to complement their vibrant character.
Peach Cobbler with Vanilla Ice Cream

Kindly imagine the warmth of a summer afternoon, where the air carries the sweet scent of ripe peaches mingling with the comforting aroma of baked pastry. This peach cobbler, paired with a scoop of creamy vanilla ice cream, is a humble yet elegant dessert that captures the essence of the season.
Ingredients
- 6 cups fresh peaches, peeled and sliced
- 1 cup granulated sugar
- 1/4 cup light brown sugar, packed
- 1/2 tsp ground cinnamon
- 1/4 tsp freshly grated nutmeg
- 1 tbsp fresh lemon juice
- 1 1/2 cups all-purpose flour
- 1/2 cup unsalted butter, cold and cubed
- 1/4 cup ice water
- 1 pint premium vanilla bean ice cream
Instructions
- Preheat your oven to 375°F (190°C) and lightly butter a 9×13 inch baking dish.
- In a large bowl, gently toss the peaches with granulated sugar, brown sugar, cinnamon, nutmeg, and lemon juice until evenly coated. Let sit for 15 minutes to macerate.
- Transfer the peach mixture to the prepared baking dish, spreading evenly.
- In another bowl, combine the flour and salt. Add the cubed butter, using your fingers or a pastry cutter to work it into the flour until the mixture resembles coarse crumbs.
- Gradually add ice water, 1 tablespoon at a time, stirring until the dough just comes together.
- Drop spoonfuls of the dough over the peaches, covering as much surface area as possible without spreading.
- Bake for 45 minutes, or until the topping is golden brown and the peaches are bubbling.
- Remove from the oven and let cool for 10 minutes before serving.
Vividly golden and bubbling, the cobbler’s crust offers a delightful contrast to the tender, spiced peaches beneath. Serve it warm, with a generous scoop of vanilla ice cream melting into the crevices, for a dessert that’s as visually appealing as it is delicious.
Conclusion
Brimming with creativity and flavor, our roundup of 18 Amazing Pretty Good Tools Recipes offers something delicious for every home cook. Whether you’re looking to impress or simply enjoy the process of cooking, these recipes are sure to delight. Don’t forget to try them out, share your favorites in the comments, and spread the love by pinning this article on Pinterest. Happy cooking!