Looking to beat the heat with something sweet and utterly delightful? You’re in luck! Our roundup of 18 Refreshing Shaved Ice Recipes is your ticket to cool, flavorful bliss. Perfect for those scorching summer days or whenever you crave a frosty treat, these recipes are easy, fun, and sure to impress. So, grab your spoons and let’s dive into a world of icy deliciousness!
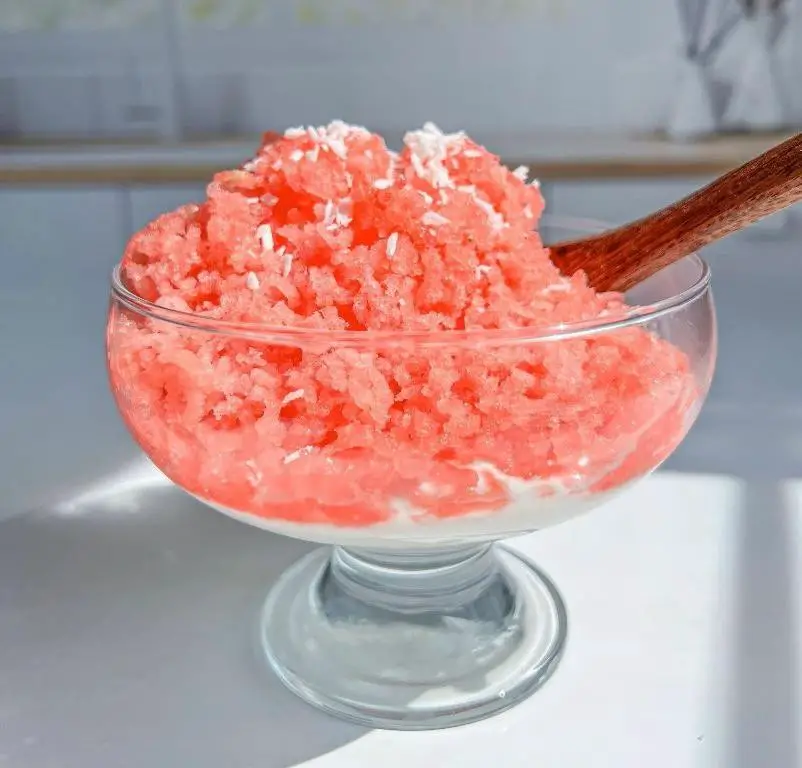
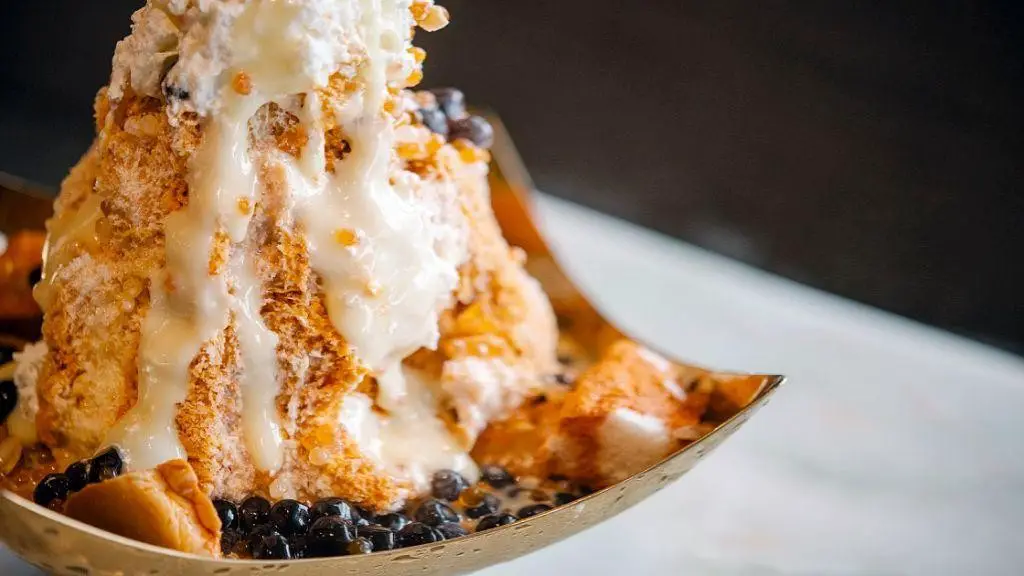
Strawberry Cheesecake Shaved Ice
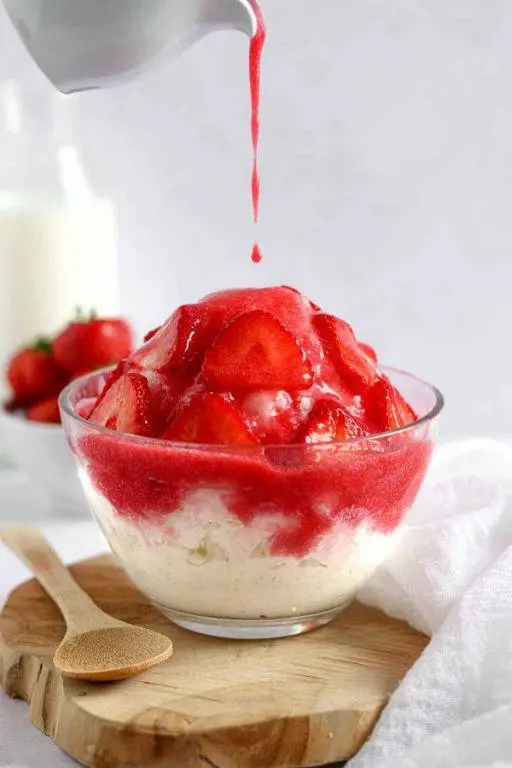
Let’s dive into making a refreshing Strawberry Cheesecake Shaved Ice, perfect for those warm summer days when you crave something sweet yet cooling. This recipe combines the creamy richness of cheesecake with the light, icy texture of shaved ice, topped with fresh strawberries for a burst of flavor.
Ingredients
- 1 cup fresh strawberries, hulled and sliced (the riper, the sweeter!)
- 1/2 cup granulated sugar (I find this amount perfectly balances the tartness of the strawberries)
- 1/4 cup water (just enough to help dissolve the sugar)
- 8 oz cream cheese, softened (room temperature blends smoother)
- 1/4 cup sweetened condensed milk (for that irresistible creamy texture)
- 4 cups shaved ice (the finer, the better for soaking up all the flavors)
- Graham cracker crumbs, for topping (because what’s cheesecake without a little crunch?)
Instructions
- In a small saucepan over medium heat, combine the strawberries, sugar, and water. Stir occasionally until the sugar dissolves and the mixture thickens slightly, about 5 minutes. Remove from heat and let cool. This strawberry syrup is the secret to a flavorful shaved ice.
- In a mixing bowl, beat the softened cream cheese until smooth. Gradually add the sweetened condensed milk, continuing to beat until the mixture is creamy and lump-free. Tip: Scrape down the sides of the bowl to ensure everything is evenly mixed.
- Fill a bowl with the shaved ice. Drizzle the cream cheese mixture over the ice, followed by the cooled strawberry syrup. Tip: Layering the ingredients ensures every bite is packed with flavor.
- Sprinkle graham cracker crumbs on top for that classic cheesecake finish. Tip: For an extra touch, lightly toast the crumbs beforehand to enhance their flavor.
Combining the creamy, tangy cream cheese mixture with the sweet strawberry syrup and crunchy graham cracker crumbs creates a delightful contrast in every spoonful. Serve immediately to enjoy the icy texture at its best, or get creative by adding a dollop of whipped cream on top for an even more indulgent treat.
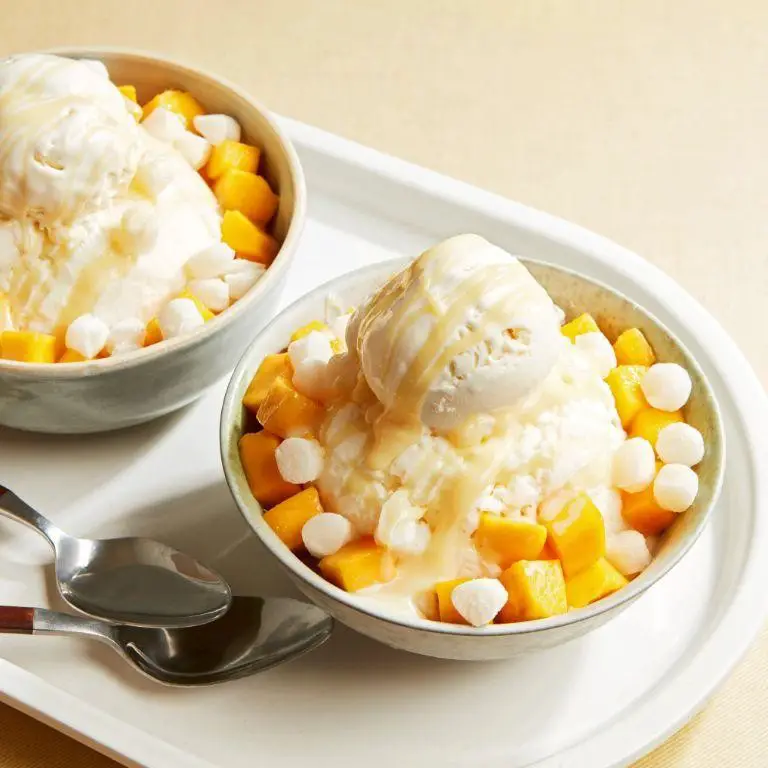
Mango Tango Shaved Ice
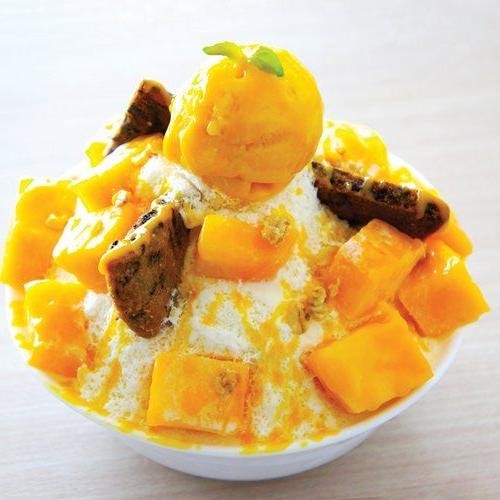
Crafting the perfect ‘Mango Tango Shaved Ice’ is simpler than you might think, and it’s the ideal way to beat the summer heat with a burst of tropical flavor. Let’s dive into the refreshing world of homemade shaved ice, where mango takes center stage.
Ingredients
- 2 ripe mangoes – ‘I find Ataulfo mangoes are the sweetest and easiest to peel.’
- 1 cup granulated sugar – ‘For a healthier twist, you can reduce this to 3/4 cup.’
- 1 cup water – ‘Filtered water ensures the cleanest taste.’
- 1 tbsp fresh lime juice – ‘This adds a zesty kick that balances the sweetness.’
- 4 cups ice – ‘The fresher the ice, the fluffier your shaved ice will be.’
Instructions
- Peel and dice the mangoes, then blend until smooth. Tip: For an extra smooth puree, strain through a fine mesh sieve.
- In a small saucepan, combine sugar and water. Heat over medium until sugar dissolves completely, about 5 minutes, stirring occasionally. Let cool to room temperature.
- Mix the mango puree with the cooled sugar syrup and lime juice. Tip: Taste and adjust lime juice if needed for that perfect tang.
- Pour the mango mixture into a shallow container and freeze for at least 4 hours, or until solid. Tip: Freezing overnight ensures the mixture is fully set for easy shaving.
- Using a shaved ice machine or a blender, shave the frozen mango mixture and the ice into a bowl. Serve immediately.
How the ‘Mango Tango Shaved Ice’ delights with its velvety texture and vibrant flavor, making every spoonful a tropical escape. For an extra special touch, garnish with thin mango slices or a sprinkle of chili powder for a sweet and spicy contrast.
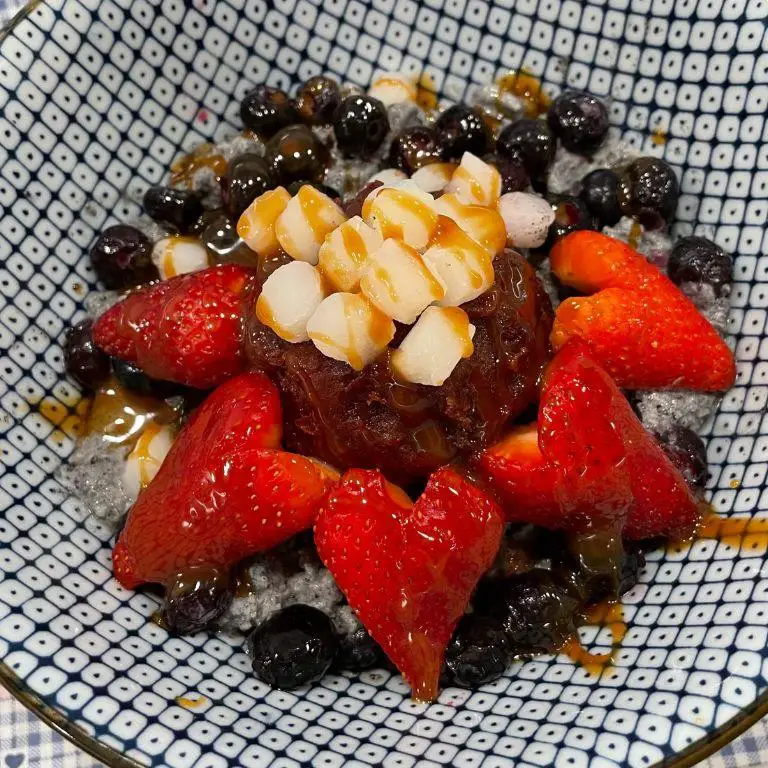
Blueberry Lavender Shaved Ice
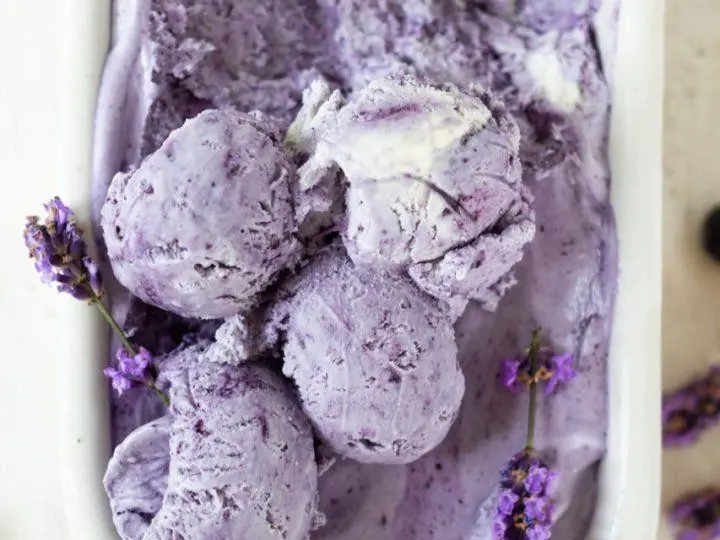
Very few desserts capture the essence of summer quite like this Blueberry Lavender Shaved Ice. It’s a refreshing treat that combines the sweetness of blueberries with the floral notes of lavender, perfect for cooling down on a hot day.
Ingredients
- 2 cups fresh blueberries (frozen works too, but fresh gives a brighter flavor)
- 1/4 cup granulated sugar (I like to use organic cane sugar for a slightly deeper flavor)
- 1 tbsp dried lavender buds (make sure they’re culinary grade for the best aroma)
- 1 cup water (filtered water ensures the purest taste)
- Ice (about 4 cups, shaved—I find using a blender on the ice crush setting works wonders)
Instructions
- In a medium saucepan, combine the blueberries, sugar, lavender, and water. Bring to a gentle boil over medium heat, stirring occasionally to dissolve the sugar.
- Once boiling, reduce the heat to low and simmer for 10 minutes, allowing the flavors to meld. The mixture should thicken slightly.
- Remove from heat and strain through a fine-mesh sieve into a bowl, pressing on the solids to extract all the liquid. Discard the solids. Let the syrup cool to room temperature, about 30 minutes. Tip: Chilling the syrup in the fridge for an hour enhances the flavors.
- While the syrup cools, prepare the shaved ice. Fill a glass or bowl with shaved ice, packing it lightly.
- Drizzle the cooled blueberry lavender syrup generously over the shaved ice. Tip: For an extra touch, garnish with a few fresh blueberries or a sprinkle of lavender buds.
Unbelievably refreshing, this Blueberry Lavender Shaved Ice offers a delightful contrast between the icy texture and the rich, aromatic syrup. Serve it in a hollowed-out lemon for a playful presentation that doubles as a flavor enhancer.
Matcha Green Tea Shaved Ice
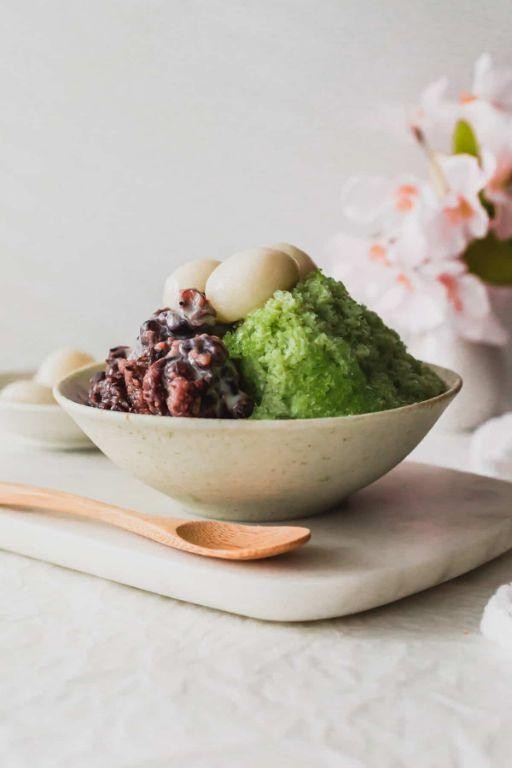
This refreshing treat is perfect for beating the summer heat with its vibrant color and unique flavor. Today, we’re diving into how to make Matcha Green Tea Shaved Ice, a delightful dessert that’s as fun to make as it is to eat.
Ingredients
- 2 cups of water (filtered tastes best for a cleaner flavor)
- 1/2 cup of granulated sugar (I like to use organic for a more natural sweetness)
- 2 tbsp of high-quality matcha green tea powder (the brighter the green, the better the quality)
- 1 tsp of vanilla extract (pure extract makes a difference here)
- Ice cubes (about 4 cups, but this can vary based on your shaver)
- Sweetened condensed milk (to drizzle, and trust me, you’ll want to be generous)
Instructions
- In a small saucepan, combine the water and sugar over medium heat. Stir until the sugar completely dissolves, about 3 minutes. Remove from heat.
- Whisk in the matcha green tea powder and vanilla extract into the sugar syrup until no lumps remain. Let the mixture cool to room temperature, then refrigerate for at least 1 hour to chill thoroughly.
- Fill your ice shaver with ice cubes and shave according to the manufacturer’s instructions. Tip: For the fluffiest shaved ice, use freshly made ice cubes.
- Pile the shaved ice into serving bowls and generously drizzle the chilled matcha syrup over the top. Tip: Pour slowly to ensure even distribution.
- Finish with a drizzle of sweetened condensed milk over each serving. Tip: For an extra touch, sprinkle a little matcha powder on top for garnish.
Glistening with the matcha syrup and creamy condensed milk, this shaved ice is a textural dream—light and fluffy yet rich in flavor. Serve it immediately to enjoy the contrast between the icy base and the sweet, aromatic toppings, or get creative by adding red bean paste or mochi for extra texture.
Chocolate Hazelnut Shaved Ice
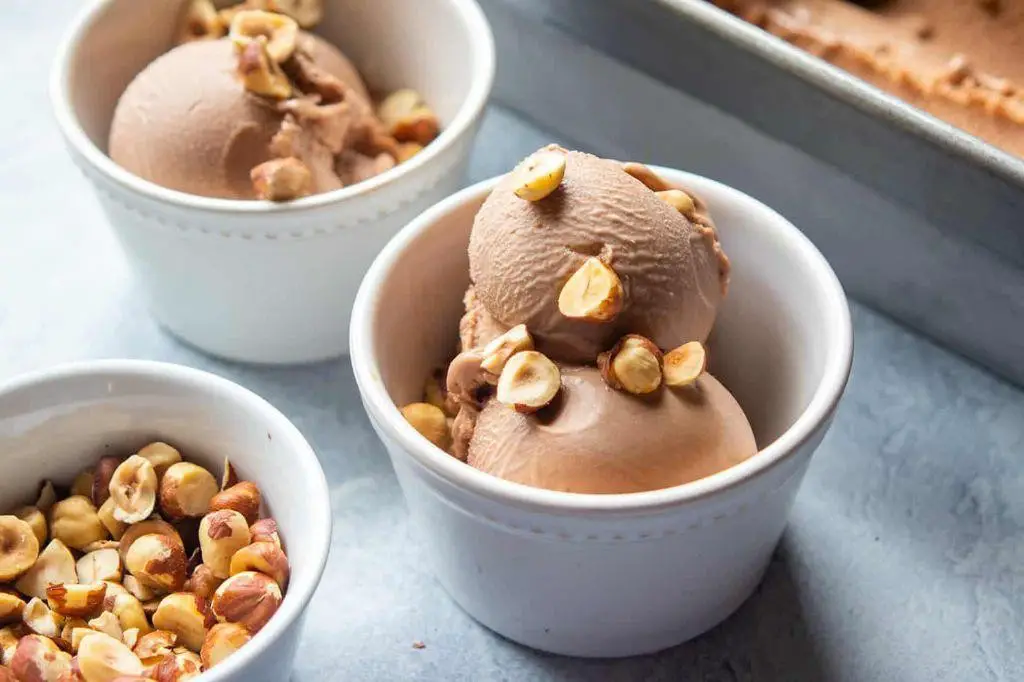
Here’s a delightful way to beat the summer heat with a treat that’s both refreshing and indulgent. Chocolate Hazelnut Shaved Ice combines the coolness of finely shaved ice with the rich flavors of chocolate and hazelnut, creating a dessert that’s sure to please.
Ingredients
- 4 cups of ice – The finer the shave, the better the texture.
- 1/2 cup chocolate hazelnut spread – I love using a brand that’s rich and creamy for the best flavor.
- 1/4 cup heavy cream – Whipped to soft peaks, it adds a luxurious touch.
- 2 tbsp chopped hazelnuts – For that essential crunch and nutty flavor.
- 1 tsp vanilla extract – A dash enhances the chocolate hazelnut spread beautifully.
Instructions
- Start by shaving the ice using a shaved ice machine or a very sharp knife. Aim for a snow-like consistency for the best texture.
- In a small bowl, warm the chocolate hazelnut spread in the microwave for about 20 seconds to make it easier to drizzle.
- Whip the heavy cream with the vanilla extract until soft peaks form. This should take about 2-3 minutes with an electric mixer.
- Divide the shaved ice evenly among four serving bowls.
- Drizzle the warmed chocolate hazelnut spread over the shaved ice, ensuring each bowl gets an equal amount.
- Top each serving with a dollop of the whipped vanilla cream.
- Sprinkle the chopped hazelnuts over the top for added texture and flavor.
One bite of this Chocolate Hazelnut Shaved Ice, and you’ll be transported to a world of creamy, crunchy, and cool bliss. Serve it in chilled bowls to keep it refreshing longer, or add a drizzle of caramel for an extra layer of sweetness.
Peach Melba Shaved Ice

You’ll find that making Peach Melba Shaved Ice is a delightful way to beat the summer heat, combining the sweetness of peaches with the tartness of raspberries in a refreshing dessert.
Ingredients
- 2 cups of fresh peaches, peeled and diced (I find ripe peaches blend smoother)
- 1 cup of raspberries (fresh or frozen, but fresh gives a brighter flavor)
- 1/2 cup of granulated sugar (adjust based on the sweetness of your peaches)
- 1 tbsp of lemon juice (freshly squeezed makes all the difference)
- 4 cups of shaved ice (for the best texture, shave the ice just before serving)
- 1/2 cup of heavy cream, whipped to soft peaks (chill the bowl and beaters for better results)
Instructions
- In a medium saucepan over medium heat, combine the peaches, raspberries, sugar, and lemon juice. Stir gently to mix.
- Bring the mixture to a simmer, then reduce the heat to low. Cook for 10 minutes, stirring occasionally, until the fruits are soft and the sugar has dissolved. Tip: Use a wooden spoon to mash the fruits slightly for a smoother sauce.
- Remove from heat and let the mixture cool to room temperature. Then, blend until smooth for a silky sauce. Tip: Strain the sauce through a fine mesh sieve to remove any seeds or pulp if you prefer a smoother texture.
- Once cooled, refrigerate the sauce for at least 1 hour to chill thoroughly. Tip: Chilling the sauce enhances the flavors and makes it the perfect consistency for drizzling.
- To serve, fill each bowl with 1 cup of shaved ice. Drizzle the chilled Peach Melba sauce generously over the ice.
- Top each serving with a dollop of whipped cream for a creamy contrast to the fruity ice.
Overtly, the Peach Melba Shaved Ice offers a luscious contrast between the icy melt-in-your-mouth texture and the rich, fruity sauce. Serve it in chilled glasses for an extra touch of elegance, or enjoy it straight from the bowl for a quick, refreshing treat.
Vanilla Bean Shaved Ice with Caramel Drizzle
Zesty flavors and a refreshing chill make this Vanilla Bean Shaved Ice with Caramel Drizzle a perfect summer treat. Let’s dive into creating this delightful dessert with precision and ease.
Ingredients
- 2 cups of granulated sugar (I find organic sugar gives a cleaner taste)
- 1 vanilla bean, split lengthwise (splurge on Madagascar vanilla for the best aroma)
- 1 cup of heavy cream (cold, straight from the fridge works best)
- 1/2 cup of water (filtered water ensures no off flavors)
- 1/4 teaspoon of sea salt (a pinch of flaky salt elevates the caramel)
- 4 cups of ice (crushed ice from your freezer’s ice maker is ideal)
Instructions
- In a medium saucepan, combine the granulated sugar and water over medium heat. Stir gently until the sugar dissolves, about 3 minutes.
- Once the sugar has dissolved, stop stirring and allow the mixture to boil until it turns a deep amber color, approximately 5-7 minutes. Keep a close eye to prevent burning.
- Remove the saucepan from heat and carefully whisk in the heavy cream. The mixture will bubble vigorously, so whisk steadily to incorporate.
- Scrape the seeds from the vanilla bean and stir them into the caramel along with the sea salt. Let the caramel cool to room temperature, about 30 minutes.
- While the caramel cools, process the ice in a shaved ice machine until it reaches a fluffy, snow-like consistency. Pack the shaved ice into serving bowls.
- Drizzle the cooled vanilla bean caramel generously over the shaved ice. Serve immediately for the best texture and flavor.
Unbelievably smooth and creamy, this shaved ice dessert melts delicately on the tongue, with the rich vanilla and caramel flavors shining through. For an extra touch, top with a sprinkle of edible gold dust or serve with a side of fresh berries for a contrast in flavors.
Lemon Basil Shaved Ice
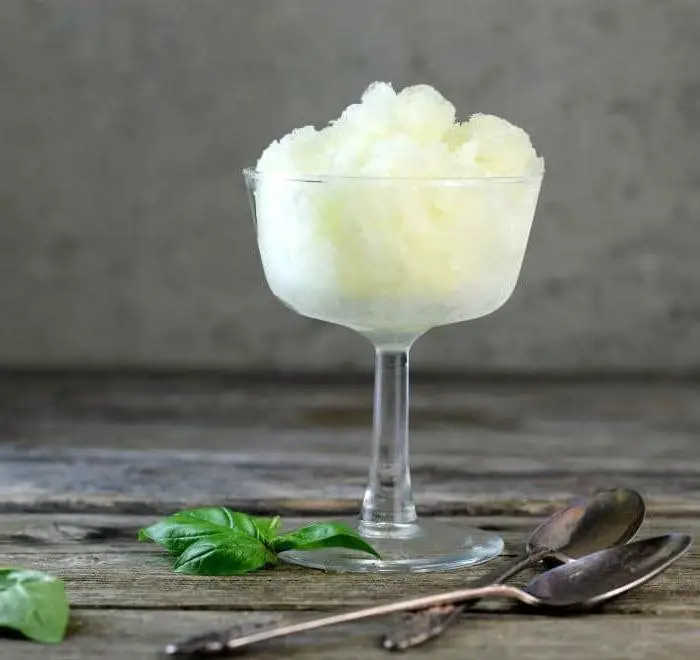
Gathering around the kitchen to whip up something refreshing? This Lemon Basil Shaved Ice is a breeze to make and a delight to savor, especially on a warm day. Let’s dive into the simple steps to create this cooling treat.
Ingredients
- 1 cup granulated sugar (I find organic sugar dissolves more evenly)
- 1 cup water
- 1 cup fresh lemon juice (about 4-5 lemons, and yes, freshly squeezed makes all the difference)
- 1/4 cup fresh basil leaves, finely chopped (I love the peppery kick basil adds)
- 4 cups ice (crushed ice works best for that perfect shaved texture)
Instructions
- In a small saucepan, combine the granulated sugar and water over medium heat. Stir continuously until the sugar completely dissolves, about 3-4 minutes. This is your simple syrup base.
- Remove the saucepan from heat and let the syrup cool to room temperature, about 20 minutes. Tip: Cooling the syrup prevents the ice from melting too quickly later.
- Once cooled, stir in the fresh lemon juice and chopped basil leaves into the syrup. Tip: Bruising the basil leaves slightly before chopping can help release more flavor.
- Fill a blender with the ice and pour the lemon-basil syrup over it. Blend on high until the mixture reaches a fine, snow-like consistency, about 30 seconds. Tip: For a smoother texture, pulse the blender a few times instead of running it continuously.
- Serve immediately in chilled glasses or bowls. A final flourish of basil leaves on top adds a fresh aroma and visual appeal.
Ah, the result is a wonderfully light and fluffy shaved ice with a vibrant lemon zing and a subtle herbal note from the basil. For an extra twist, drizzle a little honey over the top or serve with thin lemon slices on the side for garnish.
Coconut Lime Shaved Ice
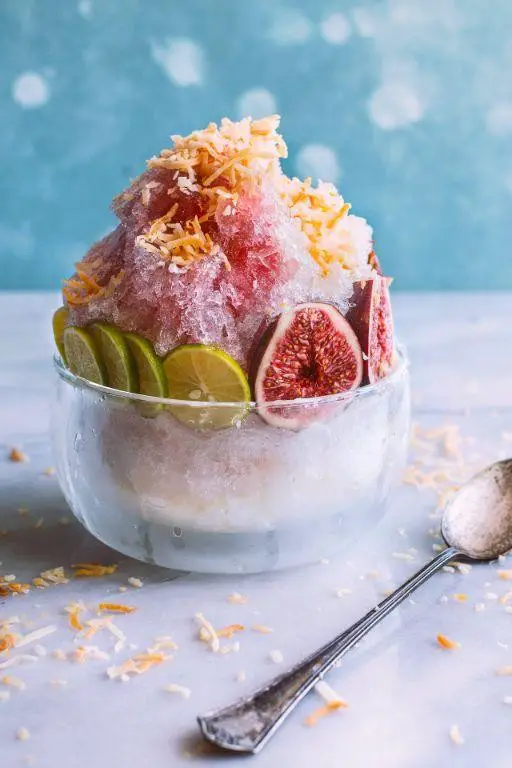
Just when you think summer couldn’t get any sweeter, here comes Coconut Lime Shaved Ice to prove you wrong. This refreshing treat combines the tropical flavors of coconut and the zesty kick of lime, perfect for those scorching days when you need a quick cool-down.
Ingredients
- 2 cups of granulated sugar (I find that organic sugar dissolves more evenly)
- 1 cup of water (filtered water makes a difference in clarity and taste)
- 1 can (13.5 oz) of coconut milk (full-fat for that creamy texture we all love)
- 1/2 cup of fresh lime juice (about 4 limes, and yes, freshly squeezed is non-negotiable)
- 1 tbsp of lime zest (for that extra punch of flavor)
- Ice (as much as you need, but make sure it’s freshly made for the best shave)
Instructions
- In a medium saucepan, combine the granulated sugar and water. Heat over medium heat until the sugar completely dissolves, stirring occasionally. This is your simple syrup base.
- Remove the saucepan from the heat and stir in the coconut milk, fresh lime juice, and lime zest. Let the mixture cool to room temperature, then refrigerate for at least 1 hour to chill thoroughly.
- While the mixture chills, prepare your ice. If you’re using an ice shaver, make sure the ice is frozen solid for the best shave. Tip: For smoother shaved ice, use filtered water to make your ice cubes.
- Once the coconut lime mixture is chilled, shave your ice into a bowl or cup. Tip: The finer the shave, the better the texture of your dessert.
- Drizzle the chilled coconut lime mixture over the shaved ice. Tip: For an even distribution of flavor, pour the mixture in layers between scoops of shaved ice.
- Serve immediately and enjoy the burst of tropical flavors. For an extra touch, garnish with a sprinkle of lime zest or a small wedge of lime on the side.
Freshly made Coconut Lime Shaved Ice is a symphony of textures and flavors—creamy from the coconut milk, tangy from the lime, and irresistibly light from the shaved ice. Try serving it in hollowed-out lime halves for a fun, Instagram-worthy presentation that’ll have everyone talking.
Watermelon Mint Shaved Ice
Great for those sweltering summer days, this Watermelon Mint Shaved Ice is a refreshing treat that’s as fun to make as it is to eat. Let’s dive into creating this simple yet delightful dessert.
Ingredients
- 4 cups of seedless watermelon, cubed (I find chilled watermelon works best for a frosty texture)
- 1/4 cup fresh mint leaves (spearmint is my favorite for its sweet aroma)
- 2 tbsp honey (local honey adds a lovely floral note)
- 1 tbsp lime juice (freshly squeezed makes all the difference)
- Ice cubes (about 2 cups, for blending)
Instructions
- In a blender, combine the chilled watermelon cubes, fresh mint leaves, honey, and lime juice. Tip: Freeze the watermelon cubes for an hour beforehand for an extra icy texture.
- Add the ice cubes to the blender. Blend on high speed for about 1 minute, or until the mixture is completely smooth. Tip: If the mixture is too thick, add a tablespoon of water to help it blend.
- Pour the blended mixture into a shallow dish or a baking tray. Freeze for at least 4 hours, or until solid. Tip: Cover the dish with plastic wrap to prevent freezer burn.
- Once frozen, use a fork to scrape the mixture into fluffy shaved ice. Serve immediately in bowls or glasses.
Cool and refreshing, this Watermelon Mint Shaved Ice has a perfect balance of sweetness and tang, with a hint of minty freshness. Try garnishing with a small mint leaf or a thin slice of lime for an extra touch of elegance.
Pina Colada Shaved Ice
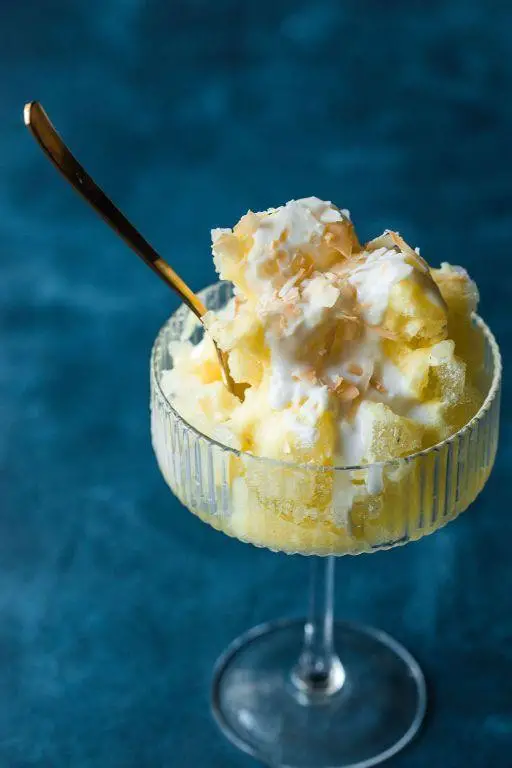
Tropical flavors and a refreshing chill come together in this Pina Colada Shaved Ice, a perfect treat to beat the summer heat. This recipe is a breeze to follow, ensuring even beginners can whip up this delightful dessert with confidence.
Ingredients
– 2 cups of ice (crushed ice works best for a smoother texture)
– 1/2 cup of pineapple juice (I love using fresh pineapple juice for a brighter flavor)
– 1/4 cup of coconut milk (full-fat gives a creamier result)
– 2 tbsp of sugar (adjust based on your sweetness preference)
– 1 tbsp of rum extract (for that authentic pina colada kick, optional but recommended)
– Maraschino cherries and pineapple chunks for garnish (because presentation matters!)
Instructions
1. Begin by placing the ice in a blender. Pulse until the ice is finely shaved, about 30 seconds. Tip: For the best texture, stop blending when the ice resembles snow.
2. Add the pineapple juice, coconut milk, sugar, and rum extract to the blender. Blend on high for 15 seconds, or until the mixture is smooth and well combined. Tip: Taste the mixture now and adjust the sweetness if needed.
3. Pour the blended mixture into serving glasses. Tip: For an extra touch, chill the glasses beforehand to keep the shaved ice colder longer.
4. Garnish with maraschino cherries and pineapple chunks on top for a festive look.
5. Serve immediately with a straw and a spoon for the full experience.
Just like a tropical vacation in a glass, this Pina Colada Shaved Ice is creamy, fruity, and utterly refreshing. Try serving it in hollowed-out pineapples for an Instagram-worthy presentation that’ll transport your guests to paradise.
Black Sesame Shaved Ice
Just when you thought summer couldn’t get any cooler, black sesame shaved ice comes along to prove you wrong. This dessert is not only a visual stunner but also a delightful play of textures and flavors, perfect for those sweltering days.
Ingredients
- 1 cup black sesame seeds (toasted for a deeper flavor)
- 1/2 cup sugar (I find this amount perfectly balances the sesame’s earthiness)
- 1/4 cup water (for the syrup, filtered works best)
- 4 cups shaved ice (the finer, the better for that snow-like texture)
- 1/4 cup sweetened condensed milk (drizzled to taste, but this is my sweet spot)
- A pinch of salt (trust me, it elevates the sesame flavor)
Instructions
- In a dry skillet over medium heat, toast the black sesame seeds for about 3 minutes, or until fragrant. Stir constantly to prevent burning.
- Combine the toasted sesame seeds, sugar, water, and salt in a blender. Blend on high for 2 minutes until the mixture is smooth and slightly thickened.
- Strain the sesame mixture through a fine-mesh sieve to remove any large pieces, ensuring a silky syrup.
- Fill a bowl with 4 cups of finely shaved ice, packing it lightly to form a mound.
- Drizzle the black sesame syrup generously over the shaved ice, followed by the sweetened condensed milk.
- Serve immediately, encouraging everyone to mix the toppings into the ice for the perfect bite every time.
Now, the magic of this dessert lies in its contrast—the creamy, nutty syrup against the icy, refreshing base. For an extra twist, top with a sprinkle of crushed peanuts or a drizzle of chocolate syrup before serving.
Passion Fruit Shaved Ice
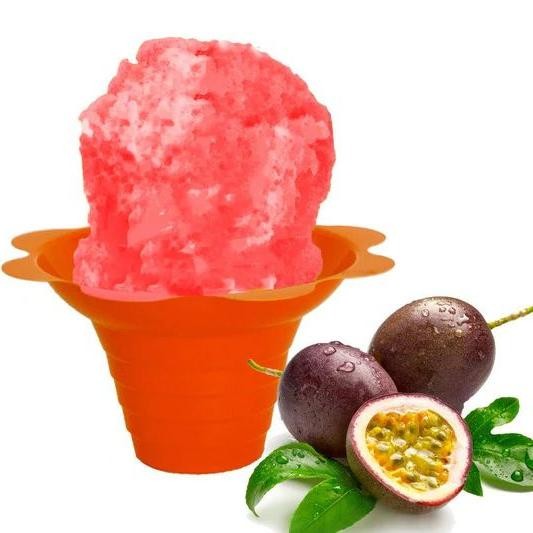
Let’s dive into making a refreshing Passion Fruit Shaved Ice, perfect for those warm summer days. This guide will walk you through each step, ensuring you achieve the perfect balance of sweet and tangy flavors.
Ingredients
- 2 cups of ice – freshly shaved for the best texture.
- 1/2 cup of passion fruit puree – I find the bottled kind works just as well as fresh, saving you time.
- 2 tbsp of honey – for a natural sweetness that complements the passion fruit’s tang.
- 1/4 cup of coconut milk – adds a creamy contrast to the icy base.
- A pinch of salt – just a dash to enhance all the flavors.
Instructions
- Start by shaving the ice using a shaved ice machine or a blender set to a low setting. Tip: For the fluffiest texture, use ice cubes made from filtered water.
- In a small bowl, mix the passion fruit puree with honey until well combined. Tip: Adjust the honey based on the sweetness of your passion fruit puree.
- Layer the shaved ice into a serving bowl, then drizzle the passion fruit mixture evenly over the top.
- Gently pour the coconut milk over the passion fruit-covered ice. Tip: For a more aesthetic presentation, drizzle the coconut milk in a circular motion.
- Sprinkle a pinch of salt over the top to balance the flavors.
- Serve immediately with a spoon and enjoy the contrast of textures and flavors.
Just like that, you’ve created a dessert that’s both invigorating and indulgent. The creamy coconut milk melds beautifully with the vibrant passion fruit, while the shaved ice provides a delightful crunch. For an extra touch, garnish with fresh mint leaves or a sprinkle of toasted coconut flakes.
Raspberry Rose Shaved Ice
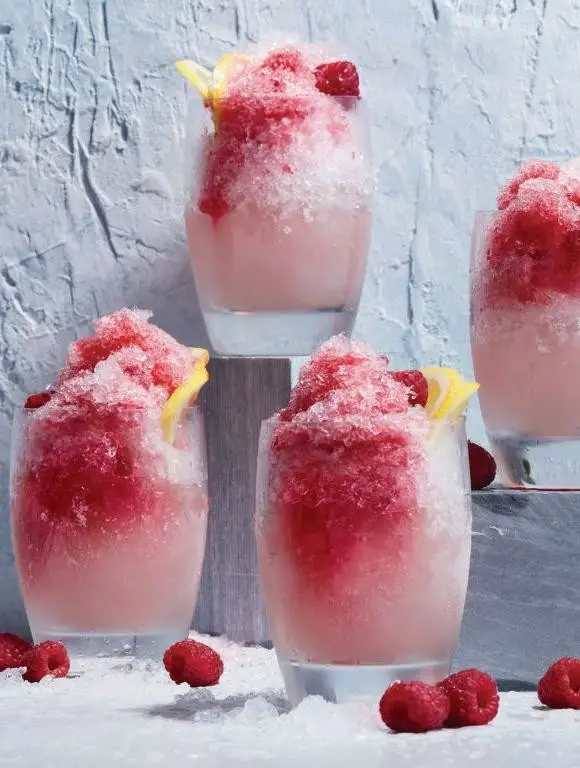
When the summer heat hits, there’s nothing quite like the refreshing chill of shaved ice to cool you down. This Raspberry Rose Shaved Ice is a delightful twist on the classic, combining the tartness of raspberries with the floral notes of rose for a dessert that’s as beautiful as it is delicious.
Ingredients
- 2 cups fresh raspberries (frozen works too, but fresh gives a brighter flavor)
- 1/2 cup granulated sugar (I find this amount perfectly balances the tartness of the raspberries)
- 1 tbsp rose water (a little goes a long way, so measure carefully)
- 4 cups ice (the clearer the ice, the prettier your shaved ice will look)
- Fresh mint leaves for garnish (optional, but adds a nice pop of color and freshness)
Instructions
- In a medium saucepan, combine the raspberries and sugar over medium heat. Stir occasionally until the sugar dissolves and the raspberries break down, about 5 minutes.
- Remove the saucepan from the heat and stir in the rose water. Let the mixture cool to room temperature, then strain through a fine-mesh sieve to remove the seeds, pressing on the solids to extract as much liquid as possible.
- While the raspberry mixture cools, shave the ice using a shaved ice machine or a blender. If using a blender, pulse briefly to achieve a fluffy, snow-like consistency.
- Divide the shaved ice among serving bowls. Drizzle the raspberry rose syrup generously over the top.
- Garnish with fresh mint leaves if desired, and serve immediately for the best texture and flavor.
Perfectly balanced between sweet and tart, this Raspberry Rose Shaved Ice melts in your mouth, leaving behind the subtle floral aroma of rose. For an extra special touch, serve it in chilled glasses or with a side of shortbread cookies for dipping.
Tiramisu Shaved Ice
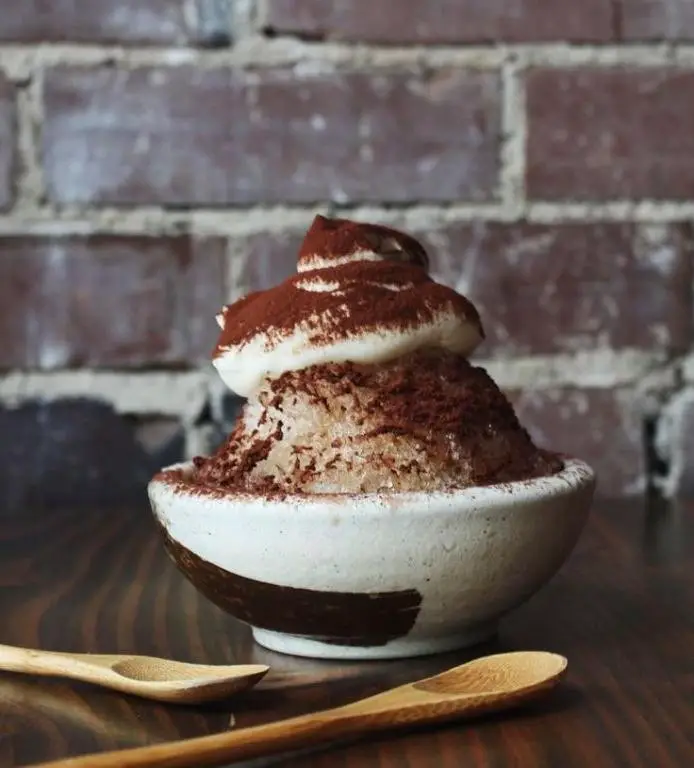
Kickstart your summer with a refreshing twist on a classic dessert—Tiramisu Shaved Ice. This delightful treat combines the creamy, coffee-infused flavors of tiramisu with the icy coolness of shaved ice, perfect for those sweltering days when you crave something sweet yet refreshing.
Ingredients
- 1 cup strong brewed coffee, cooled (I like to use a dark roast for a deeper flavor)
- 1/2 cup mascarpone cheese (room temperature blends smoother)
- 1/4 cup granulated sugar (adjust if you prefer less sweetness)
- 1 tsp vanilla extract (pure vanilla makes a difference)
- 2 cups shaved ice (freshly shaved gives the best texture)
- Cocoa powder for dusting (a generous dusting adds a nice bitterness)
Instructions
- Brew 1 cup of strong coffee and let it cool to room temperature, about 30 minutes. Tip: Cooling it quickly in the fridge saves time.
- In a mixing bowl, combine the cooled coffee, mascarpone cheese, granulated sugar, and vanilla extract. Whisk until smooth and creamy. Tip: Ensure the mascarpone is at room temperature to avoid lumps.
- Place 2 cups of freshly shaved ice into a serving bowl. Tip: For the fluffiest texture, shave the ice just before serving.
- Pour the coffee and mascarpone mixture over the shaved ice, ensuring it’s evenly distributed.
- Dust the top generously with cocoa powder for that classic tiramisu finish.
Great for a quick dessert or a fancy brunch side, this Tiramisu Shaved Ice offers a creamy, coffee-kissed flavor with a light, icy texture. Serve it in a chilled glass for an extra touch of elegance, or enjoy it straight from the bowl for a more casual treat.
Avocado Shaved Ice with Condensed Milk
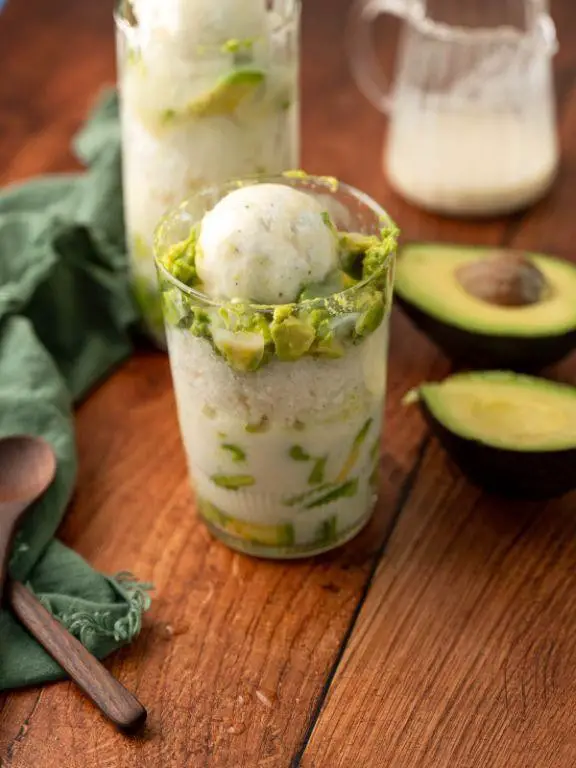
Craving something uniquely refreshing and subtly sweet? This Avocado Shaved Ice with Condensed Milk is a game-changer for those hot summer days, blending creamy avocado with the icy crunch of shaved ice, all drizzled with sweet condensed milk.
Ingredients
- 2 ripe avocados – look for ones that yield slightly to gentle pressure for the creamiest texture.
- 1 cup of sweetened condensed milk – my pantry staple for adding rich sweetness.
- 4 cups of shaved ice – the finer, the better to mimic snow-like texture.
- A pinch of salt – just a dash to enhance all the flavors.
Instructions
- Cut the avocados in half, remove the pits, and scoop the flesh into a blender.
- Add the sweetened condensed milk and a pinch of salt to the blender. Blend until smooth and creamy. Tip: If the mixture is too thick, a tablespoon of water can help loosen it.
- Fill a bowl with the shaved ice, creating a fluffy mound. Tip: For the best texture, use a shaved ice machine or a blender pulse method to achieve fine ice particles.
- Pour the avocado mixture over the shaved ice, ensuring it cascades down the sides. Tip: For an even distribution, use a spoon to gently mix the avocado into the ice.
- Drizzle additional condensed milk on top for extra sweetness, if desired.
So there you have it—a dessert that’s as fun to make as it is to eat. The contrast between the creamy avocado and the icy shavings, all tied together with the sweetness of condensed milk, creates a symphony of textures and flavors. Serve it immediately to enjoy the crispness of the ice against the smooth avocado.
Spiced Chai Shaved Ice
Spiced chai shaved ice is a refreshing twist on the traditional summer treat, blending the warm, aromatic flavors of chai with the cool, crisp texture of shaved ice. Start by gathering your ingredients to ensure a smooth preparation process.
Ingredients
- 2 cups of strong brewed chai tea, cooled (I like to steep mine a bit longer for a deeper flavor)
- 1/2 cup of sweetened condensed milk (this adds a creamy sweetness that balances the spices)
- 1 tbsp of vanilla extract (a splash enhances the chai’s complexity)
- 1/4 tsp of ground cardamom (for that signature chai warmth)
- 1/4 tsp of ground cinnamon (a must for any chai recipe)
- 1/8 tsp of ground cloves (just a pinch goes a long way)
- 1/8 tsp of ground ginger (adds a slight kick)
- 4 cups of ice (the fresher, the better for the fluffiest shaved ice)
Instructions
- Brew the chai tea according to package instructions, then let it cool to room temperature for about 30 minutes. Tip: Cooling it faster? Place it in the fridge.
- In a small bowl, mix the sweetened condensed milk and vanilla extract until well combined. Set aside.
- Combine the cooled chai tea with cardamom, cinnamon, cloves, and ginger in a pitcher. Stir well to ensure the spices are evenly distributed.
- Fill a shaved ice machine with ice and shave according to the manufacturer’s instructions. Tip: No shaved ice machine? A blender can work in a pinch, but pulse gently to avoid a slushy texture.
- Divide the shaved ice evenly among four serving bowls.
- Drizzle the spiced chai mixture over the shaved ice, then top with the sweetened condensed milk mixture. Tip: For a layered effect, alternate between chai and condensed milk.
Kindly savor the contrast of the icy flakes against the rich, spiced chai and creamy sweetness. Serve immediately to enjoy the full spectrum of textures and temperatures, perhaps with a cinnamon stick for an elegant touch.
Cherry Blossom Shaved Ice

Spring has sprung, and what better way to celebrate than with a refreshing Cherry Blossom Shaved Ice? This delightful treat is not only a feast for the eyes but also a breeze to make, perfect for those warm afternoons when you crave something sweet and cooling.
Ingredients
- 4 cups of ice – freshly shaved for the fluffiest texture.
- 1/2 cup cherry blossom syrup – homemade or store-bought, but I love the subtle floral notes of the artisanal kind.
- 1 tbsp sweetened condensed milk – for a creamy drizzle that balances the syrup’s sweetness.
- Edible cherry blossoms for garnish – these delicate flowers add a beautiful touch and a hint of authenticity.
Instructions
- Start by shaving the ice using a shaved ice machine or a blender set to the highest setting. Aim for a fine, snow-like consistency.
- Gently pack the shaved ice into a serving bowl, creating a mound that’s ready to be adorned.
- Drizzle the cherry blossom syrup evenly over the ice, allowing it to seep into the crevices for maximum flavor in every bite.
- Add a generous drizzle of sweetened condensed milk over the top, creating a beautiful contrast against the pink syrup.
- Finally, garnish with a few edible cherry blossoms for that Instagram-worthy finish.
Zesty and refreshing, this Cherry Blossom Shaved Ice is a symphony of flavors and textures, from the icy crunch to the creamy sweetness. Serve it in a clear glass to showcase the beautiful layers, or top with a scoop of vanilla ice cream for an extra indulgent twist.
Conclusion
Refreshingly simple and bursting with flavor, these 18 shaved ice recipes are your ticket to summer bliss. Whether you’re craving something fruity, creamy, or uniquely adventurous, there’s a treat here for everyone. We’d love to hear which recipes you try—drop a comment with your favorites and don’t forget to share the joy by pinning this article on Pinterest. Happy shaving!