Valentine’s Day is just around the corner, and whether you’re celebrating with a partner, family, or friends, one thing is for certain—you’ll need a treat that’s as sweet as the occasion.

And what could be better than these homemade Valentine’s Day cake pops? They’re adorable, bite-sized, and bursting with flavor. Best of all, they’re quick and easy to make, so you’ll have plenty of time to focus on the things that matter most this season of love.
Why Cake Pops?

If I’m being completely honest, I haven’t always been the biggest fan of cake pops. For years, I felt like they just weren’t worth the effort—dense, overly sweet, and often a bit too crumbly. I’d have high expectations, but time after time, I was left disappointed. I’ve always thought, why not just have a slice of regular cake instead?
But then, an idea struck me. I had a batch of leftover cake sitting in my freezer and decided to turn it into something new: cake pops that I would actually enjoy. The result? A delicious, moist cake pop that completely changed my mind about these treats.
In fact, I’ve come to love how versatile they are—whether you’re looking to make something special for a holiday or simply want a fun, portable snack, cake pops are a fantastic choice.
The Secret to Perfect Cake Pops
The great thing about cake pops is how simple they are to make, but like any good recipe, there are a few key steps that will make the difference between a delightful treat and a disappointing one. Here’s what you need to know.
First, let’s talk about the texture. When you’re making cake pops, the key is balance. You’ll need just the right amount of frosting to bind the cake crumbs together. Too little frosting, and the cake pops will fall apart. Too much, and they’ll be dense and too sweet. Our goal is to keep them light and moist, so the texture is soft, not too heavy.
Another important step is freezing the cake balls before dipping them into chocolate. This ensures they don’t crumble or lose shape as they get coated. It’s all about patience!
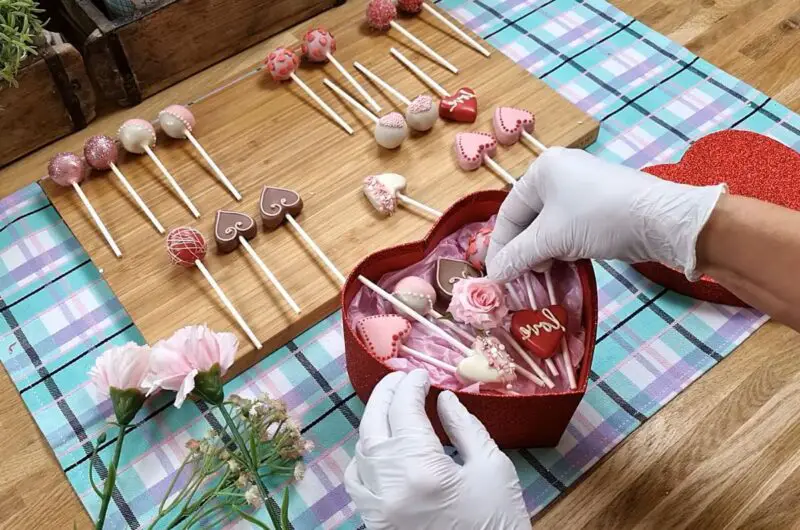
Valentine’s Day Cake Pops: A Seasonal Twist
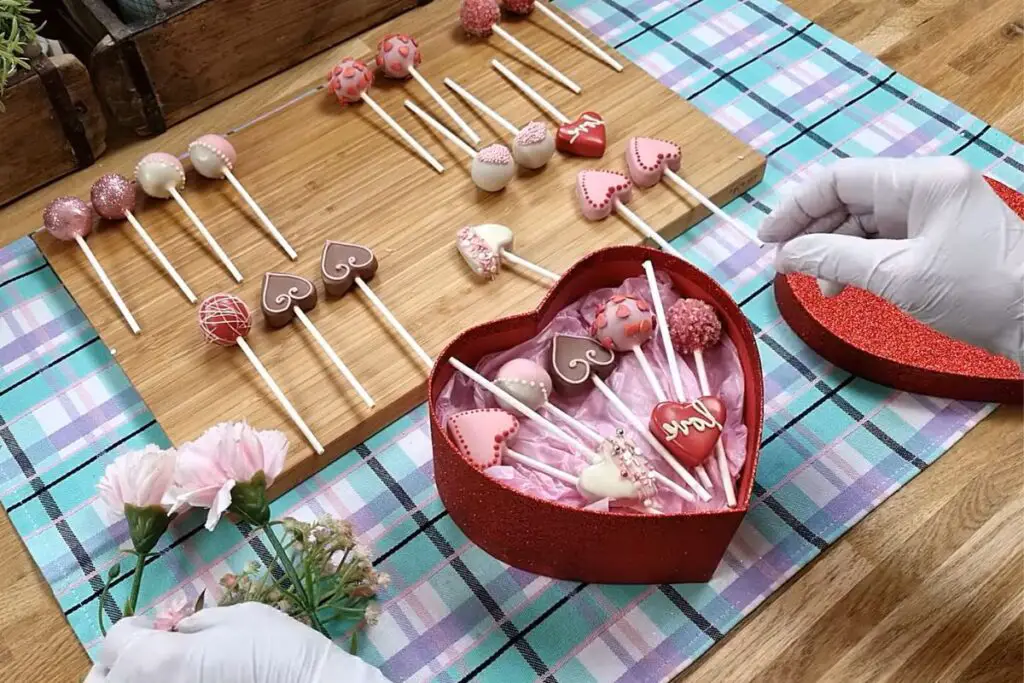
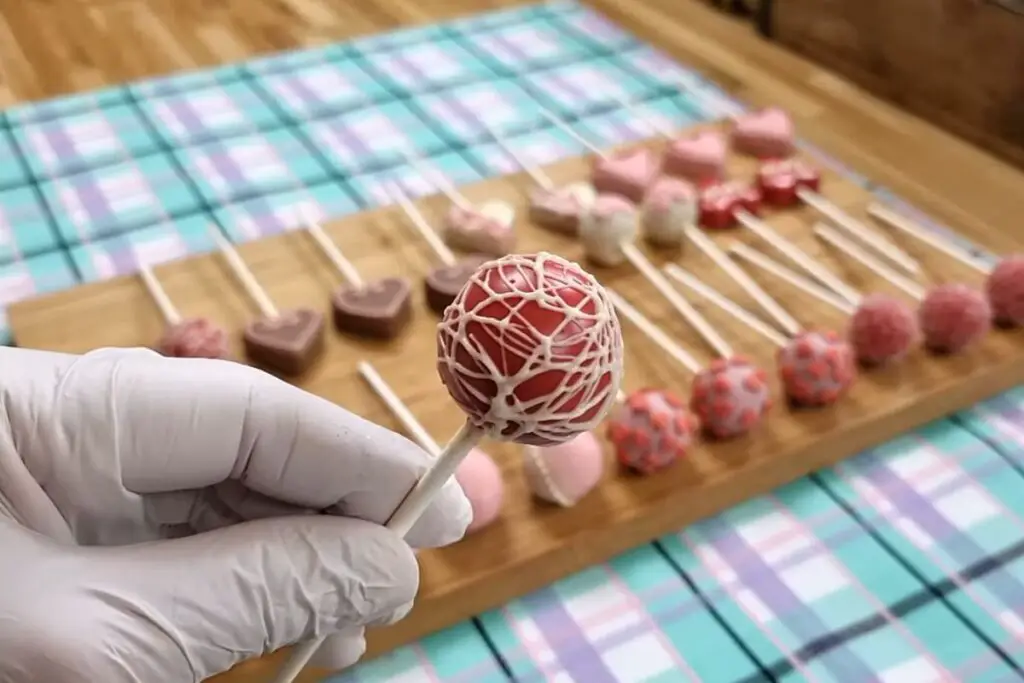
For this batch of cake pops, I’ve given them a Valentine’s Day makeover by dipping them in pink and white chocolate candy melts. Not only does this give them a lovely seasonal look, but it’s also a fun way to add color and flair. That said, you can make cake pops for any occasion, so feel free to experiment with different colors and flavors.
- Want to make them for the Fourth of July? Go for red, white, and blue.
- Halloween? Black and orange candy melts would be perfect.
- You can even choose a flavored cake (like chocolate or strawberry) if you’re feeling extra adventurous.
The options are endless, and the best part is that these little cake pops are a guaranteed crowd-pleaser, no matter the occasion.
What You’ll Need
Ingredients:
- Leftover cake (or a freshly baked cake—box cake works fine too!)
- 2-3 tablespoons of premade frosting
- 2 bags (12 oz each) of chocolate candy melts (pink, white, or any color you prefer)
- Lollipop sticks
Equipment:
- Cookie dough scooper (or a spoon)
- Parchment paper
- Freezer
- A glass or container for melting chocolate
- Cake pop stand (or use a cardboard box with holes for the sticks)
How to Make Cake Pops
Step 1: Prepare Your Cake
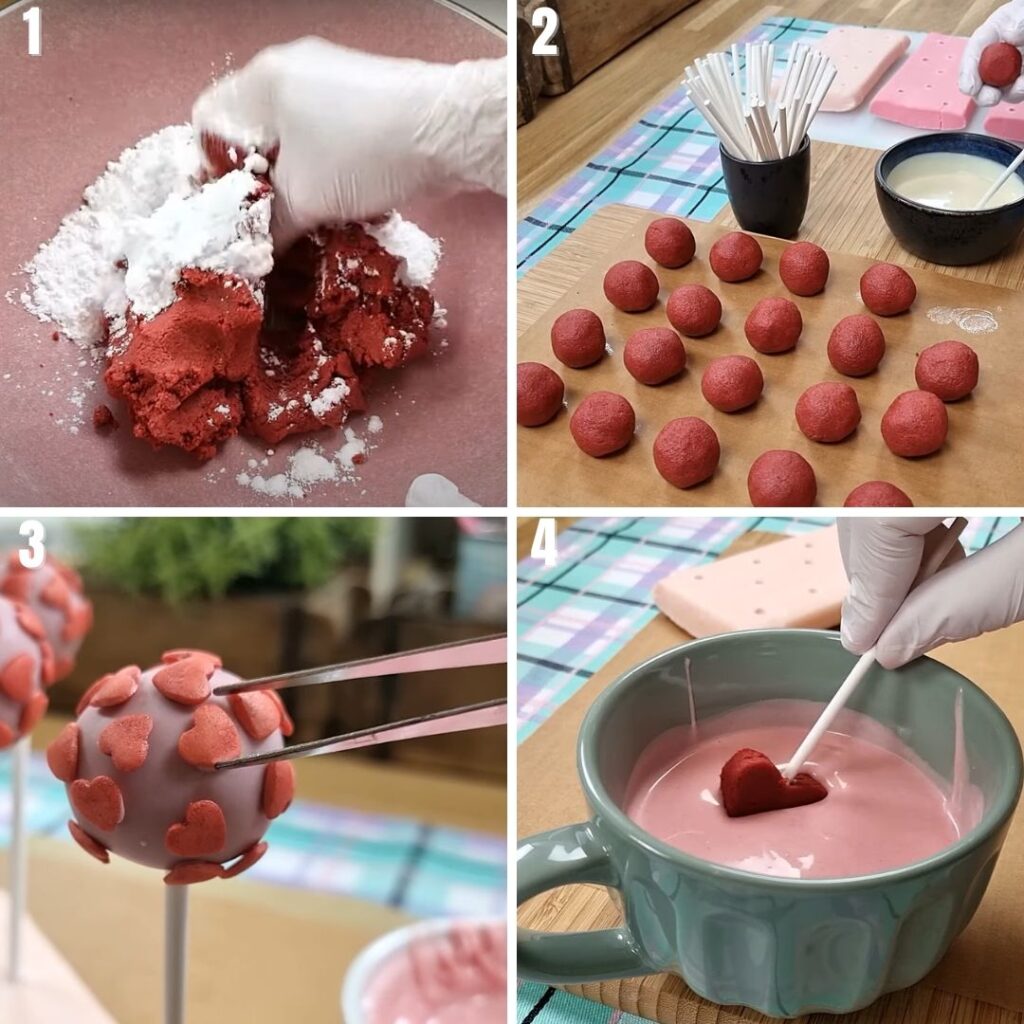
Start by preparing a sheet pan with parchment paper. If you’re using leftover cake, make sure it’s fully cooled. If you’re baking a new cake, allow it to cool completely before moving on to the next step. Once the cake is cool, use your hands or a fork to crumble it into fine crumbs, resembling a sandy texture.
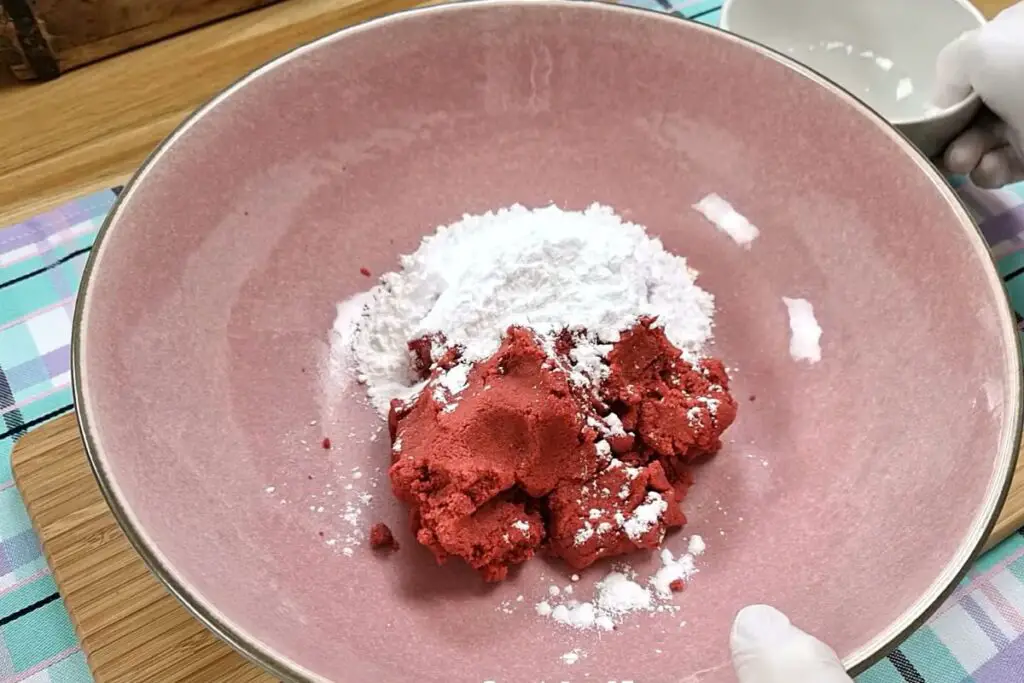
Step 2: Add Frosting
Add about 2 tablespoons of frosting to the cake crumbs. Mix well until the texture turns into a dough-like paste. You want it to come together, but not be too wet or sticky. If it feels dry, you can add a little more frosting, but remember—less is more! You’re looking for a consistency that holds together but is still light and easy to roll into balls.
Step 3: Form the Cake Balls
Now it’s time to shape the cake pops! Using a cookie dough scooper or a spoon, scoop about 1 tablespoon of the cake mixture and roll it into a ball. Place each ball on your prepared sheet pan. Once all the cake pops are formed, place the sheet pan in the freezer for 1-2 hours to chill. This step is crucial because it helps the cake pops stay intact when you dip them in chocolate.
Step 4: Melt the Chocolate
While the cake pops are chilling, it’s time to melt the chocolate. Follow the instructions on the package of the candy melts. I recommend using a large glass or a deep bowl to melt the chocolate, as it will make dipping the cake pops easier. You can choose any color you like—pink, white, red, or even a mix of all three for a fun, festive look.
Step 5: Dip and Decorate
Once the cake balls are chilled and the chocolate is ready, it’s time to assemble your cake pops. Take each cake ball out of the freezer and dip the tip of a lollipop stick into the melted chocolate. Insert the stick into the bottom of each cake ball to help it stay on the stick when you dip it into the chocolate. Then, dip the entire cake ball into the melted chocolate, making sure it’s evenly coated. You can gently rotate the stick in a circular motion to ensure an even coating.
If you want to add sprinkles, glitter, or any other fun decorations, this is the time to do it! Dip the freshly coated cake pops into your choice of toppings before the chocolate has fully set. Place the decorated cake pops in a cake pop stand or a makeshift stand (like a cardboard box with small holes) and let them dry completely.
Step 6: Let the Chocolate Set
Allow the cake pops to set for about 30 minutes to 1 hour. Once the chocolate has hardened, they’re ready to enjoy. If you’re storing them for later, make sure to place them in an airtight container. They’ll stay fresh at room temperature for up to a week or can be stored in the freezer for up to 2-3 months.
How to Store Cake Pops

Cake pops can be stored in a container at room temperature for up to a week. If you want to store them for a longer period, keep them in the freezer. Place them in a Ziploc bag or airtight container, and thaw them for a few minutes before enjoying. They’ll taste just as delicious as the day they were made!
Common Questions About Cake Pops
What’s the trick to making cake pops?
The secret is patience! Make sure to freeze the cake balls long enough so they hold their shape. If they’re not properly chilled, they can fall apart when you dip them.
Should I use fresh cake for cake pops?
It’s best to use cake that’s at least a day old. Freshly baked cake can be a bit too moist, making it harder to roll into perfect balls. But if you’re in a pinch, fresh cake works just fine—just make sure it’s fully cooled before you start crumbling it.
Why are my cake pops falling off the stick?
If your cake pops are falling off the stick, it’s likely because you’ve used too much frosting or chocolate. Keep it light and adjust as needed. You can always add more, but you can’t take it away!
Final Thoughts
Whether you’re gifting them to a loved one, sharing them with friends, or simply enjoying them as a sweet treat, these Valentine’s Day cake pops are sure to bring a smile to anyone’s face.
They’re easy to make, fun to decorate, and the perfect way to show your love this Valentine’s Day. So grab your ingredients, and let’s get baking!
Valentine’s Day Cake Pops: A Sweet, Fun Treat for Your Loved Ones
Ingredients
Leftover cake (or fresh cake)
2-3 tbsp premade frosting
2 bags (12 oz each) chocolate candy melts (pink, white, or your choice)
Lollipop sticks
Directions
- Prepare the Cake: Crumble cake into fine crumbs (like sand). Let cool if using fresh cake.
- Mix with Frosting: Add 2 tbsp of frosting and mix until the consistency is dough-like (not too wet).
- Form Balls: Roll mixture into 1-tbsp sized balls and place on parchment paper.
- Freeze: Freeze cake balls for 1-2 hours to set.
- Melt Chocolate: Melt candy melts according to package instructions.
- Dip Cake Pops: Dip stick into melted chocolate and insert into cake ball. Dip the entire ball into chocolate, swirling for even coverage.
- Decorate (Optional): Add sprinkles or toppings before chocolate hardens.
- Let Set: Allow cake pops to dry and set for 30-60 minutes.
Notes
- Store at room temperature for up to 1 week or freeze for up to 2-3 months.